5 Creative Alternatives to Yoga Mats

Overview of Yoga Mat Alternatives

Finding a good yoga mat substitute can make practice safer and more enjoyable. If your usual mat is unavailable, several household items can serve as alternatives. This part of the article explores such options and what makes them viable.

Pendleton x Yune Yoga Mat Harding Shadow 5mm

Importance of Non-Slip Surfaces

For safe yoga practice, a non-slip surface is crucial. It helps prevent falls and injuries during poses. Whether using a towel, blanket, or rug, ensure it provides enough grip to keep your practice accident-free.

Essential Qualities for Effective Alternatives

A good yoga mat alternative must be cushioning, firm, and hygienic. Materials should absorb impact and have a surface that grips well. Regular cleaning is necessary to maintain its hygienic state.

Rolled-Up Towels as Yoga Mat Replacements

Finding the perfect yoga mat substitute can sometimes lead one to unconventional yet effective options, such as rolled-up towels. These can provide many of the benefits of a traditional yoga mat without requiring the specific item. Especially when traveling or in situations where carrying a full-sized yoga mat isn’t feasible, utilizing a towel can be a perfect stand-in. This section delves into how towels can replace yoga mats and how to use them effectively for various poses.

How to Use Towels for Different Yoga Poses

To use a towel as a yoga mat substitute, firstly ensure it is thick and long enough to support your body. Place the towel flat on the ground, and if slipping is a concern, place it on a surface that provides more friction, or add a non-slip layer underneath. For standing poses, roll the towel a bit thicker to provide cushioning for your feet. For seated or lying poses, spread the towel fully to cover the entire area of contact.

Benefits and Limitations

Benefits:

  1. Portability: Towels are lightweight and easy to carry, making them great for travel.
  2. Versatility: They can be used for other purposes such as drying off or cushioning.
  3. Affordability: Towels are generally less expensive than yoga mats.

Limitations:

  1. Grip: Depending on the fabric, towels might not offer the same level of grip as specialized yoga mats.
  2. Cushioning: Towels may not provide the same level of cushioning, which can be a drawback for poses that require more support.
  3. Maintenance: Towels require regular washing, especially when used intensively for yoga practices, to maintain hygiene and texture.

Organic and Sustainable Towel Options

Transform your yoga practice with eco-friendly towels. These alternatives offer a blend of sustainability and functionality. Invest in your health and the planet.

Choosing the Right Materials

Seek organic fabrics such as cotton, linen, or hemp when picking a towel. They grip well and are kind to the environment. Ensure the towel is robust and absorbent for optimal use.

Advantages of Organic Cotton Towels

Organic cotton towels are skin-friendly and eco-conscious. They’re free from harmful chemicals and support ethical farming. Their soft texture provides comfort while their grip enhances safety during yoga sessions.

Yoga Mat 24” x 71” with 2-in-1 Strap and Resistance Band

Blankets and Large Fabrics

Turning everyday blankets into effective yoga mat substitutes is both creative and practical. This section covers how you can repurpose blankets for yoga and the types that work best.

How to Convert Blankets into Yoga Mats

To use a blanket as a yoga mat substitute, fold it to match the desired thickness and size. For added stability, layer two blankets or place a non-slip rug underneath. This method is ideal for indoor and carpeted floors. Ensure the blanket’s material is firm enough to support yoga poses.

Best Blankets for Yoga Practice

Choose blankets made from materials like cotton or wool for optimal use. These fabrics provide a good balance of cushioning and grip. Avoid using very soft or slippery blankets as they may cause instability during practice. Wool blankets are particularly recommended for their durability and natural grip.

Rugs and Carpets

Rugs and carpets can double as yoga mat substitutes at home. They provide comfort and are readily available.

Suitability of Various Rug Materials

When searching for a suitable rug to use, consider its material. Wool and cotton rugs often provide the right mix of cushioning and grip for yoga. Avoid rugs with too much plush, as they may not offer the stability required for yoga postures.

Choose rugs with a flat weave or low pile for better balance and support. Synthetic rugs might be more durable but check if they provide sufficient grip. Natural fiber rugs, like jute or sisal, have good traction but may not be as comfortable.

DIY Tips for Enhancing Grip

To enhance the grip of a rug, you can use a few DIY tactics. If a rug slides on the floor, place a gripper mat beneath it or apply a non-slip backing. This modification can add stability during your yoga practice. For extra cushioning, layer another rug or use a thick blanket underneath.

Make a DIY yoga mat by sewing non-slip fabric to one side of the rug. This provides grip and prevents the rug from bunching up during poses. Simple solutions, such as using double-sided tape or silicone caulking lines on the underside, can also improve grip without altering the rug’s appearance.

Practicing yoga on a rug or carpet can be a convenient and comfortable alternative to a traditional yoga mat. Keep these tips in mind to ensure the alternative provides the support you need for a safe and effective practice.

Cleaning and Care of Yoga Mat Alternatives

Maintaining the cleanliness and hygiene of your yoga mat substitute is paramount. In this section, we’ll provide tips on how to effectively clean and care for your chosen alternative to ensure long-lasting use.

How to Clean Non-Traditional Yoga Mats

To clean items like towels, blankets, or rugs used as yoga mat substitutes, follow these steps:

  1. Wash Regularly: Clean these items after each use to remove sweat and dirt.
  2. Use Mild Detergents: Opt for gentle, eco-friendly cleaning agents to protect the fabric.
  3. Avoid Harsh Chemicals: Steer clear of bleach or fabric softeners that can degrade the material.
  4. Air Dry: After washing, let them air dry completely to prevent mold and mildew.
  5. Spot Clean: For small stains or spills, use a soft cloth with a mix of water and mild soap.

Maintaining Hygiene and Durability

  1. Frequent Cleaning: Make cleaning a part of your regular yoga routine.
  2. Store Properly: Keep your yoga mat alternative in a dry, cool place when not in use.
  3. Handle with Care: Treat the items gently to prevent wear and tear.
  4. Roll or Fold Neatly: Avoid crumpling when storing to maintain shape and texture.
  5. Refresh with Essential Oils: Optionally add a drop of lavender or tea tree oil during cleaning for a pleasant scent and additional antibacterial properties.

By following these simple care instructions, your yoga mat substitute can remain a hygienic and supportive partner in your yoga practice for a long time.

Coikll Checkerboard Yoga Mat

Some Yoga Mat Alternatives

There are several items that can substitute as a yoga mat if you don’t have one available:

  1. Towel or blanket: A large towel or blanket can provide some padding and grip for your yoga practice.
  2. Carpet or rug: A soft carpet or rug can provide some cushioning and stability for your yoga poses.
  3. Grass or sand: If you’re practicing yoga outdoors, you can use the grass or sand as a natural mat substitute.
  4. Non-slip surface: If you’re practicing on a hard floor, you can use a non-slip surface such as a grippy workout mat or even a non-slip shelf liner to provide some traction.
  5. Folded up clothes: In a pinch, you can use a stack of folded clothes to cushion your knees and provide some stability for your practice.

While these substitutes may not provide the same level of cushioning and support as a traditional yoga mat, they can work in a pinch until you’re able to get a proper mat.


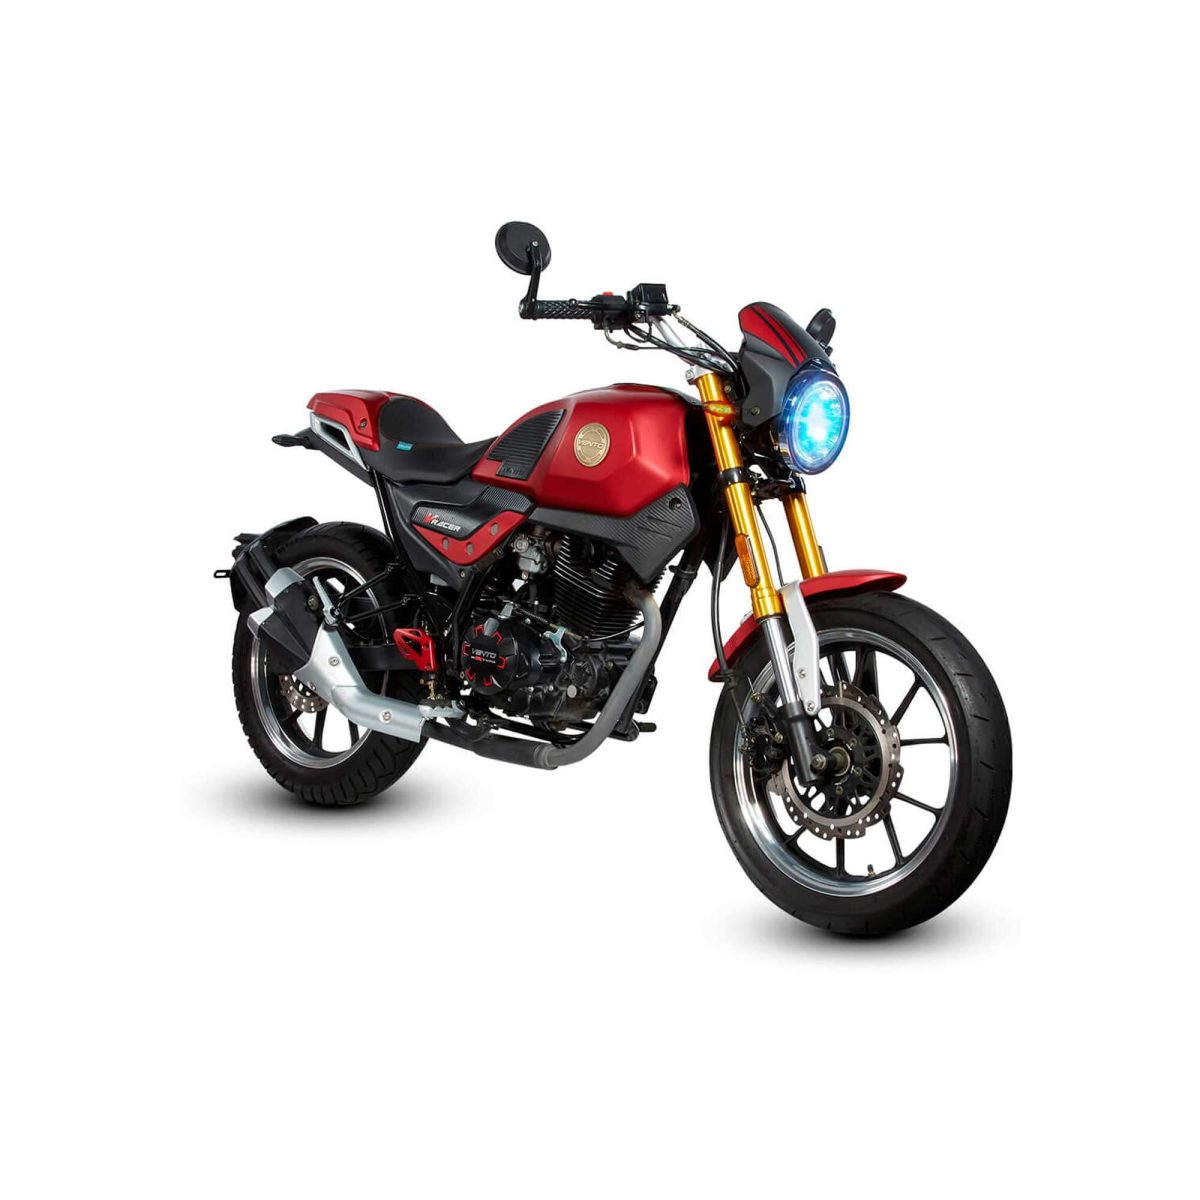
The Ultimate Guide to Vento Motorcycles

Introduction:

Vento Motorcycles is a well-known and respected brand in the world of motorcycles. With a rich history and a commitment to quality and innovation, Vento has become a leading choice for motorcycle enthusiasts all around the world. In this comprehensive guide, we will take a closer look at everything you need to know about Vento motorcycles. From their history and models to their features and benefits. Whether you’re a seasoned rider or a newcomer to the world of motorcycles. This guide will provide you with all the information you need to make an informed decision about Vento motorcycles.

Part 1: History of Vento Motorcycles

Vento Motorcycle has a rich history that spans several decades, and the company has left an indelible mark on the motorcycle industry. The Vento brand was established in the 1990s and quickly gained popularity for its high-quality, stylish bikes. They offered great performance at an affordable price point.

One of the core philosophies of Vento Motorcycle has always been to provide riders with the best bang for their buck. This meant offering motorcycles that were not only affordable, but also reliable and fun to ride. Vento truly understood the needs and desires of riders. And this philosophy has been a driving force behind the brand’s success.

Level 1: In this section, we will explore the history of Vento Motorcycles. And tracing their roots back to their founding and discussing their growth and evolution over the years.

Level 2: We will take a closer look at the key milestones and achievements of Vento Motorcycles. And including their introduction of new models and their contributions to the motorcycle industry as a whole.

Part 2: Vento Motorcycle Models

The legacy of Vento Motorcycle is a testament to the company’s unwavering commitment to excellence. Its motorcycles have become synonymous with quality, reliability, and value. And riders continue to choose Vento for their next motorcycle purchase.

Vento’s impact on the motorcycle industry is undeniable, and its legacy will undoubtedly continue to inspire future generations of riders and motorcycle enthusiasts. With a steadfast dedication to providing exceptional motorcycles and a focus on meeting the needs of riders. Vento Motorcycle has secured its place as a true industry leader.

Level 1: Here, we will provide an overview of the different models of Vento motorcycles, highlighting their unique features and specifications.

Level 2: We will delve deeper into each specific model, discussing their performance, design, and technology to help you better understand the options available to you as a potential Vento motorcycle owner.

Moto Mexico Big Boy Bera Italika Vento Cg Cargo Motorcycle

Part 3: Features of Vento Motorcycles

Level 1: This section will focus on the features that set Vento motorcycles apart from the competition, such as their advanced technology, cutting-edge design, and superior performance.

Level 2: We will explore the specific features of Vento motorcycles in more detail, highlighting their strengths and advantages compared to other motorcycle brands on the market.

Part 4: Benefits of Vento Motorcycles

Level 1: In this part, we will discuss the various benefits of choosing a Vento motorcycle, from their reliability and safety to their impressive fuel efficiency and overall value.

Level 2: We will provide real-world examples and testimonials from Vento motorcycle owners, showcasing the tangible benefits and advantages of owning and riding a Vento motorcycle.

Part 5: Vento Motorcycle Community and Culture

Level 1: Here, we will explore the unique community and culture that surrounds Vento motorcycles, including events, clubs, and online forums dedicated to Vento enthusiasts.

Level 2: We will highlight the sense of camaraderie and connection that comes with being part of the Vento motorcycle community. As well as the support and resources available to Vento owners and riders.

TALIKA Vento moto BAJAJ BOXER

Part 6: Vento Motorcycle: Performance and Specifications

Vento motorcycles are known for their exceptional performance and impressive specifications. With powerful engines and sturdy build, Vento motorcycles are designed to deliver a smooth and thrilling riding experience.

One of the key highlights of Vento motorcycles is their efficient and high-performance engines. Whether it’s a powerful 250cc or 150cc engine, Vento motorcycles are engineered to provide excellent acceleration and reliable performance on the road. The suspension system of Vento motorcycles is also worthy of praise, offering superior handling and control even on rough terrains.

When it comes to specifications, Vento motorcycles are equipped with advanced features such as disc brakes, digital speedometer, LED headlights, and a comfortable seating arrangement. The ergonomics of Vento motorcycles are designed to ensure a comfortable riding position for the rider, reducing fatigue on long rides.

Overall, Vento motorcycles are built to deliver outstanding performance and come with impressive specifications that make them a desirable choice for motorcycle enthusiasts.

Part 7: Vento Motorcycle: Safety Features and Technology

Vento motorcycles are equipped with advanced safety features and technology, prioritizing the well-being of the riders. The safety features in Vento motorcycles include robust braking systems, ABS (Anti-lock Braking System), and superior grip tires to ensure stability and control on the road. These safety features are designed to offer maximum protection and confidence to the riders.

In terms of technology, Vento motorcycles come with modern amenities. Such as digital instrument clusters, smartphone connectivity, and integrated navigation systems. And enhancing the overall riding experience. The LED lighting technology in Vento motorcycles ensures better visibility for the riders, especially during night rides.

Vento motorcycles also incorporate innovative technology to enhance fuel efficiency and reduce emissions, aligning with environmental standards. The combination of safety features and advanced technology makes Vento motorcycles a reliable and futuristic choice for motorcycle enthusiasts.

Electric Motorcycle and 125cc Scooter

Part 8: Vento Motorcycle: Customization and Personalization Options

Vento motorcycles offer a range of customization and personalization options, allowing riders to express their individual style and preferences. From a variety of color choices to customized graphics and decals. Vento motorcycles can be tailored to reflect the unique personality of the rider.
Additionally, Vento motorcycles offer a selection of accessories such as windshields, saddlebags, and performance upgrades. And enabling riders to enhance the functionality and aesthetics of their motorcycles. Whether it’s for touring, commuting, or off-road adventures, Vento motorcycles can be customized to meet specific requirements.

With these customization options, Vento motorcycles cater to a diverse range of riders who seek a personalized and distinct riding experience. The ability to customize and personalize Vento motorcycles adds an extra layer of excitement and individuality to the riding experience.

Conclusion:

Over the years, Vento Motorcycle has released a wide range of models, catering to various riding styles and preferences. From sleek and sporty street bikes to rugged and powerful off-road machines. Vento has consistently delivered motorcycles that have resonated with riders around the world.

In addition to its dedication to providing high-quality motorcycles. Vento has also been committed to innovation and technological advancement. The company has continuously invested in research and development to improve the performance, safety. And overall riding experience of its motorcycles.

In conclusion, Vento motorcycles offer a unique and compelling option for motorcycle enthusiasts of all kinds. With a rich history, diverse range of models, advanced features, and a vibrant community, Vento motorcycles provide a comprehensive and fulfilling experience for riders around the world. Whether you’re new to the world of motorcycles or a seasoned rider looking to switch things up. Vento motorcycles are definitely worth considering. So next time you’re in the market for a new motorcycle, be sure to give Vento a closer look. They just the perfect fit for you.

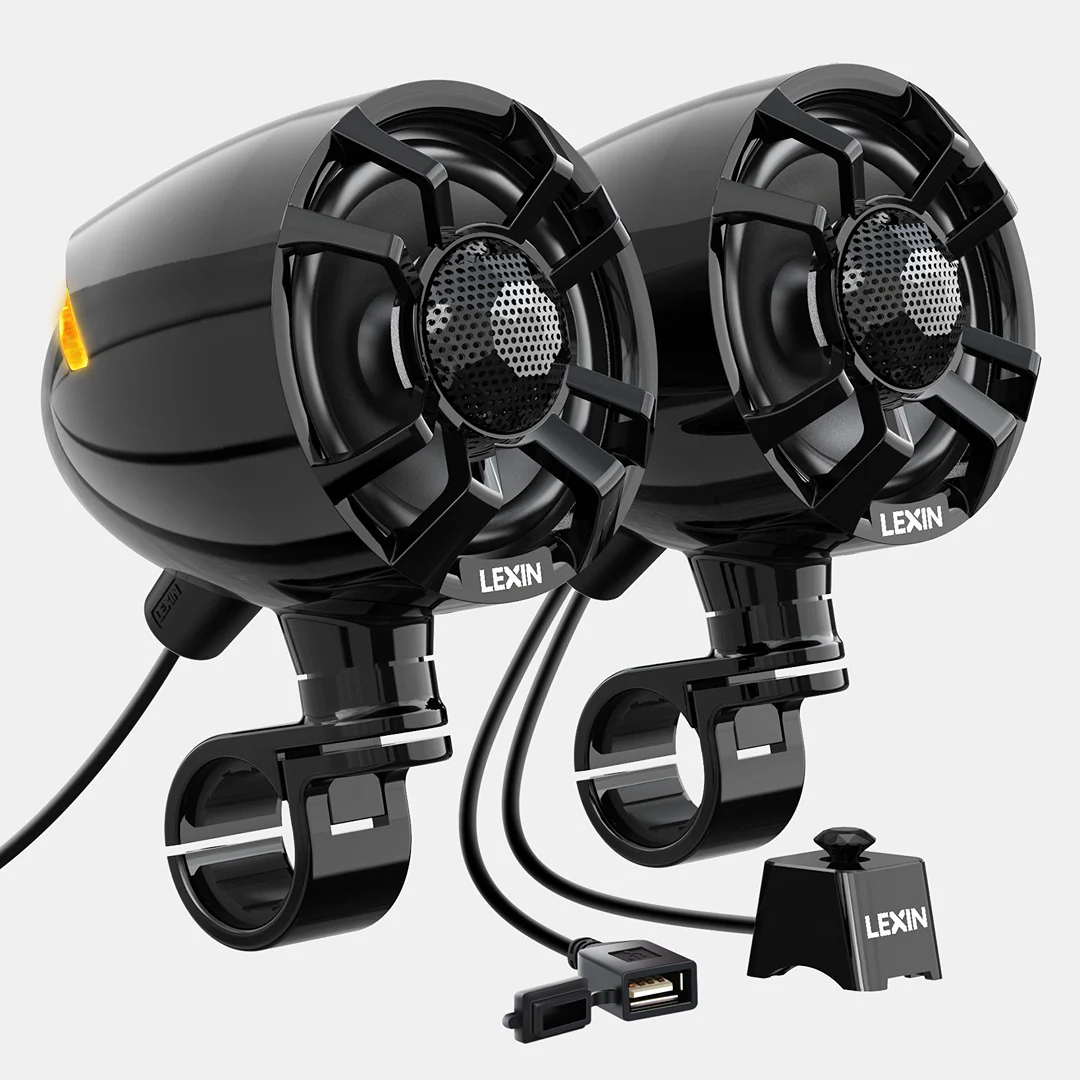
Ultimate Guide to the Best Motorcycle Speakers

Introduction

When it comes to riding your motorcycle, having a good set of speakers can make all the difference in your overall experience. Whether you enjoy listening to music, podcasts, or staying connected with GPS navigation, having quality speakers can elevate your rides to the next level. In this ultimate guide, we’ll take a deep dive into the best motorcycle speakers available on the market, and provide you with everything you need to know to make an informed decision.

Pyle 600 Watt Weatherproof Motorcycle Speaker

Part 1: Understanding Motorcycle Speakers

Level 1: Types of Motorcycle Speakers

Bluetooth Speakers: These are wireless speakers that connect to your smartphone or other devices via Bluetooth. They are easy to install and provide great flexibility as they can be easily removed when not in use. Handlebar Speakers: These speakers to mount directly to the handlebars of your motorcycle, providing easy access to your music or other audio while you ride.

Level 2: Key Features to Consider

Weatherproofing: Since motorcycles are exposed to the elements, it’s important to choose speakers that are weatherproof to ensure longevity.
Sound Quality: Look for speakers with high-quality audio output to ensure clear and powerful sound even at high speeds.

Part 2: Top Motorcycle Speaker Brands

Level 1: Leading Brands in the Market

BOSS Audio Systems: Known for their high-quality and durable motorcycle speakers, BOSS Audio Systems offers a range of options to suit different preferences.
Kuryakyn: With a focus on cutting-edge design and performance, Kuryakyn is a leading brand in the motorcycle speaker industry.

Level 2: Notable Products from Each Brand

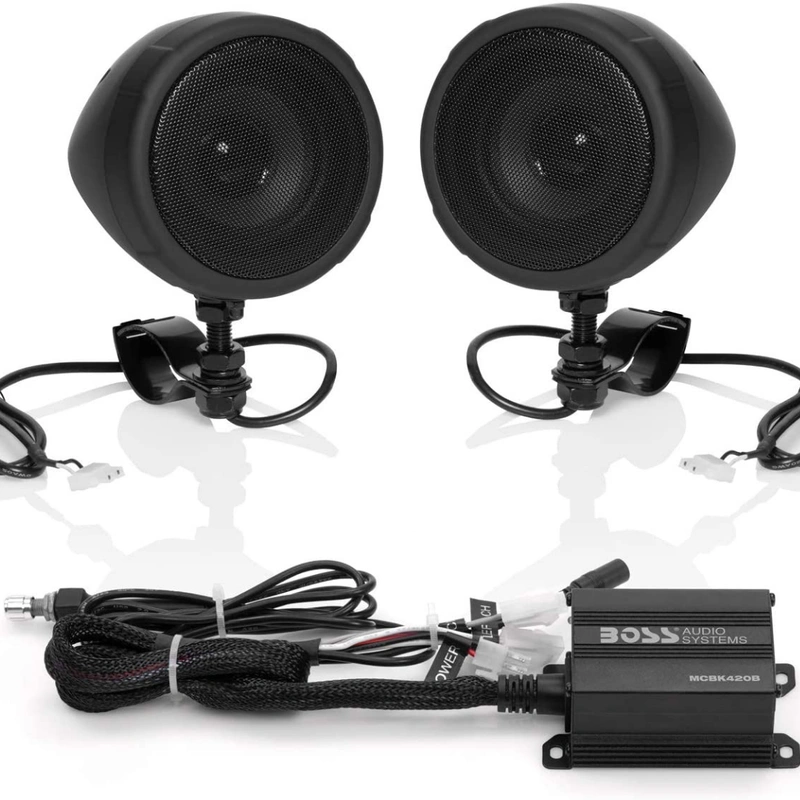
BOSS Audio Systems MC420B: This compact and powerful Bluetooth speaker system is weatherproof and easy to install, making it a popular choice among motorcycle enthusiasts.
Kuryakyn Sound Bar Plus by MTX: With its sleek design and exceptional audio quality, this handlebar-mounted speaker system delivers an immersive listening experience.

Part 3: Installation and Compatibility

Level 1: Installing Motorcycle Speakers

Wiring and Mounting: Depending on the type of speakers you choose, the installation process can vary. Ensure that you follow the manufacturer’s instructions carefully for a secure and professional installation.
Compatibility with Your Motorcycle: Before making a purchase, double-check that the speakers are compatible with your specific make and model of motorcycle to avoid any compatibility issues.

Level 2: Maintenance and Care

Regular Inspection: Periodically check the wiring and connections of your speakers to ensure they remain secure and in good condition.
Cleaning: Keep your speakers clean from dust, dirt, and debris to maintain their performance and longevity.

Part 4: Reviews of the Best Motorcycle Speakers

Level 1: In-Depth Reviews

BOSS Audio Systems MC420B
Kuryakyn Sound Bar Plus by MTX
Sena 20S-01 Motorcycle Bluetooth 4.1 Communication System

Level 2: Comparison and Recommendations

Sound Quality: While all of the featured speakers offer exceptional sound quality, the Kuryakyn Sound Bar Plus by MTX stands out for its immersive audio experience.
Versatility: The Sena 20S-01 stands out for its advanced communication capabilities, making it a top choice for riders who prioritize staying connected on their journeys.

Best bluetooth motorcycle handlebar speakers

Part 5: Conclusion and Final Thoughts

Level 1: Making the Right Choice

Consider Your Riding Style: Think about how you typically use your motorcycle and what you value most in a speaker system to make the right choice.
Budget and Value: Balance your budget with the features and quality you desire to make the best investment in your motorcycle speakers.

Level 2: Final Recommendations

For those seeking a versatile and advanced communication system, the Sena 20S-01 is an excellent choice.
If you prioritize powerful sound and sleek design, the Kuryakyn Sound Bar Plus by MTX is highly recommended.

Part 6: Benefits of Using Motorcycle Speakers

Motorcycle speakers offer a range of benefits to riders looking to enhance their riding experience. One of the main advantages of using motorcycle speakers is the ability to listen to music or audio while out on the road. Whether it’s your favorite tunes, a podcast, or GPS navigation instructions, having speakers on your bike provides a convenient and enjoyable way to stay entertained and informed during your rides.

Another benefit of motorcycle speakers is the ability to stay connected while on the go. With Bluetooth-enabled speakers, riders can easily connect their smartphones to stream music or take calls hands-free. This can improve safety by allowing riders to stay focused on the road while still accessing important features on their phone.

In addition to entertainment and connectivity, motorcycle speakers can also enhance safety by providing better awareness of the surrounding environment. With the ability to hear GPS directions or important notifications, riders can stay informed without having to take their eyes off the road or remove their hands from the handlebars.

Furthermore, motorcycle speakers can also contribute to a more enjoyable riding experience for both solo and group rides. Whether cruising alone or with friends, having music or audio playing in the background. It can elevate the overall experience and add to the enjoyment of the journey.

Overall, the benefits of using motorcycle speakers extend beyond entertainment and can contribute to safety, connectivity, and overall enjoyment while out on the road.

Part 7: How to Choose the Best Motorcycle Speakers

When it comes to choosing the best motorcycle speakers, there are several important factors to consider. Here are some key considerations to keep in mind when selecting the right speakers for your bike:

  1. Sound Quality: Look for speakers that offer clear and high-quality sound. This will ensure that you can enjoy your music or audio without any distortion, even in noisy riding conditions.
  2. Durability: Given the outdoor and rugged nature of motorcycle riding. It’s important to choose speakers to withstand the elements. Look for speakers that are weatherproof, shockproof, and designed to handle vibrations and rough terrain.
  3. Installation: Consider the ease of installation and compatibility with your bike. Look for speakers that are designed to fit your specific motorcycle model and can be easily installed without the need for extensive modifications.
  4. Connectivity: Choose speakers that offer convenient connectivity options, such as Bluetooth, USB, or auxiliary input. This will allow you to easily stream music from your smartphone or other devices while on the go.
  5. Power: Consider the power output of the speakers and ensure that they can provide enough volume and clarity to be heard over the noise of the motorcycle and traffic.

By taking these factors into account, you can find the best motorcycle speakers to enhance your riding experience.

Top 10 Best Wakeboard Tower Speakers in 2024 Reviews

Part 8: Top Brands for Motorcycle Speakers

When it comes to choosing the best motorcycle speakers, there are several top brands that are known for producing high-quality products tailored specifically for motorcycle use.

  1. BOSS Audio Systems: BOSS Audio Systems offers a range of weatherproof and durable motorcycle speakers with Bluetooth connectivity and easy installation.
  2. KICKER: KICKER is a well-known brand for audio equipment, and their speakers for motorcycles are designed to deliver premium sound quality and durability.
  3. JBL: JBL offers a selection of compact and powerful motorcycle speakers. It can withstand the outdoor elements while delivering excellent sound performance.
  4. Rockford Fosgate: Rockford Fosgate produces a variety of motorcycle speakers for rugged conditions and provide superior sound and durability.
  5. Hogtunes: Hogtunes specializes in audio solutions for Harley-Davidson motorcycles, offering premium speakers and amplifiers designed specifically for the brand.

Conclusion

These brands are reliable choices for the motorcycle speaker. They offer a range of options to suit different preferences and budgets. By choosing from these top brands, riders can find speakers that will enhance their riding experience with excellent sound quality, durability, and convenient features.

In conclusion, finding the best motorcycle speakers requires careful consideration of your specific needs and preferences. With the wide range of options available. You can easily find a set of speakers that will enhance your riding experience and provide endless enjoyment on the road.

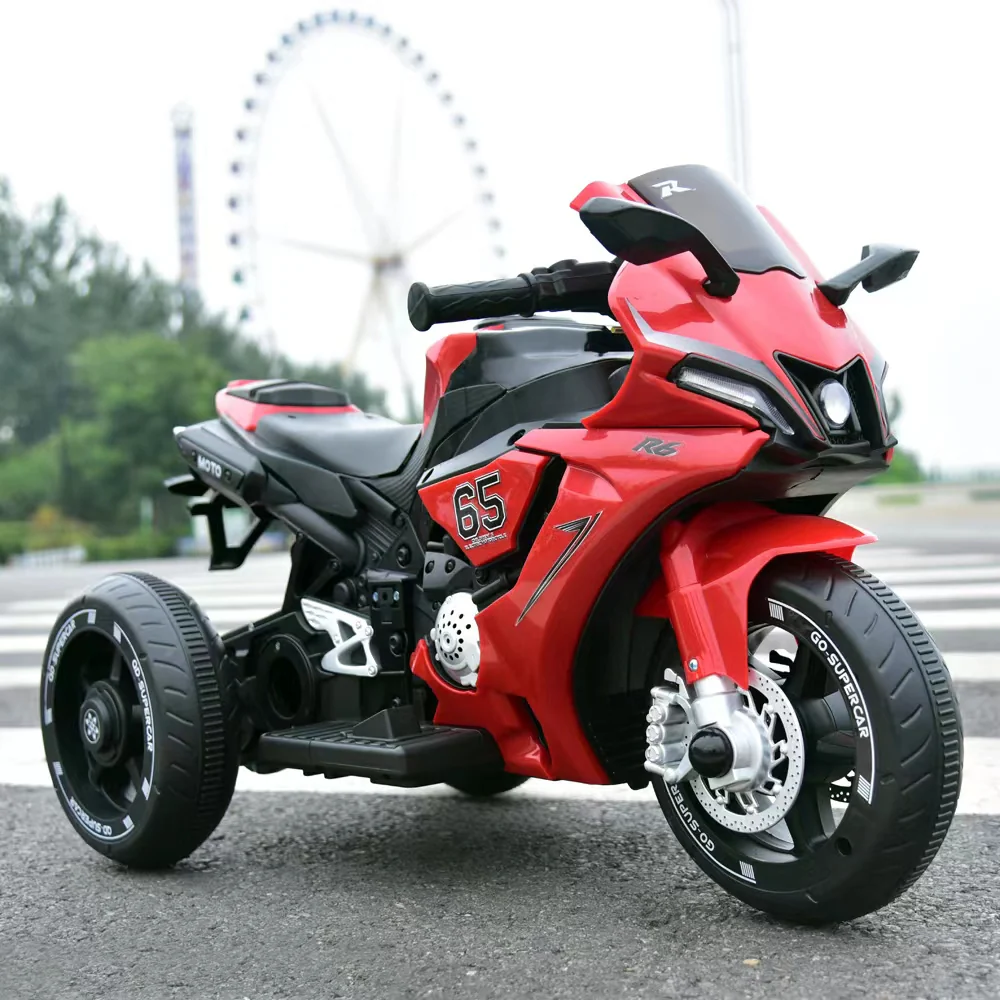
The Ultimate Guide to Mini Motorcycles for Kids

Introduction:

Mini motorcycles for kids have become increasingly popular in recent years, providing young riders with the thrill of riding a motorcycle in a safe and controlled environment. These pint-sized bikes come in a variety of styles and designs, making them a fun and exciting option for kids who are looking to get into the world of motocross and dirt biking. In this comprehensive guide, we will explore everything you need to know about mini motorcycles for kids, including the different types of bikes available, safety considerations, and tips for finding the perfect mini motorcycle for your child.

Part 1: Types of Mini Motorcycles for Kids

Level 1: Electric Mini Motorcycles
Electric mini motorcycles are a popular choice for kids due to their low maintenance and ease of use. These bikes are powered by rechargeable batteries and are generally quieter than their gas-powered counterparts. They are suitable for younger children and are often designed with safety features such as speed limiters and parental controls.

Level 2: Gas-Powered Mini Motorcycles
Gas-powered mini motorcycles provide a more authentic riding experience for older kids. These bikes typically have more power and higher top speeds than electric models, making them suitable for more experienced riders. However, they require regular maintenance and must be fueled with gasoline.

Mini Gas Power Pocket Bike Motorcycle for Kids

Part 2: Safety Considerations

Level 1: Protective Gear
Before allowing your child to ride a mini motorcycle, it’s essential to ensure they have the proper protective gear. This includes a helmet, gloves, knee and elbow pads, and sturdy footwear. These items help to minimize the risk of injury in the event of a fall or accident.

Level 2: Training and Supervision
It’s crucial for kids to receive proper training and supervision when learning to ride a mini motorcycle. Consider enrolling your child in a motorcycle safety course or hiring a professional instructor to teach them the basics. Additionally, always supervise your child when they are riding and set clear boundaries for where and when they can ride.

Part 3: Choosing the Right Mini Motorcycle for Your Child

Level 1: Age and Experience
When selecting a mini motorcycle for your child, it’s important to consider their age and level of experience. Younger children may be better suited to electric models with speed limiters, while older kids with more riding experience may be ready for a gas-powered bike.

Level 2: Size and Weight
Mini motorcycles come in a range of sizes and weights, so it’s essential to choose a bike that your child can comfortably handle. Consider the seat height, handlebar reach, and overall weight of the bike to ensure it’s a good fit for your child’s size and strength.

Part 4: Maintenance and Care

Level 1: Routine Maintenance
Regardless of whether you choose an electric or gas-powered model, mini motorcycles require regular maintenance to keep them running smoothly. This includes checking and topping up the battery or fuel, oil changes, and inspecting the brakes and tires for wear.

Level 2: Storage and Protection
Proper storage and protection are essential for prolonging the life of a mini motorcycle. When not in use, store the bike in a dry, secure location, and consider using a cover to protect it from the elements. Additionally, regular cleaning and lubrication will help keep the bike in top condition.

Part 5: Riding Opportunities and Etiquette

Level 1: Riding Locations
Mini motorcycles can be ridden in a variety of locations, including designated tracks, trails, and private property with permission. It’s important to research and abide by local laws and regulations regarding the use of mini motorcycles, as well as any specific rules for the locations you choose to ride.

Level 2: Etiquette and Respect
Teaching kids proper riding etiquette and respect for others is essential for fostering a safe and enjoyable riding experience. This includes following trail and track rules, yielding to pedestrians and other riders, and being mindful of noise levels in residential areas.

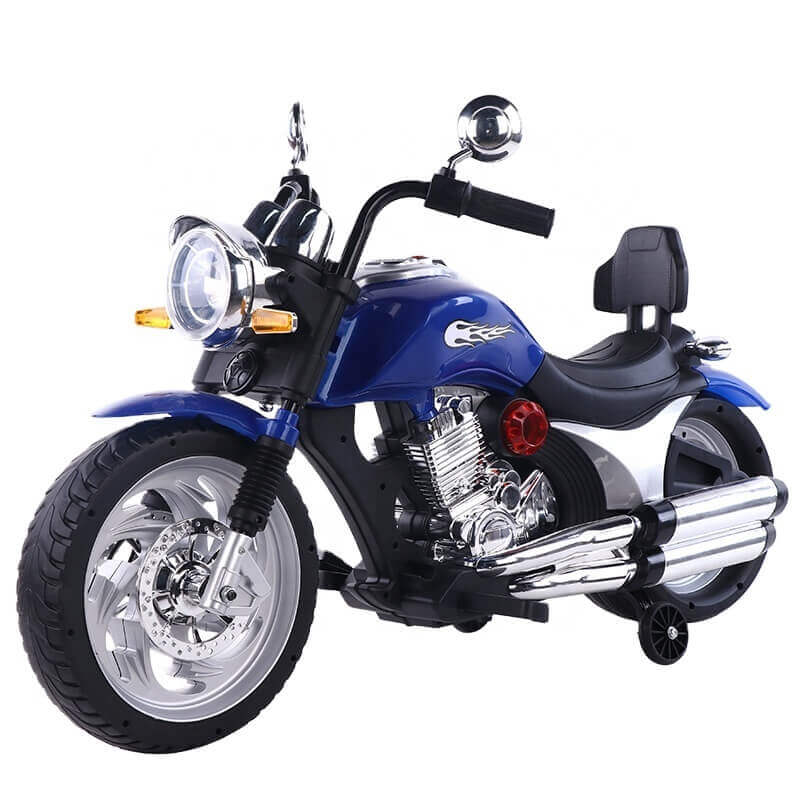
2024 New 24v Children Electric Mini Motorcycle Scooter Harley Bike

Part 6: Safety Features of Mini Motorcycles for Kids

When it comes to mini motorcycles for kids, safety is the number one concern. That’s why many of these bikes come equipped with a variety of safety features to help protect young riders. Some common safety features found on mini motorcycles for kids include speed limiters, remote shut-off switches, and adjustable throttle restrictors.

Speed limiters are a great safety feature for mini motorcycles. These devices allow parents to set a maximum speed for the bike, ensuring that their child can’t go too fast. This can help prevent accidents and give parents peace of mind knowing that their child won’t be able to ride at dangerous speeds.

Remote shut-off switches are another important safety feature. These switches allow parents to turn off the bike remotely, giving them the ability to stop the bike if their child gets into trouble or ventures too far from home. This feature provides an extra layer of protection for young riders.

Adjustable throttle restrictors are also a key safety feature found on many mini motorcycles for kids. These devices allow parents to control how much power the bike has, making it easier for young riders to learn how to ride without being overwhelmed by too much speed or power.

In addition to these safety features, it’s important for parents to make sure their child wears the proper safety gear when riding a mini motorcycle. This includes a helmet, gloves, knee and elbow pads, and proper riding attire. By taking these precautions and investing in a mini motorcycle with built-in safety features, parents can help ensure that their child stays safe while enjoying the thrill of riding.

Part 7: Maintenance Tips for Mini Motorcycles for Kids

Just like any other vehicle, mini motorcycles for kids require regular maintenance to keep them running smoothly and safely. Whether your child’s mini motorcycle is gas-powered or electric, there are several key maintenance tasks that should be performed on a regular basis to ensure the bike stays in good condition.

For gas-powered mini motorcycles, it’s important to regularly check and change the oil, clean or replace the air filter, and inspect the spark plug. These tasks will help keep the engine running smoothly and reduce the risk of mechanical issues. It’s also important to check the brakes, chain, and tires regularly to ensure they are in good working condition.

If your child’s mini motorcycle is electric, there are still a few maintenance tasks that should be performed regularly. This includes checking and charging the battery, inspecting the chain and tires, and making sure all electrical connections are secure. It’s also a good idea to periodically clean the bike to remove dirt and debris that can build up over time.

In addition to these specific maintenance tasks, it’s important to follow the manufacturer’s maintenance schedule for your child’s mini motorcycle. This will help ensure that the bike stays in good condition and lasts for as long as possible. By staying on top of regular maintenance, you can help keep your child safe and prolong the life of their mini motorcycle.

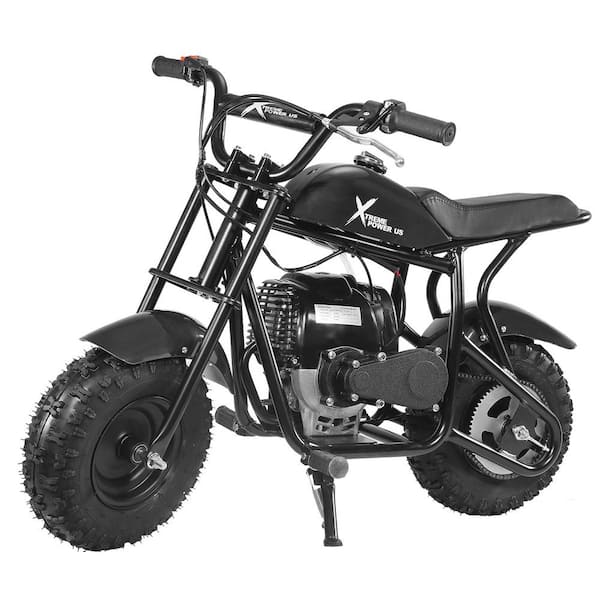
XtremepowerUS Pro-Edition Black Mini Trail Dirt Bike

Part 8: Choosing the Right Mini Motorcycle for Your Child

When it comes to choosing a mini motorcycle for your child, there are several factors to consider to ensure you find the right bike for their needs and skill level. From the size and power of the bike to the safety features and maintenance requirements, there are several key considerations to keep in mind when shopping for a mini motorcycle for kids.

One of the most important factors to consider is the size and power of the mini motorcycle. It’s important to choose a bike that is appropriately sized for your child’s age, height, and skill level. You’ll also want to consider how much power the bike has and whether it’s suitable for your child’s riding abilities.

Safety features are another important consideration when choosing a mini motorcycle for kids. Look for bikes that come equipped with speed limiters, remote shut-off switches, and adjustable throttle restrictors to help keep your child safe while riding.

Maintenance requirements are also important to consider when choosing a mini motorcycle for your child. Some bikes require more maintenance than others, so it’s important to choose a bike that fits with your ability and willingness to perform regular maintenance tasks.

Finally, it’s a good idea to involve your child in the decision-making process when choosing a mini motorcycle. This will help ensure that they are excited about their new bike and feel comfortable and confident riding it.

By considering these factors and taking the time to choose the right mini motorcycle for your child, you can help ensure that they have a safe and enjoyable riding experience.

Conclusion

Mini motorcycles for kids are a popular choice for parents looking to introduce their children to the world of motorbikes. These small, lightweight bikes provide an excellent opportunity for kids to learn balance and coordination while having fun. In this comprehensive guide, we’ll explore everything parents need to know about mini motorcycles for kids, including the different types available, safety considerations, and tips for purchasing the right bike for your child.

Mini motorcycles for kids offer a fantastic way for children to learn valuable skills while having fun. By understanding the different types available, prioritizing safety, choosing the right bike, and practicing proper maintenance and etiquette, parents can ensure their child has a positive and rewarding experience with mini motorcycles. With the right guidance and support, mini motorcycles can provide countless hours of enjoyment for kids of all ages.

Motorcycle Speedometer: Everything You Need to Know

Introduction

Motorcycle speedometer plays a crucial role in ensuring safe and efficient riding. They allow riders to maintain a steady and legal speed, monitor fuel consumption, and keep track of distance traveled. In this comprehensive guide, we will delve into the world of motorcycle speedometers, exploring their history, functionality, types, and maintenance. Whether you are a new rider looking to understand the basics or a seasoned enthusiast seeking to upgrade your speedometer, this article has got you covered.

Part 1: The History and Evolution of Motorcycle Speedometers

Level 1: Early Speedometers

The invention of the speedometer dates back to the late 19th century when bicycles and early automobiles began to incorporate these devices to measure and display speed. These early speedometers relied on analog mechanisms such as mechanical gears and cables to calculate speed based on wheel rotation.

Level 2: Modern Advances

As technology evolved, motorcycle speedometer transitioned from mechanical to electronic, leveraging digital displays and sensors to provide more accurate and reliable speed readings. Additionally, advancements in GPS technology have given rise to GPS-based speedometers, offering riders precise speed measurements regardless of wheel size or tire pressure.

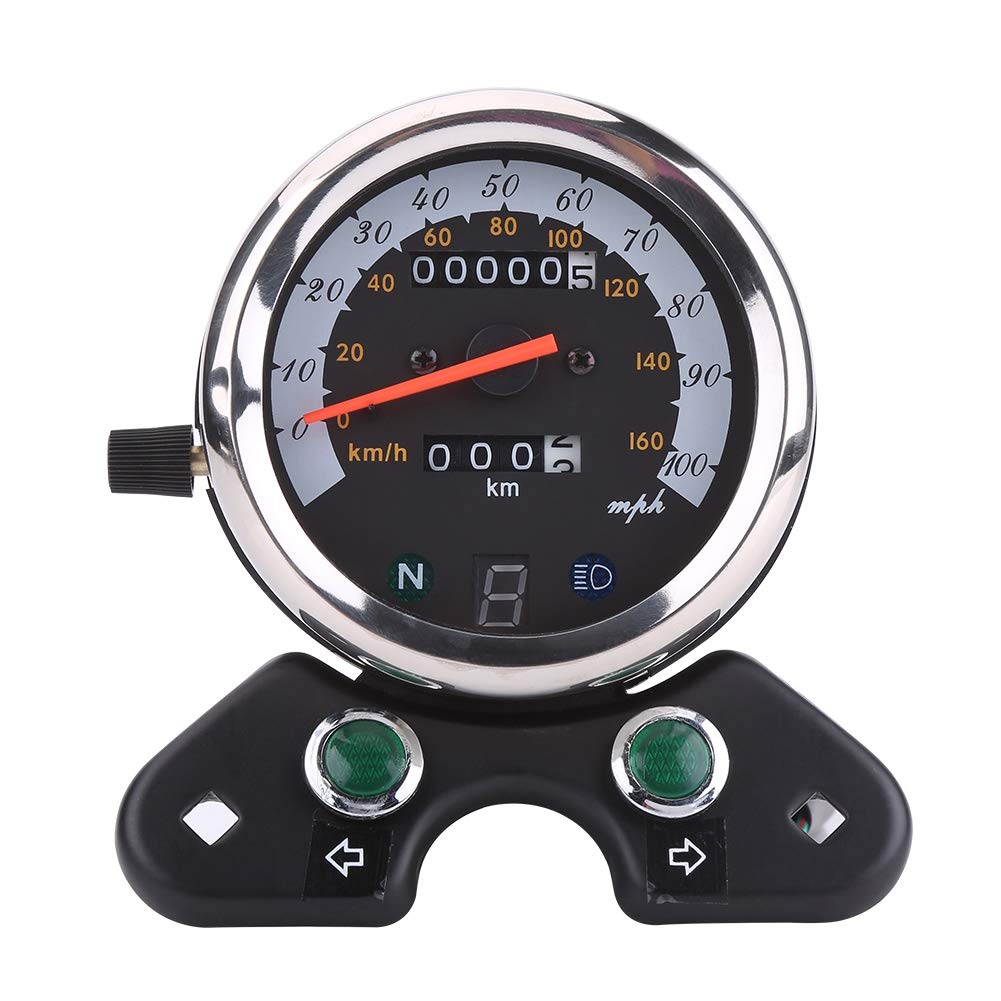
Motorcycle Speedometer Tachometer Odometer For Honda Ducati Kawasaki Suzuki

Part 2: How Motorcycle Speedometers Work

Level 1: Mechanical Speedometers

Traditional mechanical speedometers operate through a cable connected to the motorcycle’s wheel. As the wheel rotates, the cable spins a magnet inside the speedometer, which in turn drives the speedometer needle to display the speed.

Level 2: Electronic Speedometers

Electronic speedometers, on the other hand, utilize sensors to monitor wheel rotation and generate electronic pulses that are interpreted by the speedometer’s microprocessor. This digital approach allows for greater accuracy and flexibility in displaying additional information such as trip distance, fuel level, and engine diagnostics.

Part 3: Types of Motorcycle Speedometers

Level 1: Analog vs. Digital Speedometers

Analog speedometers utilize a dial and needle to display speed readings, offering a classic and retro aesthetic. In contrast, digital speedometers feature LCD or LED screens to present speed and additional data in a modern and customizable format.

Level 2: GPS-Based Speedometers

GPS-based speedometers rely on satellite signals to determine the motorcycle’s speed, making them immune to mechanical wear and environmental factors that may affect traditional speedometers. These devices have gained popularity for their high accuracy and ease of installation.

Part 4: Choosing the Right Speedometer for Your Motorcycle

Level 1: Compatibility with Motorcycle Model

When selecting a speedometer, it is essential to ensure that it is compatible with your motorcycle model. Consider factors such as wheel size, tire circumference, and calibration options to guarantee accurate speed readings.

Level 2: Additional Features

Beyond speed measurement, modern speedometers offer a range of additional features such as trip meters, fuel gauges, gear position indicators, and even smartphone connectivity. Assess your riding needs and preferences to identify the speedometer that best suits your requirements.

Part 5: Maintaining and Troubleshooting Motorcycle Speedometers

Level 1: Regular Inspection and Calibration

Regularly inspecting and calibrating your speedometer is crucial to ensure accurate readings and proper functionality. Factors such as tire pressure, wheel alignment, and sensor condition can affect speedometer performance.

Level 2: Troubleshooting Common Issues

From sensor malfunctions to display errors, speedometers may encounter various issues that require troubleshooting and maintenance. Understanding common problems and their solutions will help keep your speedometer in optimal working condition.

Digital Gauge Motorcycle Speedometer

Part 6: Upgrades and Customizations for Power Wheels Motorcycle

When it comes to power wheels motorcycles, there are a variety of upgrades and customizations that can be made to enhance the overall experience. One popular upgrade is to install a higher capacity battery, which can provide longer ride times and improved performance. Additionally, LED lights and custom decals can be added to give the motorcycle a personalized look. Some enthusiasts also choose to upgrade the motor for increased speed and power.

Another popular customization is the addition of a Bluetooth speaker system, allowing riders to listen to their favorite music while cruising around. Additionally, a storage compartment can be added to store snacks, drinks, or other small items while on the go. Many power wheels motorcycles also feature a throttle control, which allows parents to limit the top speed of the motorcycle when younger children are riding.

For those looking to take their power wheels motorcycle to the next level, there are also options for custom paint jobs and performance upgrades. Some companies offer aftermarket suspension kits and upgraded wheels and tires for improved off-road capabilities. Overall, the possibilities for upgrading and customizing a power wheels motorcycle are nearly endless, allowing owners to create a truly one-of-a-kind ride for their little ones.

Part 7: Safety Tips for Riding a Power Wheels Motorcycle

While riding a power wheels motorcycle can be a fun and exciting experience for kids, it’s important to prioritize safety at all times. Here are some essential safety tips for riding a power wheels motorcycle:

  1. Always wear protective gear such as a helmet, gloves, and knee and elbow pads.
  2. Ride in a safe and appropriate area, such as a driveway or backyard, away from traffic and obstacles.
  3. Follow all manufacturer’s guidelines and age recommendations for the specific power wheels motorcycle being ridden.
  4. Parents should supervise young riders at all times, ensuring they are following safety rules and riding responsibly.
  5. Teach children the importance of obeying traffic laws and being aware of their surroundings, even while riding a toy motorcycle.

By following these safety tips, kids can enjoy the thrill of riding a power wheels motorcycle while staying safe and protected.

Part 8: Maintenance and Care for Power Wheels Motorcycle

To ensure that a power wheels motorcycle remains in top condition, proper maintenance and care are essential. Here are some tips for keeping a power wheels motorcycle running smoothly:

  1. Regularly check the battery and charger to ensure they are functioning properly. Clean the battery terminals and connections as needed.
  2. Keep the motorcycle clean and free of dirt and debris, as this can affect performance and longevity.
  3. Inspect the tires regularly for wear and tear, and inflate them to the recommended pressure as needed.
  4. Check all moving parts, such as the motor and throttle, for any signs of damage or wear. Lubricate as necessary.
  5. Store the power wheels motorcycle in a dry, climate-controlled environment when not in use to prevent rust and corrosion.

By following these maintenance tips, owners can ensure that their power wheels motorcycle remains in great condition for years to come.

Futurekart Motorcycle speed meter

Part 9: Tips for Maintaining Your Power Wheels Motorcycle

To keep your power wheels motorcycle running smoothly and safely, it’s important to perform regular maintenance. Here are some tips for maintaining your power wheels motorcycle:

  1. Keep the battery charged: One of the most important things you can do to maintain your power wheels motorcycle is to keep the battery charged. Make sure to follow the manufacturer’s recommendations for charging the battery and storing it properly when not in use.
  2. Check the tires: Regularly inspect the tires on your power wheels motorcycle for any signs of wear or damage. Replace any tires that are worn or damaged to ensure the safety of your child while riding.
  3. Clean the motorcycle: Regularly clean the motorcycle to prevent dirt and grime from building up and causing damage. Use a mild detergent and water to clean the motorcycle, and avoid using harsh chemicals that could damage the paint or plastic parts.
  4. Inspect the electrical components: Check the wiring and electrical components of the power wheels motorcycle to ensure they are in good working condition. Look for any frayed wires or loose connections, and address any issues immediately.
  5. Store properly: When the power wheels motorcycle is not in use, store it in a dry and safe place to prevent damage from moisture or extreme temperatures. This will help extend the life of the motorcycle and keep it running smoothly.

By following these maintenance tips, you can help ensure that your child’s power wheels motorcycle stays in good condition and provides years of fun and safe riding.

Conclusion

In conclusion, the motorcycle speedometer serves as a vital component of every rider‘s dashboard, providing essential information for safe and efficient navigation. From its historical roots to modern advancements and the diverse range of options available, understanding the intricacies of motorcycle speedometer is key to making informed decisions about their selection, use, and maintenance. With the knowledge gained from this guide, riders can confidently harness the power of their speedometers to enhance their riding experience.

Everything You Need to Know About Power Wheels Motorcycle

Introduction

The world of children’s toys has come a long way from traditional dolls and action figures. Today, kids can ride around in their very own power wheels motorcycles, which are battery-powered mini motorcycles designed specifically for children. These fun and exciting toys are a great way for kids to experience the thrill of riding a motorcycle in a safe and controlled environment. In this article, we will explore everything you need to know about power wheels motorcycles, including their features and benefits, how to choose the right one for your child, and important safety considerations.

Part 1: Features and Benefits

Level 1: Features

Power wheels motorcycles come with a range of features designed to enhance the riding experience for kids. These may include realistic motorcycle designs, working headlights and taillights, and realistic sound effects. Some models also come with a built-in radio or MP3 player, allowing kids to listen to their favorite music while they ride.

Level 2: Benefits

The benefits of power wheels motorcycles extend beyond pure entertainment. These toys can help children develop important motor skills, coordination, and spatial awareness. Riding a power wheels motorcycle also promotes outdoor play and physical activity, which is essential for a child’s overall health and well-being.

12V Kid Electric Motorcycle Power Wheels

Part 2: Choosing the Right Power Wheels Motorcycle

Level 1: Age and Weight Restrictions

When choosing a power wheels motorcycle for your child, it’s important to consider the manufacturer’s recommended age and weight restrictions. These guidelines ensure that the toy is safe and appropriate for your child’s size and developmental stage.

Level 2: Battery Life and Charging Time

Another important factor to consider is the battery life and charging time of the power wheels motorcycle. Look for a model with a long-lasting battery that can provide plenty of riding time on a single charge. Additionally, consider how long it takes to recharge the battery, as this will determine how much downtime there is between play sessions.

Part 3: Safety Considerations

Level 1: Protective Gear

Even though power wheels motorcycles are designed for children, it’s still important for them to wear appropriate protective gear while riding. This may include a helmet, knee and elbow pads, and closed-toe shoes. Teaching children to wear protective gear from a young age instills important safety habits that can carry into adulthood.

Level 2: Supervision and Boundaries

While power wheels motorcycles are a safe and fun toy for kids, it’s important for parents to establish rules and boundaries for riding. Supervise children while they ride, and set clear guidelines for where and when the motorcycle can be used. This ensures that children can enjoy the toy safely and responsibly.

Part 4: Maintenance and Care

Level 1: Cleaning and Storage

Like any other toy, power wheels motorcycles require regular maintenance and care to keep them in good condition. This may include cleaning the motorcycle after use to remove dirt and debris, as well as storing it in a dry and secure place when not in use. Proper care will help extend the life of the toy and keep it looking and performing its best.

Level 2: Battery Maintenance

Taking care of the battery is an important aspect of maintaining a power wheels motorcycle. Follow the manufacturer’s guidelines for charging and storing the battery, and replace it when necessary. Proper battery maintenance ensures that the motorcycle runs smoothly and reliably.

Part 5: Popular Models and Accessories

Level 1: Popular Power Wheels Motorcycle Brands

There are several popular brands that produce power wheels motorcycles for kids. These include Fisher-Price, Razor, and Kid Motorz, among others. Each brand offers a range of models with different features and designs, allowing parents to find the perfect motorcycle for their child.

Level 2: Fun Accessories for Power Wheels Motorcycles

In addition to the motorcycles themselves, there are a variety of fun accessories that can enhance the riding experience for kids. These may include themed decals and stickers, custom license plates, and additional sound effects or music players. Adding these accessories can personalize the motorcycle and make it even more enjoyable for children to ride.

Kids Electric Ride-on Megastar Harley-Davidson Topper Power Bike

Part 6: Maintenance and Care for Power Wheels Motorcycle

To keep your power wheels motorcycle in top condition, it’s important to perform regular maintenance and care. Here are some tips to help you keep your motorcycle running smoothly:

  1. Keep the battery charged: Make sure to keep the battery of your power wheels motorcycle fully charged. Regularly charge the battery after use and avoid letting it sit for long periods without being charged.
  2. Clean the motorcycle: Regularly clean the exterior of the motorcycle to remove any dirt or debris that may have accumulated. Use a mild soap and water solution to gently wash the surfaces, and then dry them thoroughly with a soft cloth.
  3. Check the tires: Inspect the tires for any signs of wear or damage. Make sure they are properly inflated and replace them if they show excessive wear.
  4. Tighten loose parts: Periodically check for any loose nuts, bolts, or screws on the motorcycle and tighten them as needed. This will help prevent any parts from coming loose during use.
  5. Store properly: When not in use, store your power wheels motorcycle in a dry, cool place away from direct sunlight. This will help preserve the integrity of the materials and extend the life of the motorcycle.

By performing regular maintenance and care, you can ensure that your power wheels motorcycle continues to provide hours of fun and excitement for your little one.

Part 7: Safety Tips for Riding a Power Wheels Motorcycle

Riding a power wheels motorcycle can be a fun and exciting experience for kids, but it’s important to prioritize safety at all times. Here are some safety tips to keep in mind when riding a power wheels motorcycle:

  1. Wear protective gear: Make sure your child wears a properly fitting helmet, long pants, closed-toe shoes, and gloves to protect them in case of a fall.
  2. Supervise the ride: Always supervise your child when they are riding the power wheels motorcycle, especially if they are still learning how to operate it.
  3. Choose a safe location: Pick a flat, open area free of obstacles and traffic for your child to ride their power wheels motorcycle.
  4. Follow the rules of the road: Teach your child basic road safety rules such as yielding to pedestrians and other vehicles, and obeying traffic signs and signals.
  5. Maintain control: Encourage your child to ride at a safe speed and to avoid sudden starts or stops to prevent accidents.

By following these safety tips, you can help ensure that your child has a fun and safe experience while riding their power wheels motorcycle.

Part 8: Upgrades and Customizations for Power Wheels Motorcycle

If you’re looking to take your child’s power wheels motorcycle to the next level, consider upgrading and customizing it to make it more unique and enjoyable. Here are some ideas for upgrades and customizations you can make to the power wheels motorcycle:

  1. Custom paint job: Add a personal touch to the motorcycle by giving it a custom paint job with your child’s favorite colors or designs.
  2. Performance upgrades: Consider upgrading the motor or battery to give the motorcycle a boost in speed and power.
  3. Lighting additions: Install LED lights or other lighting accessories to make the motorcycle stand out and improve visibility during nighttime rides.
  4. Sound effects: Add a speaker or sound effects system to the motorcycle to enhance the overall experience.
  5. Storage accessories: Attach a storage compartment or saddlebags to the motorcycle to carry toys, snacks, or other essentials.

By customizing and upgrading the power wheels motorcycle, you can create a one-of-a-kind ride that your child will love. Just be sure to follow any safety guidelines and manufacturer recommendations when making modifications.

Power Wheels Harley-Davidson Cruiser 12V Battery-Powered Ride-On

Conclusion

Power wheels motorcycle is a fantastic way for kids to experience the excitement of motorcycle riding in a safe and controlled manner. By considering the features and benefits, choosing the right model, prioritizing safety, and maintaining the motorcycle properly. Parents can ensure that their child gets the most out of this fun and thrilling toy. With the wide range of models and accessories available, there is a power wheels motorcycle out there for every child to enjoy.

The Ultimate Guide to the Best Motorcycle Rain Gear

Introduction:

Riding a motorcycle in the rain can be a daunting experience, especially if you’re not properly prepared. As a rider, it’s important to invest in high-quality rain gear to keep yourself dry, warm, and safe on the road. In this comprehensive guide, we will explore the best motorcycle rain gear on the market, covering everything from jackets and pants to gloves and boots. Whether you’re a seasoned rider or just getting started, this guide will help you find the perfect rain gear to suit your needs and budget.

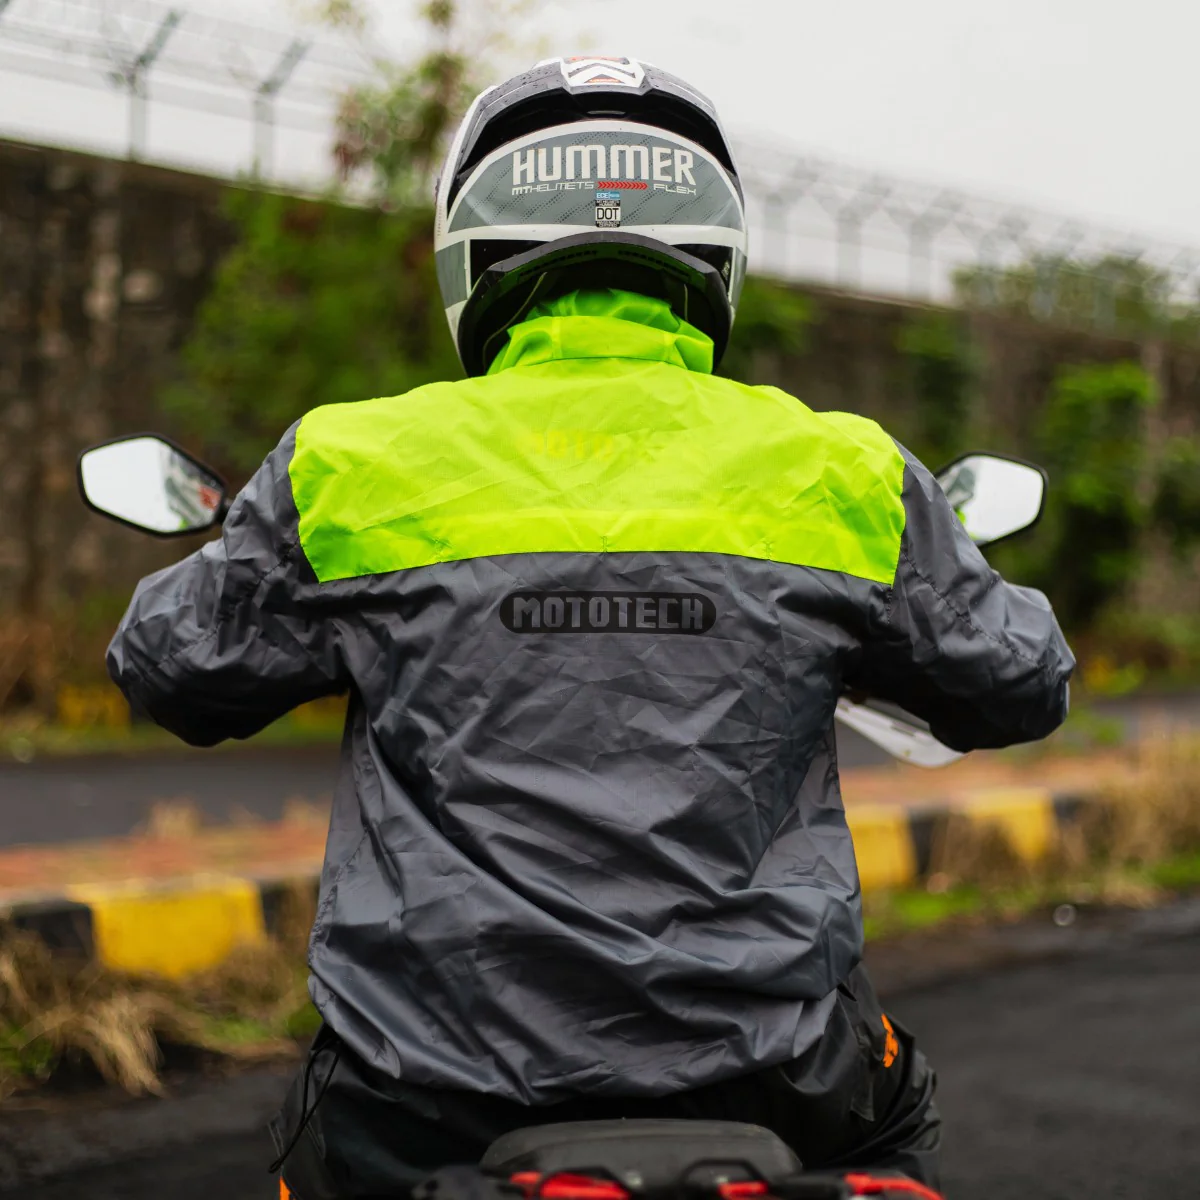
Men Motorcycle Raincoat

Part 1: Motorcycle Rain Jackets

Level 1: Importance of a Quality Rain Jacket
Riding in the rain without a proper motorcycle rain jacket can be uncomfortable and dangerous. A quality rain jacket will keep you dry, provide ventilation, and offer added visibility in low-light conditions.

Level 2: Top Motorcycle Rain Jacket Brands
We will explore popular motorcycle rain jacket brands such as Alpinestars, REV’IT, and Tourmaster, discussing their features, materials, and price points.

Part 2: Motorcycle Rain Pants

Level 1: The Benefits of Motorcycle Rain Pants
Investing in a pair of motorcycle rain pants is crucial for staying dry and comfortable during rainy rides. Rain pants provide an extra layer of protection and offer enhanced visibility to other motorists.

Level 2: Choosing the Right Rain Pants for Your Riding Style
We will discuss different types of motorcycle rain pants, including overpants, one-piece suits, and two-piece sets, and how to select the best option based on your specific riding needs.

Part 3: Motorcycle Rain Gloves

Level 1: The Importance of Waterproof Gloves
Wet hands can lead to reduced grip and control while riding, making waterproof gloves an essential part of your motorcycle rain gear arsenal. Quality rain gloves also provide warmth and protection from the elements.

Level 2: Top Motorcycle Rain Glove Features
We will explore features such as insulation, grip, and touchscreen compatibility in popular motorcycle rain glove brands like Klim, Held, and Joe Rocket.

Part 4: Motorcycle Rain Boots

Level 1: Why Waterproof Boots are a Must-Have
Keeping your feet dry and comfortable is crucial for maintaining control of your motorcycle in wet conditions. Waterproof boots also offer added protection and support during rainy rides.

Level 2: Finding the Right Rain Boots for Your Needs
We will discuss different types of motorcycle rain boots, including touring, adventure, and commuter styles, and what to look for when purchasing the best pair for your riding style.

Part 5: Motorcycle Rain Gear Accessories

Level 1: Additional Rain Gear Accessories
In addition to jackets, pants, gloves, and boots, there are various other accessories that can enhance your rain riding experience, such as rain covers for backpacks, helmet covers, and neck gaiters.

Level 2: Tips for Staying Dry on the Road
We will provide essential tips for staying dry and comfortable while riding in the rain, including proper layering, maintenance of rain gear, and adjusting your riding style for wet conditions.

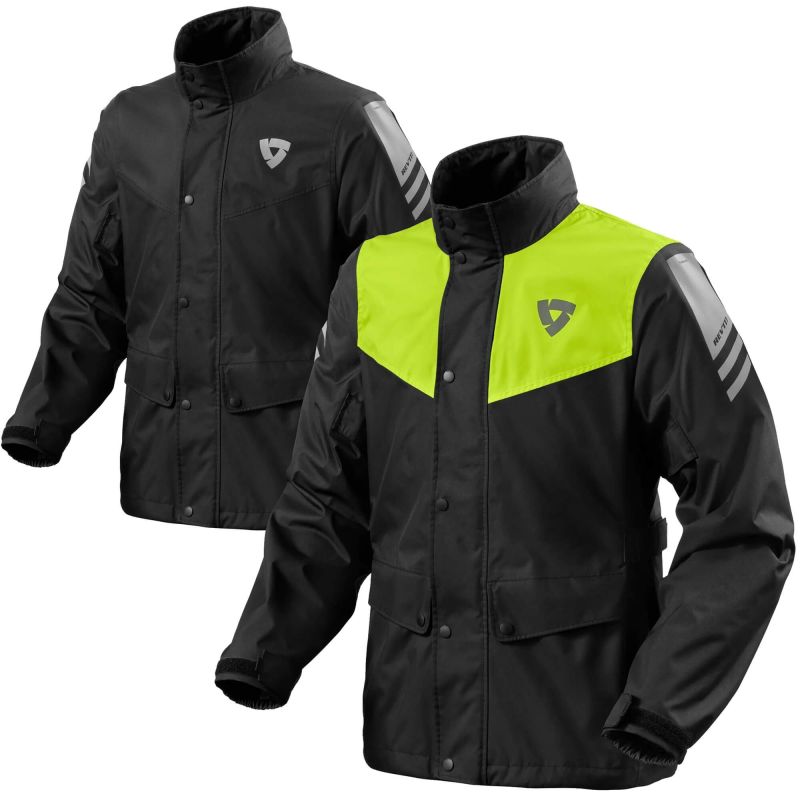
Motorcycle Rain Suits

Part 6: How to Choose the Best Motorcycle Rain Gear

When choosing the best motorcycle rain gear, there are a few key factors to consider to ensure maximum protection and comfort during wet weather riding.

First and foremost, it’s important to look for rain gear that is both waterproof and breathable. This will help keep you dry from the rain while still allowing moisture and heat to escape from your body, preventing you from getting too hot and sweaty underneath the gear. Look for gear that is made from high-quality, waterproof materials such as Gore-Tex or similar fabrics.

Another important factor to consider is visibility. Riding in the rain can already be dangerous due to reduced visibility, so it’s crucial to choose rain gear that is brightly colored and/or has reflective elements to increase your visibility to other drivers on the road.

Additionally, it’s wise to look for rain gear that is specifically designed for motorcycle riding. This type of gear is typically tailored to fit comfortably while riding and may feature added elements such as reinforced stitching in high-wear areas, padded shoulders and elbows, and extra ventilation.

Lastly, consider the convenience and ease of use of the rain gear. Look for options that are easy to put on and take off quickly, as well as those that can be easily packed down for storage when not in use.

By considering these factors when choosing the best motorcycle rain gear, you can ensure that you stay comfortable, dry, and safe during even the rainiest of rides.

Part 7: The Importance of High-Quality Motorcycle Rain Gear

High-quality motorcycle rain gear is an essential investment for any rider who plans to continue riding in all weather conditions. Not only does the right rain gear keep riders dry and comfortable, but it also plays a crucial role in safety on the road.

One of the most significant ways that high-quality motorcycle rain gear contributes to safety is by ensuring that riders stay dry and focused. Riding in wet conditions can be particularly dangerous due to reduced visibility, slippery road surfaces, and the potential for hypothermia. With the right rain gear, riders can stay dry, warm, and comfortable, allowing them to maintain their focus on the road and their surroundings.

Additionally, high-quality rain gear often comes with added safety features such as reflective elements and bright colors, which increase visibility to other drivers on the road. This can significantly reduce the risk of accidents caused by reduced visibility in rainy conditions.

Furthermore, high-quality rain gear is often more durable and longer-lasting than cheaper options, meaning that it can provide reliable protection for many seasons of riding. This can ultimately save riders money in the long run by reducing the need for frequent replacements and repairs.

Overall, high-quality motorcycle rain gear is essential for staying safe, comfortable, and protected in wet weather conditions. By investing in the best rain gear available, riders can ensure that they can handle any weather that comes their way.

Motorcycle Wet Weather Gear

Part 8: Maintaining and Caring for Motorcycle Rain Gear

To ensure that your motorcycle rain gear continues to provide the best protection and performance, proper maintenance and care are essential. By following a few simple steps, riders can extend the life of their rain gear and keep it in top condition for many rides to come.

Firstly, it’s important to regularly clean and re-waterproof your rain gear. Over time, dirt, sweat, and other contaminants can build up on the surface of the gear, compromising its waterproofing capabilities. To clean rain gear, follow the manufacturer’s instructions and use a mild detergent specifically designed for technical outdoor garments. Once clean, re-waterproof the gear using a specialized waterproofing spray or wash-in treatment to restore its water-repellent properties.

Additionally, it’s important to inspect rain gear regularly for any signs of wear and tear. Check for damaged seams, zippers, and other components, and make any necessary repairs promptly to prevent moisture from seeping through.

When storing rain gear, make sure it is completely dry before packing it away to prevent mold and mildew from developing. Store rain gear in a cool, dry place away from direct sunlight and heat, and avoid folding or creasing it in a way that could damage the waterproof membrane.

By maintaining and caring for motorcycle rain gear properly, riders can ensure that they continue to stay dry, comfortable, and protected on every ride, regardless of the weather conditions.

Conclusion:

Investing in the right motorcycle rain gear is essential for staying safe, comfortable, and in control while riding in wet weather. With the wide range of options available on the market, finding the best rain gear for your needs doesn’t have to be a daunting task. By considering the features, materials, and fit of different rain gear products, you can make informed decisions to enhance your riding experience, rain or shine.

Everything You Need to Know about the Motorcycle Stator

Introduction:

When it comes to the electrical system of a motorcycle, one crucial component that often gets overlooked is the stator. The stator is responsible for generating the electrical power needed to run the motorcycle’s various systems, including the lights, ignition, and charging the battery. In this comprehensive guide, we will delve into the inner workings of motorcycle stators, their importance, common issues, and maintenance tips.

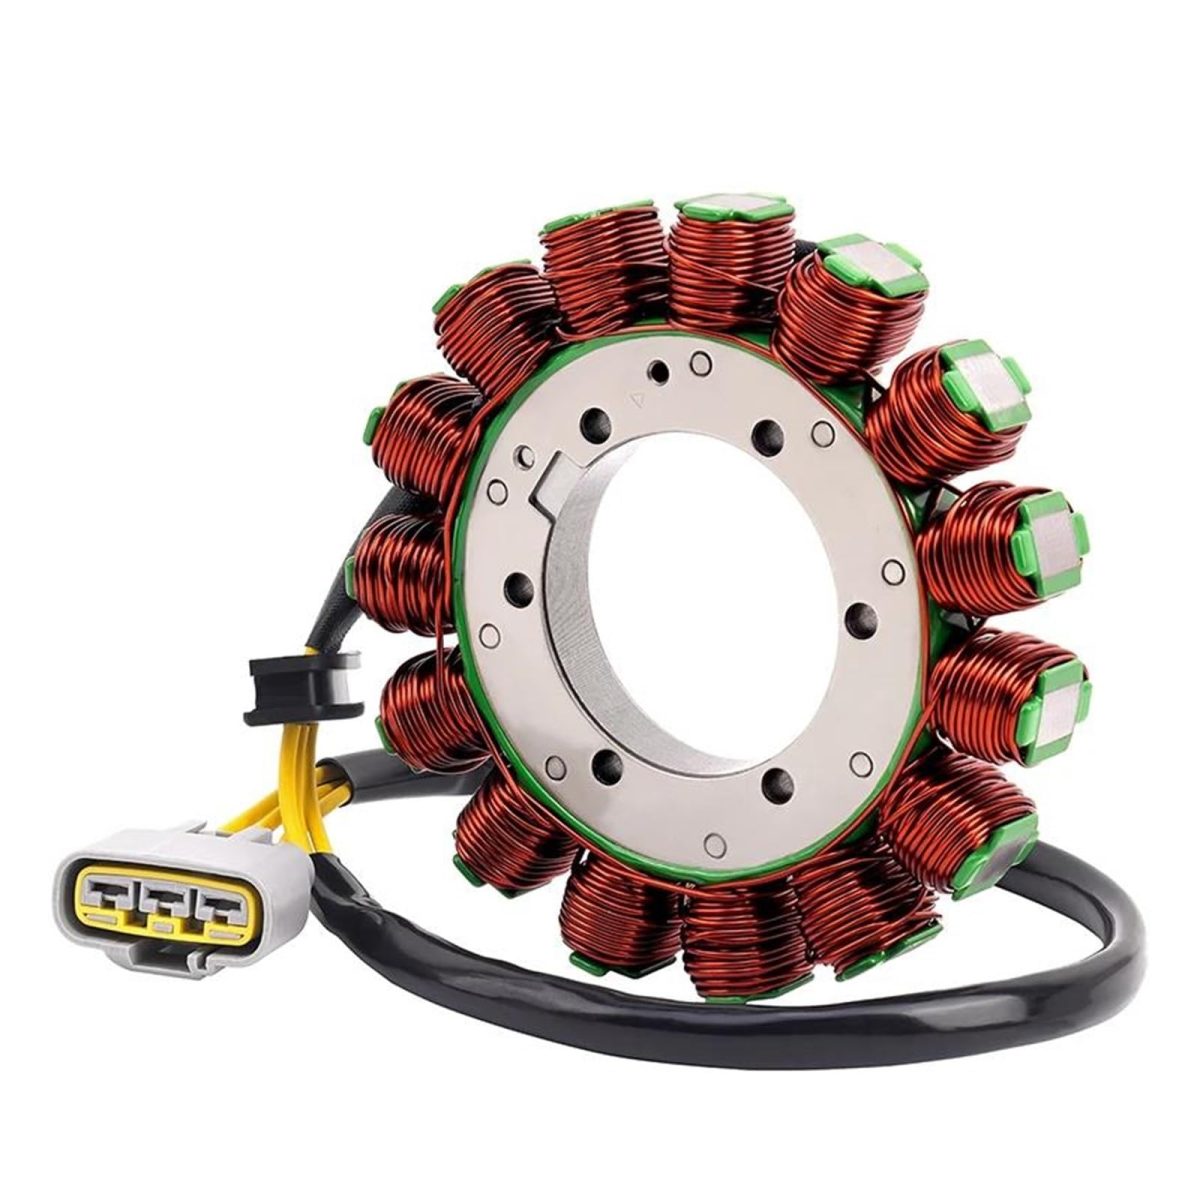
SGR 169039 Motorcycle stator

Part 1: What is a Motorcycle Stator?

Level 1: The Basics of a Motorcycle Stator
A motorcycle stator is a stationary component that forms a part of the charging system. It consists of a metal core with wire windings and is mounted within the engine casing. When the engine is running, the stator produces an alternating current (AC) that gets converted to direct current (DC) by the regulator-rectifier before being used to power the motorcycle’s electrical systems.

Level 2: Stator Types in Motorcycles
There are generally two types of stators used in motorcycles: single-phase and three-phase. Single-phase stators have only one set of wire windings and are commonly found in older or smaller displacement motorcycles. On the other hand, most modern motorcycles utilize three-phase stators, which are more efficient and produce a more stable electrical output.

Part 2: Importance of the Motorcycle Stator

Level 1: Powering the Electrical Systems
The primary function of the motorcycle stator is to generate electrical power for the motorcycle’s various systems. This includes providing power to the ignition system, lights, horn, and charging the battery. Without a functioning stator, the motorcycle would be unable to operate its electrical components.

Level 2: Charging the Battery
Another critical role of the stator is to charge the motorcycle’s battery while the engine is running. This ensures that the battery remains fully charged and capable of starting the engine and powering the electronics when the motorcycle is not running. A malfunctioning stator can lead to a drained battery and subsequent starting issues.

Part 3: Common Issues with Motorcycle Stators

Level 1: Overheating
One of the most common problems with motorcycle stators is overheating. This can occur due to excessive electrical loads, faulty wiring, or a failing regulator-rectifier. When the stator overheats, it can lead to insulation breakdown, wire damage, and ultimately, stator failure.

Level 2: Short Circuits
Short circuits within the stator windings can also cause issues. This can be a result of insulation breakdown, physical damage, or excessive heat. When a short circuit occurs, it can disrupt the flow of electrical current and cause the stator to malfunction.
Part 4: Signs of a Failing Motorcycle Stator

Level 1: Dim or Flickering Lights
One of the first signs of a failing stator is dim or flickering lights. This indicates that the stator is not producing enough electrical power to meet the demands of the motorcycle’s systems, resulting in a decrease in brightness or intermittent operation of the lights.

Level 2: Difficulty Starting the Motorcycle
As the stator’s output diminishes, the motorcycle’s battery may not receive enough charge, leading to starting difficulties. A failing stator can result in a weakened spark from the ignition system, making it harder to start the engine, especially when the motorcycle is cold.

Part 5: Maintenance Tips for Motorcycle Stators

Level 1: Regular Inspections
Periodic inspections of the stator and its associated components are crucial for early detection of potential issues. This includes visually inspecting the wiring, connectors, and the stator itself for any signs of damage, wear, or overheating.

Level 2: Proper Wiring and Grounding
Ensuring that the stator is properly wired and grounded is essential for its optimal performance and longevity. Loose or corroded connections can impair the stator’s ability to generate electrical power and lead to premature failure.

Motorcycle New Stator Coil Magneto Generator Engine For Yamaha XV400

Part 6: Common Signs of a Faulty Motorcycle Stator

A motorcycle stator plays a crucial role in providing electrical power to the vehicle’s battery and other electrical components. When the stator malfunctions, it can lead to various issues that affect the overall performance of the motorcycle. Here are some common signs of a faulty motorcycle stator:

  1. Charging Issues: One of the most noticeable signs of a bad stator is when the motorcycle’s battery is not receiving a proper charge. This can lead to a dead battery, difficulty starting the bike, or dimming headlights and other electrical components.
  2. Engine Stalling: A malfunctioning stator can also cause the engine to stall unexpectedly, as it fails to provide sufficient electrical power to keep the engine running.
  3. Electrical Malfunctions: If you notice that the motorcycle’s electrical components such as the lights, turn signals, or horn are not working properly, it could be a sign of a faulty stator.
  4. Overheating: A failing stator may also cause the motorcycle to overheat, as it struggles to provide the necessary electrical power to keep the engine and other components running smoothly.
  5. Strange Noises: Sometimes, a malfunctioning stator can produce unusual noises, such as buzzing or rattling, indicating internal damage.

It’s important to address these signs of a faulty stator promptly to prevent further damage to the motorcycle’s electrical system and ensure safe and reliable operation.

Part 7: How to Test a Motorcycle Stator

Testing the motorcycle stator is essential for identifying any issues that may be affecting its performance. Here are the steps to follow when testing a motorcycle stator:

  1. Disconnect the Battery: Before testing the stator, it’s important to disconnect the motorcycle’s battery to prevent any electrical mishaps.
  2. Locate the Stator: The stator is typically located on the left side of the engine and is connected to the rotor assembly.
  3. Use a Multimeter: Set the multimeter to the resistance or ohms setting and connect the probes to the stator’s wiring harness. Check the manufacturer’s specifications for the correct resistance values. If the readings are not within the specified range, it indicates a faulty stator.
  4. Check for Grounding: Test for continuity between the stator’s wires and the engine or frame. If there is continuity, it indicates a grounding issue, which can affect the stator’s performance.
  5. Test the Voltage Output: Use a voltmeter to test the stator’s voltage output. Rev the engine to different RPM levels and check if the voltage output increases accordingly. If the voltage output is inconsistent or nonexistent, it indicates a problem with the stator.

By following these steps, motorcycle owners can determine if their stator is functioning properly and address any issues that may be affecting its performance.

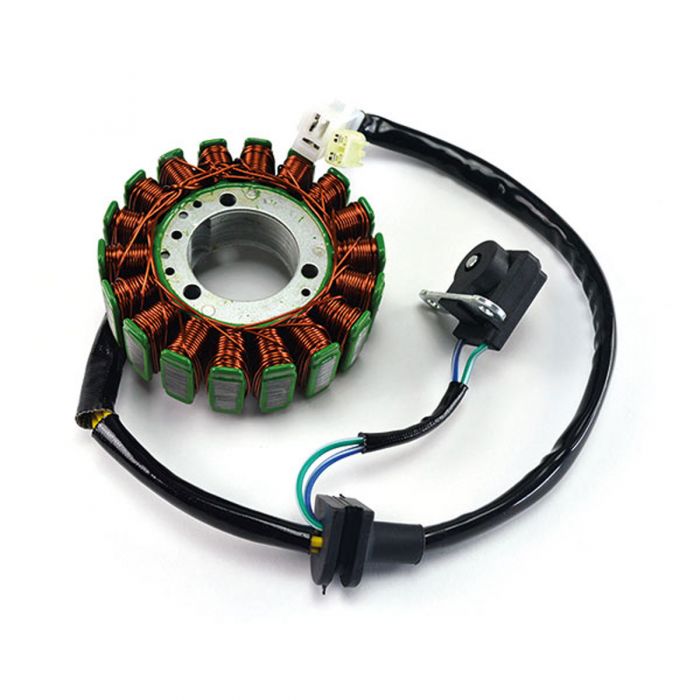
SGR 163083 Motorcycle stator

Part 8: Replacing a Motorcycle Stator

Replacing a motorcycle stator can be a complex and labor-intensive task, but with the right tools and knowledge, it is possible to do it yourself. Here are the general steps to follow when replacing a motorcycle stator:

  1. Prepare the Motorcycle: Begin by disconnecting the battery and removing any necessary components to access the stator, such as the side cover and rotor.
  2. Remove the Old Stator: Once the stator is accessible, disconnect the wiring harness and mounting bolts to remove the old stator from the motorcycle.
  3. Install the New Stator: Carefully position the new stator in place and secure it with the mounting bolts. Reconnect the wiring harness and ensure that all connections are secure.
  4. Reassemble the Motorcycle: Put back any components that were removed to access the stator, such as the side cover and rotor. Reconnect the battery and test the motorcycle to ensure that the new stator is functioning properly.

It’s important to consult the motorcycle’s service manual for specific instructions and torque specifications when replacing the stator. If you’re not confident in your ability to replace the stator yourself, it’s best to seek professional help to ensure the job is done correctly.

Conclusion:

The motorcycle stator may not always be in the spotlight, but it plays a critical role in the functionality of the motorcycle’s electrical system. Understanding the basics of the stator, its importance, common issues, and maintenance tips can help motorcycle enthusiasts keep their bikes running smoothly. By being proactive in addressing stator-related issues, riders can avoid potential breakdowns and enjoy a hassle-free riding experience.

The Comprehensive Guide to Starting a Motorcycle

Introduction

Starting a motorcycle is a fundamental skill that every rider should master. Whether you’re a beginner or a seasoned rider, understanding the proper techniques for starting your motorcycle can make a significant difference in your riding experience. In this comprehensive guide, we’ll walk you through everything you need to know about starting a motorcycle, from the initial safety checks to getting the engine revving. By the end of this article, you’ll be equipped with the knowledge and confidence to start your motorcycle with ease.

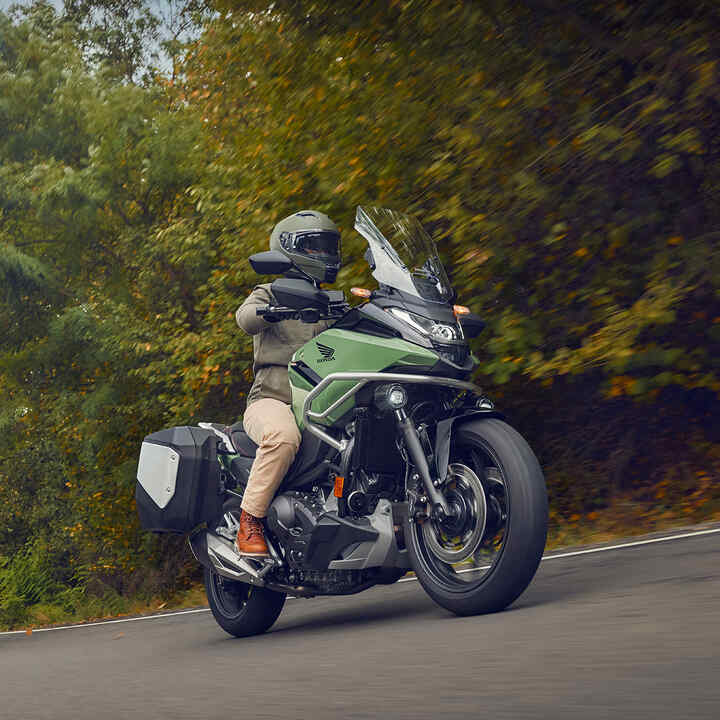
New Motorcycles & Bikes | Ride your Dream | Honda UK

Part 1: Pre-Start Safety Checks

Level 1: Importance of Pre-Start Safety Checks
Before you even think about starting your motorcycle, it’s crucial to perform a series of safety checks to ensure that your bike is in good working condition. These checks can help prevent accidents and ensure a smooth and safe ride. Some of the key safety checks include inspecting the tires for proper inflation and tread wear, checking the oil and fluid levels, and examining the brakes for any signs of wear or damage.

Level 2: Step-by-Step Safety Checks Process
Start by visually inspecting the exterior of your motorcycle, looking for any signs of damage or loose parts. Next, check the tire pressure using a pressure gauge and ensure that the tread depth is within the recommended range. Then, pop open the seat and check the oil and other fluid levels, topping up if necessary. Finally, test the brakes by gently applying pressure to the levers or pedals and ensuring that they respond appropriately.

Part 2: Understanding the Controls

Level 1: Familiarizing Yourself with the Controls
Before starting your motorcycle, it’s essential to become familiar with the various controls and switches on your bike. This includes the ignition switch, throttle, clutch, brakes, and gear shifter. Understanding how each control functions and how to operate them correctly is crucial for a safe and efficient start.

Level 2: Proper Hand and Feet Placement
When sitting on your motorcycle, ensure that your hands are positioned comfortably on the handlebars, with your fingers ready to operate the clutch and brake levers. Your feet should be resting on the foot pegs, with your toes on the brake and shifter pedals. It’s important to maintain a proper posture and body position to ensure that you can reach and operate the controls with ease.

Part 3: Starting the Engine

Level 1: Turning on the Ignition
Once you’ve completed the safety checks and familiarized yourself with the controls, it’s time to start the engine. Start by turning the ignition key to the “on” position, which will power up the electrical system and prepare the engine for starting. If your motorcycle has a kickstart, ensure that the kickstand is up, and the bike is in neutral before attempting to start the engine.

Level 2: Engaging the Clutch and Starting the Engine
If your motorcycle has a manual transmission, pull the clutch lever in all the way to disengage the transmission. Then, press the starter button or kick the starter pedal to engage the engine. Once the engine is running, slowly release the clutch lever to transfer power to the rear wheel and start moving forward. If you have an electric starter, simply push the starter button to initiate the engine.

Part 4: Warm-Up and Pre-ride Checks

Level 1: Allowing the Engine to Warm Up
After starting your motorcycle, it’s important to allow the engine to warm up before riding off. This can help improve engine performance and prolong the life of your motorcycle. Allow the engine to idle for a few minutes, giving it time to reach its optimal operating temperature.

Level 2: Double-Checking Your Controls
While the engine is warming up, take a moment to double-check all your controls, including the brakes, throttle, and gear shifter. Ensure that everything is functioning smoothly and that there are no signs of any potential issues. Additionally, take a quick look at your mirrors and gauges to confirm that everything is in order before setting off on your ride.

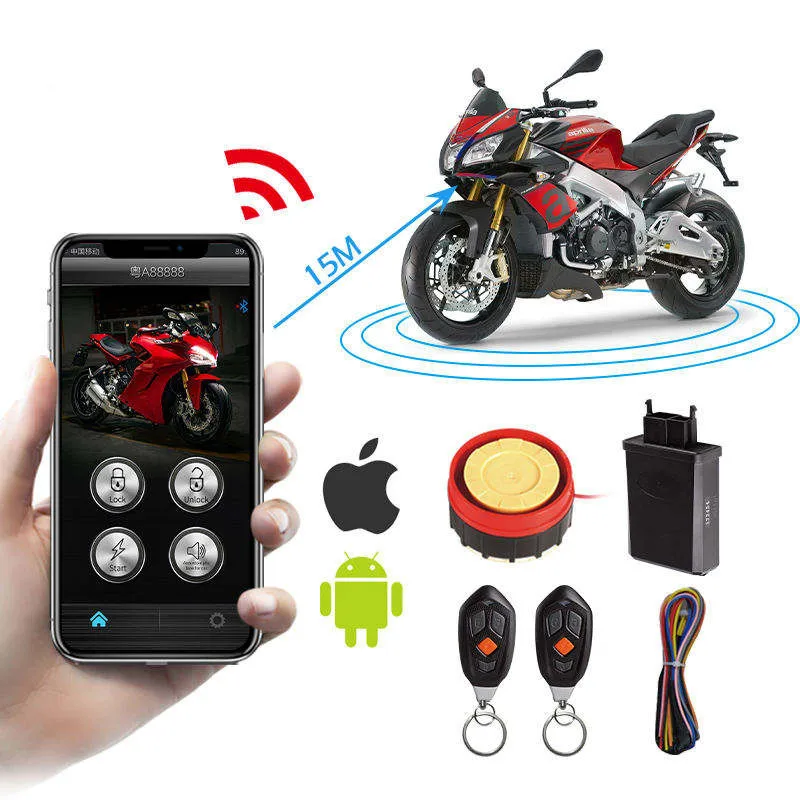
Hot Sale Universal APP Remote Engine Start Motorcycle Alarm System 2 Keys

Part 5: Troubleshooting Starting Issues

Level 1: Common Starting Problems
Despite your best efforts, there may be instances where your motorcycle refuses to start or encounters starting issues. Some common problems include a dead battery, fuel delivery issues, ignition problems, or a faulty starter motor. It’s essential to familiarize yourself with these potential issues to troubleshoot and resolve them effectively.

Level 2: How to Address Starting Issues
If you encounter starting problems, start by checking the battery and ensuring that it is charged and connected properly. If the fuel delivery system is the culprit, inspect the fuel lines and the fuel tank, ensuring that there are no blockages or leaks. For ignition or starter motor issues, it may be necessary to seek professional assistance to diagnose and resolve the problem.

Part 6: Basic Maintenance and Troubleshooting

When starting a motorcycle, it’s essential to make sure that basic maintenance is up to date and any issues are troubleshooted before attempting to start the engine. This includes checking the oil level, fuel level, and ensuring that the battery is charged and in good condition. It’s also important to inspect the tires, brakes, and lights to ensure that everything is in proper working order.

If the motorcycle has been sitting for an extended period, it’s a good idea to check for any signs of corrosion or buildup in the fuel system. This can be done by inspecting the fuel lines and filter for any blockages, as well as draining any old fuel from the tank and replacing it with fresh gasoline.

In the event that the motorcycle is not starting, troubleshooting the issue can help identify the problem and make the necessary repairs. Common reasons for a motorcycle not starting can include a dead battery, faulty spark plugs, or a clogged fuel system. By methodically checking each component and ruling out potential issues, it becomes easier to pinpoint the cause of the problem and take appropriate action to fix it.

Regular maintenance and troubleshooting can help ensure that the motorcycle starts reliably and performs optimally when on the road.

Part 7: Proper Warm-up Procedure

After performing basic maintenance and troubleshooting any issues, it’s important to follow a proper warm-up procedure when starting a motorcycle. This allows the engine to reach its optimal operating temperature and ensures smooth performance when riding.

To warm up a motorcycle, start the engine and let it run for a few minutes at a steady idle. During this time, the engine oil will begin to circulate and reach the critical parts of the engine, reducing wear and tear. It also allows the engine to reach a stable temperature, which is important for efficient combustion and overall performance.

Additionally, a proper warm-up allows the motorcycle’s transmission and drivetrain to reach their operating temperatures, ensuring smooth shifting and optimal performance. This can help prevent premature wear on the clutch and transmission components, as well as reduce the risk of stalling or jerky acceleration when riding.

By following a proper warm-up procedure, motorcycle enthusiasts can ensure that their bikes are ready for a safe and enjoyable ride.

Part 8: Starting a Motorcycle Safely

In addition to performing maintenance, troubleshooting issues, and following a proper warm-up procedure, it’s crucial to start a motorcycle safely to prevent accidents and injuries.

Before starting the engine, it’s important to ensure that the motorcycle is on stable ground and in a suitable location for starting. This means avoiding areas with loose gravel, mud, or other hazards that could cause the bike to slip or lose traction.

Once the motorcycle is in a safe position, the rider should ensure that the bike is in neutral and the kickstand is up before attempting to start the engine. It’s also essential to have a clear understanding of the controls and ensure that the clutch and brakes are in good working condition before starting the motorcycle.

When starting the engine, it’s important to keep the motorcycle upright and have a firm grip on the handlebars to maintain control. This can prevent the bike from tipping over or rolling unexpectedly when the engine starts.

By following these safety precautions, motorcycle enthusiasts can start their bikes with confidence and minimize the risk of accidents or injuries.

Conclusion

Starting a motorcycle is a fundamental aspect of riding, and mastering this skill is essential for a safe and enjoyable ride. By following the steps outlined in this comprehensive guide, you’ll be well-equipped to start your motorcycle confidently, ensuring a smooth and trouble-free ride. Remember to prioritize safety, perform pre-start checks, understand the controls, and troubleshoot starting issues to ensure that your motorcycle is always ready to hit the road. With practice and diligence, starting your motorcycle will become second nature, allowing you to focus on the thrill of the ride ahead.

The Ultimate Guide to Motorcycle Tire Balancers

Introduction

Motorcycle tire balancers are an essential tool for maintaining the performance and safety of your bike. Properly balanced tires can improve stability, handling, and overall ride quality. In this comprehensive guide, we will explore the importance of tire balancers, discuss the different types available, and provide a step-by-step guide on how to use them effectively.

Part 1: Why Motorcycle Tire Balancing is Important

Level 1: The Importance of Tire Balancing

  • Proper tire balancing ensures even weight distribution, which is crucial for stable and predictable handling.
  • Unbalanced tires can lead to uneven wear, increased vibration, and reduced overall performance.

Level 2: Effects of Unbalanced Tires

  • Uneven tire wear can compromise traction and lead to premature tire replacement.
  • Vibration can cause discomfort for the rider and potentially damage other components of the motorcycle.

Wheel balancer compatible with KTM 390 Adventure

Part 2: Types of Motorcycle Tire Balancers

Level 1: Static vs. Dynamic Balancing

  • Static balancers are simple and cost-effective, but they may not address all sources of imbalance.
  • Dynamic balancers use spinning technology to identify and correct imbalances in both the tire and wheel assembly.

Level 2: Manual vs. Automatic Balancers

  • Manual balancers require the operator to make adjustments based on visual and tactile feedback.
  • Automatic balancers utilize sensors and computerized algorithms to determine and correct imbalances more efficiently.

Part 3: How to Use a Motorcycle Tire Balancer

Level 1: Preparing the Wheel and Tire

  • Remove the wheel from the motorcycle and ensure it is clean and free of any mud, debris, or old wheel weights.
  • Inflate the tire to the recommended pressure and inspect it for any signs of damage or excessive wear.

Level 2: Mounting the Wheel on the Balancer

  • Use the appropriate adapters or cones to secure the wheel to the balancer and ensure it is aligned properly.
  • Rotate the wheel by hand to check for any wobbles or imbalances before proceeding.

Part 4: Balancing a Motorcycle Tire

Level 1: Static Balancing Method

  • With the wheel mounted on the balancer, use wheel weights to eliminate any static imbalance indicated by the balancer.
  • Adjust the position of the weights and recheck the balance until the wheel remains stationary in any position.

Level 2: Dynamic Balancing Method

  • Apply the appropriate adhesive or clip-on weights to address any remaining dynamic imbalances as indicated by the balancer.
  • Spin the wheel to confirm that the dynamic balance is within acceptable limits and make any necessary adjustments.

Wheel Balancers: K22 Motorcycle Wheel Balancer

Part 5: Tips for Maintaining Balanced Tires

Level 1: Regular Inspections and Maintenance

  • Check tire pressure, tread depth, and overall condition regularly to prevent potential imbalances.
  • Ensure that wheel bearings, suspension components, and other related parts are in good working order to maintain balanced tires.

Level 2: Proper Installation and Alignment

  • Make sure that tires are mounted and balanced correctly when installed, and that the wheels are aligned according to the manufacturer’s specifications.
  • Seek professional assistance if you are unsure about the proper installation, balancing, or alignment of your motorcycle tires.

Part 6: Benefits of Using a Motorcycle Tire Balancer

When it comes to maintaining your motorcycle, one of the most important aspects to consider is the balance of your tires. A well-balanced tire ensures a smooth and safe ride, while also prolonging the life of your tires and other crucial components of your motorcycle. This is where a motorcycle tire balancer comes in handy.

Using a motorcycle tire balancer offers several key benefits. Firstly, it ensures a smoother and more stable ride by evenly distributing the weight of the tire and wheel assembly. This reduces vibrations and improves handling, especially at high speeds. A balanced tire also minimizes wear and tear on the suspension and steering components, ultimately prolonging the life of your motorcycle.

Secondly, a tire balancer helps to prevent uneven tire wear. By accurately balancing the tire and wheel assembly, it reduces the risk of cupping and uneven tread wear, which can compromise the performance and safety of your motorcycle. This not only saves you money on frequent tire replacements but also ensures optimal grip and traction on different road surfaces.

Additionally, a motorcycle tire balancer can also improve fuel efficiency. By reducing vibrations and resistance caused by an imbalanced tire, your motorcycle’s engine doesn’t need to work as hard, leading to improved fuel economy. This not only saves you money on fuel costs but also reduces the environmental impact of your motorcycle.

Overall, the benefits of using a motorcycle tire balancer are clear. From improving ride quality and safety to extending the lifespan of your tires and enhancing fuel efficiency, a tire balancer is a must-have tool for any motorcycle owner who values performance, safety, and savings.

Part 7: Tips for Using a Motorcycle Tire Balancer

Using a motorcycle tire balancer may seem daunting at first, but with the right knowledge and technique, it can be a straightforward and rewarding process. Here are some essential tips for using a motorcycle tire balancer effectively:

  1. Properly Mount the Wheel: Before balancing your motorcycle tire, ensure that the wheel is properly mounted on the balancer. It should be securely positioned and centered to achieve accurate results.
  2. Check for Imperfections: Inspect the tire and wheel for any imperfections such as dents, bends, or flat spots. These can affect the balance and should be addressed before proceeding with the balancing process.
  3. Use the Right Balancing Weights: Depending on the balancer you are using, you may need to add or remove weights to achieve a perfect balance. Use the appropriate weights and follow the manufacturer’s guidelines for placement and adjustment.
  4. Take Your Time: Balancing a motorcycle tire requires patience and precision. Take your time to make small adjustments and recheck the balance until it is perfect.
  5. Test Ride: Once the tire is balanced, take your motorcycle for a test ride to ensure that the handling and stability have improved. If you notice any issues, revisit the balancing process and make necessary adjustments.

By following these tips and taking a methodical approach to using a motorcycle tire balancer, you can ensure optimal performance, safety, and longevity of your motorcycle tires.

Wheel balancer for motorcycle ConStands WU22 Tire balancer black

Part 8: Maintenance and Care for Your Motorcycle Tire Balancer

As with any precision tool, proper maintenance and care for your motorcycle tire balancer are essential to ensure accurate and reliable results. Here are some important maintenance tips for your tire balancer:

  1. Regular Inspection: Inspect the balancer for any signs of wear, damage, or misalignment. Check for loose components or any irregularities that may affect its performance.
  2. Clean Properly: Keep the balancer clean and free of debris, dust, and other contaminants that can interfere with its functionality. Use a gentle cleaning solution and ensure that all moving parts are properly lubricated.
  3. Calibration: Periodically calibrate your tire balancer to maintain accuracy. Over time, environmental factors and regular use can affect the calibration, so it’s important to recalibrate as needed.
  4. Storage: When not in use, store your motorcycle tire balancer in a clean, dry, and secure location. This helps to prevent damage and ensures that it remains in optimal condition for future use.

By following these maintenance and care guidelines, you can extend the lifespan of your motorcycle tire balancer and continue to benefit from accurate and reliable tire balancing results. Proper maintenance not only ensures the performance and longevity of your balancer but also contributes to the safety and efficiency of your motorcycle.

Conclusion

Motorcycle tire balancers are an essential tool for maintaining smooth, stable, and safe riding experiences. By understanding the importance of tire balancing, knowing the different types of balancers available, and following the proper procedures for balancing and maintaining tires, riders can ensure optimal performance and longevity for their motorcycle tires. With this guide, you are equipped with the knowledge and skills to effectively utilize a motorcycle tire balancer and keep your bike riding smoothly for miles to come.