Easy DIY Yoga Mat Carrier: How to Carry A Yoga Mat?

Introduction to DIY Yoga Mat Carriers

Engaging in yoga offers numerous health benefits, but one minor challenge can be the transportation of the yoga mat. To practice yoga outdoors or attend classes, carrying a yoga mat is a must. However, not everyone has a specialized yoga bag, and at times these bags can be an added expense or a hassle. Here lies the beauty of a DIY no-sew yoga mat carrier: it’s a simple, cost-effective solution for conveniently transporting your mat.

How to carry a yoga mat? Having a custom-made sling ensures that you’re always ready for a yoga session, without the worry of leaving your mat behind. Plus, making your own carrier is not only easy on the wallet, but it also allows you to express your personal style and preference. And the best part is the simplicity; you can craft a functional and stylish yoga mat carrier with a few common household items, and avoid the complexities of sewing altogether. In this blog post, we will guide you through the process of creating your very own yoga mat sling, ensuring you’ll know how to carry a yoga mat comfortably and fashionably.

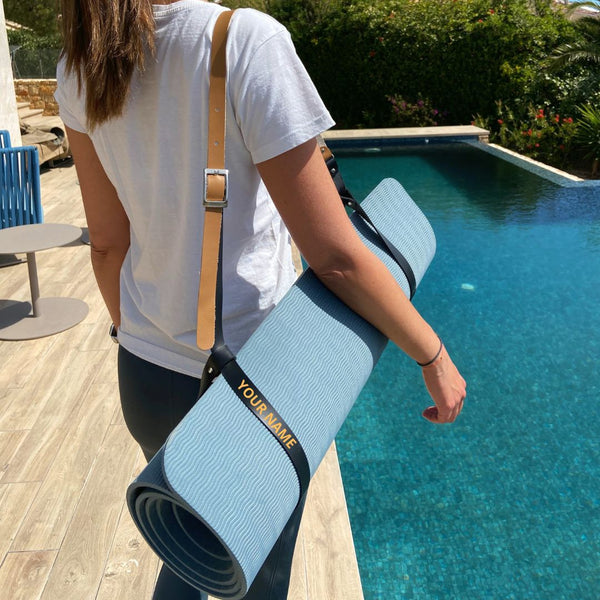
Yoga Mat Carry Strap

Essential Materials for Your No-Sew Yoga Mat Carrier

To create your no-sew yoga mat carrier, you’ll need a few basic items. Here’s what to gather:

  • Scissors: Sharp scissors will cut materials clean and fast.
  • Ribbon: Grab 2 yards of ?-inch wide ribbon for strength and ease of use.
  • Yoga Mat: The central item for this DIY project.

For those who may have alternative items at home, consider:

  • T-Shirt: An old t-shirt can substitute for ribbon. Cut it into strips.

When selecting materials, opt for durability and comfort. The ribbon is ideal as it’s sturdy and less stretchy, unlike t-shirt strips which can sag over time. If you use a t-shirt, wider strips may offer better support.

Remember, choosing the right materials ensures your carrier is both practical and long-lasting. Think about what you have available and what suits your needs before starting.

Step-by-Step Guide: Creating Your Yoga Mat Sling

Creating your no-sew yoga mat sling is quick and straightforward. Follow these steps to have your personal carrier ready in no time.

  1. Measure and Cut the Ribbon: Start by measuring a length of about 2 yards of ribbon. Use your scissors to cut this neatly.
  2. Wrap the Ribbon: Take one end of the ribbon and wrap it around your rolled-up yoga mat to size the loop.
  3. Form the Loop: With the top piece of ribbon, create a loop around the bottom piece. Check that both ends of the ribbon are parallel to each other.
  4. Secure the Loop: Now, tie a basic knot where you’ve formed the loop. It’s wise to tie a second one for added security.
  5. Leave Enough Space: The loop should be large enough to slide freely over the ribbon without coming loose.
  6. Create the Second Loop: Move to the other end of the mat and repeat these steps to form another loop.
  7. Adjust for Fit: The ribbon’s length between the two loops will vary depending on your body size. Adjust it so that when you wear the sling, the mat fits comfortably against your back.
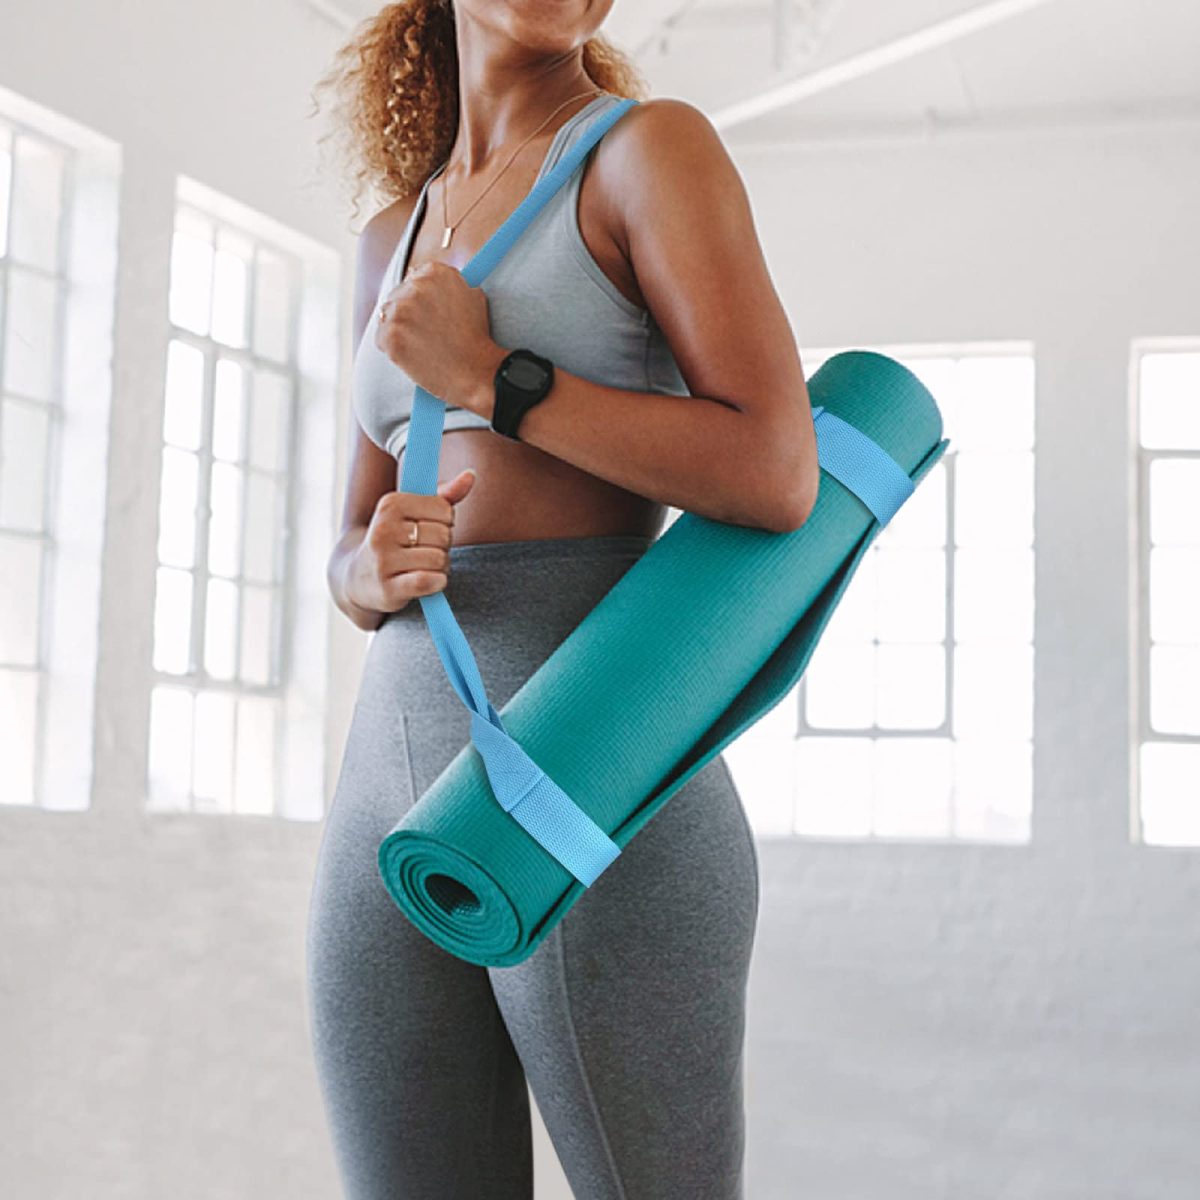
  8. Test Your Sling: Slip the loops over both ends of your yoga mat, then put it over your shoulder like a bag to ensure it sits right.

Congratulations, you have created a simple, effective, and stylish way to carry your yoga mat. Remember, the keywords here are ‘no-sew’ and ‘ease.’ With just a bit of ribbon and a few knots, you’re all set for a hassle-free journey to your next yoga session.

Alternative Materials: Using T-Shirts or Fabric

If you don’t have ribbon on hand, there’s no need to worry. You can use alternative materials like an old t-shirt or fabric scraps. These materials are not only cost-effective but also allow for recycling, turning something old into a new, useful item.

Using an Old T-Shirt

To use a t-shirt as an alternative to ribbon, start by selecting a shirt that’s no longer in use. Once you have your t-shirt:

  1. Cut the T-Shirt: Lay the t-shirt flat and cut it into 1.5 to 3-inch wide strips. The width will affect the comfort and durability of your sling.
  2. Stretch the Strips: Pull on the strips to stretch them out. This gives them the elasticity they’ll need to hold the yoga mat securely.
  3. Knot the Strips: Just like with ribbon, tie the strips into loops at both ends of the mat. Make sure the knots are tight and secure.
  4. Check for Comfort: Since t-shirt material is stretchy, it may fit differently. Test it out to ensure it’s snug but comfortable against your body.

Using Fabric Scraps

If you have fabric scraps, you can craft a highly durable and attractive yoga mat carrier. Here’s what to do:

  1. Measure the Fabric: Choose a sturdy fabric and cut two pieces approximately 2 yards long and 3 inches wide.
  2. Fold and Iron: To make the edges neat, fold them inward and iron flat. This will give your sling a more finished look without sewing.
  3. Form the Loops: Tie each fabric strip into a loop on either end of your yoga mat, making sure they’re secure.
  4. Fit Test: Adjust the loops so they’re tight enough to hold the mat, but not too tight to slide off easily. Try wearing the sling to check the fit.

These alternatives are excellent for those who want to repurpose materials they already own. Whether you’re an eco-conscious yoga enthusiast or looking to save some money, using a t-shirt or fabric scraps is a creative way to carry a yoga mat.

Yoga mat carrying straps - Leather - Adjustable size

Customizing Your Sling for Comfort and Convenience

To ensure your DIY yoga mat carrier suits your needs, customizing for comfort and convenience is key. Follow these tips to personalize your sling:

  • Adjust the Length: The right length is vital for comfort. Make sure the ribbon or fabric strip is long enough to fit over your shoulder and around the mat without being too tight or too loose.
  • Choose Soft Materials: Whether you opt for a ribbon, t-shirt strips, or fabric, select a material that feels gentle against the skin, especially if you carry it directly on your shoulder.
  • Consider Width for Shoulder Comfort: A wider strap may provide more shoulder comfort. Especially if you walk long distances, a strap that distributes weight evenly will reduce strain.
  • Add Padding: For extra comfort, especially with heavier mats, consider adding padding like a foam strip or folded fabric within the loops of the sling.
  • Secure the Mat: Ensure your yoga mat is tightly rolled before placing it within the sling. A well-secured mat prevents slipping and makes carrying easier.
  • Personalize with Color: Choose a color or pattern that reflects your style. It’s an easy way to spot your mat and adds a personalized touch.

By customizing your yoga mat carrier, you’ll enjoy more than just the practicality of having an easy way to carry your mat. You’ll also appreciate the added comfort, convenience, and a dash of personal style that comes with a carrier tailored to your preference.

Tips for Securing Your Yoga Mat Safely

Securing your yoga mat is crucial for safe transportation. Follow these easy tips to ensure your mat stays in place:

  • Roll Tightly: Begin by tightly rolling your yoga mat. This prevents it from unraveling while you carry it.
  • Check Knots: Ensure your knots are strong. Double knot your ribbon or fabric loops for extra security.
  • Even Loops: Create loops of equal size. This helps in maintaining balance and ensures that the mat won’t tilt or slip.
  • Test the Hold: Before heading out, place the mat on your shoulder and give it a gentle shake. This will confirm if everything is secure.
  • Avoid Overstuffing: Do not force too many items under the strap, as it can loosen the hold.
  • Regular Inspection: Over time, check the condition of the knots and material. Replace if you notice wear or stretching.
  • Mindful Storage: Store your carrier and yoga mat in a dry, cool place to prevent damage.

By considering these simple tips, your DIY yoga mat carrier will hold up well and keep your mat secure, no matter where your yoga journey takes you.

Making Your Yoga Sling Stylish and Personal

Ensuring your DIY yoga mat carrier is not only functional but also stylish adds joy to your yoga practice. To personalize your carrier and make it stand out, you can put your creativity to good use. Here are some tips for adding that personal touch:

  • Choose Vibrant Colors: Select ribbons or fabric in colors that you love. Bright, bold colors or patterns can make your sling pop and express your personality.
  • Incorporate Patterns: If you have patterned t-shirts or fabric, use them to add an interesting design to your sling. Stripes, florals, or abstract prints could be eye-catching choices.
  • Add Decorative Elements: Consider attaching charms, beads, or buttons to the sling. Ensure they’re securely fastened and won’t damage the mat.
  • Embroidery or Painting: If you’re skilled with a needle or brush, embroider your initials or paint a design directly onto the fabric or ribbon. Use non-toxic, waterproof paints or threads.
  • Mix and Match: Combine different materials or colors to create a unique patchwork effect. This works well if you’re using old t-shirts for your sling.
  • Re-purpose Jewelry: Old necklaces or bracelets can be wrapped around the straps for an added flair. Just be sure they won’t snag on the mat or your clothing.

Remember, the aim is to make a yoga sling that’s a reflection of you and brings a smile to your face every time you head out to practice. By adding these personalized touches, your yoga mat carrier becomes more than just a convenient tool; it transforms into a statement of your individual style.

Yoga Mat Carry Strap - Burnt Orange

Caring for Your DIY Yoga Mat Carrier

Maintaining your DIY yoga mat carrier ensures longevity and cleanliness. Here are some care tips:

  • Wash Regularly: Depending on the material, hand wash or machine wash your carrier. Use mild detergent and avoid bleach.
  • Dry Properly: After washing, let it air dry completely. Don’t twist or wring the material.
  • Inspect for Wear: Look for signs of fraying or weakening. Repair any damage promptly to prevent it from worsening.
  • Store Correctly: Keep your carrier in a cool, dry place when not in use. This helps prevent mildew and fading.
  • Avoid Direct Sunlight: Prolonged exposure to the sun can degrade fabrics. Store your carrier away from direct sunlight whenever possible.
  • Follow Material Guidelines: Use washing and care instructions specific to the material you’ve chosen for your carrier.

Careful maintenance will extend the life of your carrier and keep it looking fresh for every yoga session. Remember, a clean and durable carrier is essential for ‘how to carry a yoga mat’ without hassle.
Explore the Easy Steps to Cleaning A Yoga Mat

Choosing the Right Cleaning Solution

Selecting the correct solution of cleaning a yoga mat is vital for both the longevity of your yoga mat and your own safety. There are commercial cleaners designed specifically for yoga mats, but some household items can be just as effective and less harsh.

Understand Your Mat’s Material

Before choosing a cleaner, know your mat’s material. Most mats are from PVC, rubber, TPE, or eco-friendly materials. Use mild detergents for PVC and TPE mats. Natural rubber mats respond well to gentle, non-oil-based cleaners.

Opt for Specific Yoga Mat Cleaners

There are yoga mat cleaners available that are formulated to safely disinfect and deodorize without damaging the mat’s surface. They often contain natural ingredients that provide a gentle clean without leaving a slippery residue.

DIY Solutions

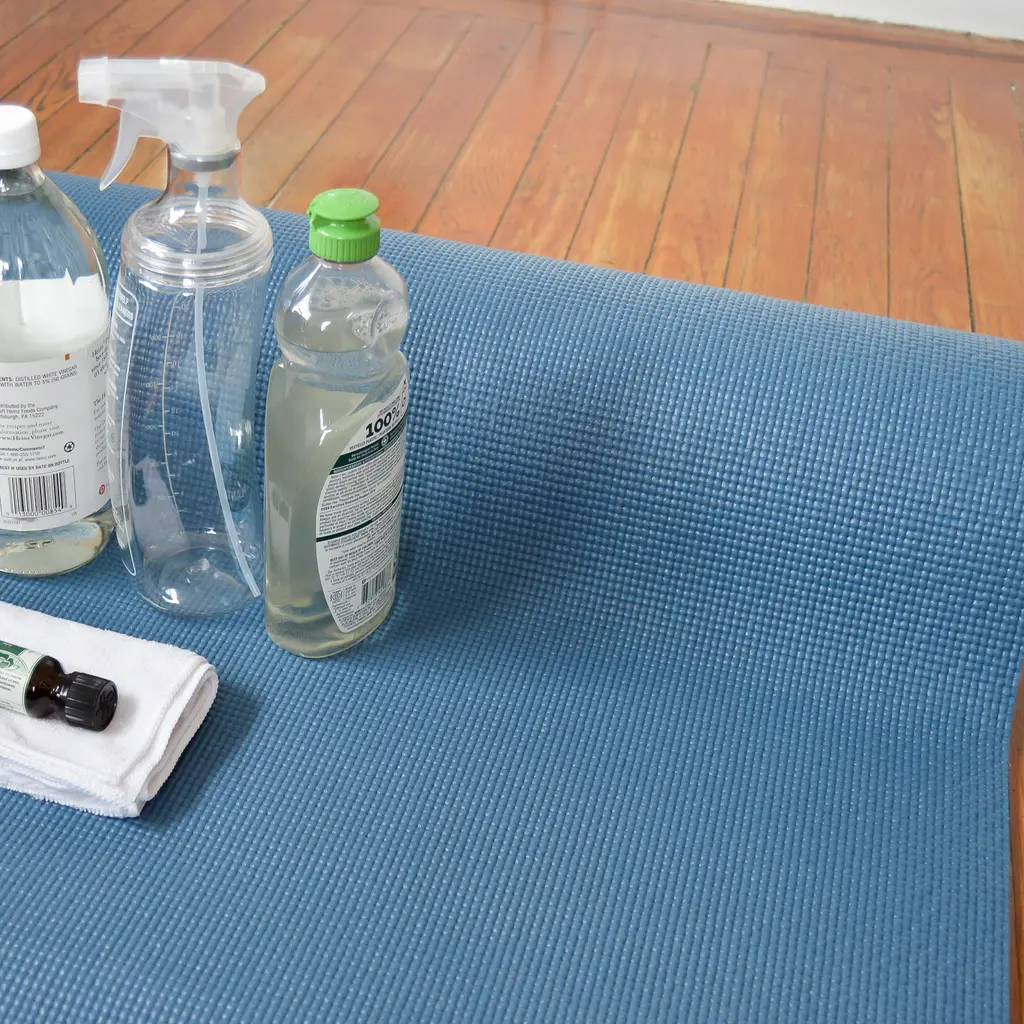
Making your own cleaner can be a cost-effective and natural method. Common ingredients include water for dilution, white vinegar or witch hazel for disinfecting, and essential oils for a fresh scent. Always do a spot test to check your mat’s reaction to homemade solutions.

Remember to dilute your chosen cleaner properly and avoid using excessive amounts. Harsh chemicals or overuse of even natural solutions can break down your mat over time. Saturate a cloth or spray directly onto the mat before wiping it down, ensuring even and gentle cleaning. Keep these considerations in mind for an effective, safe cleaning routine.

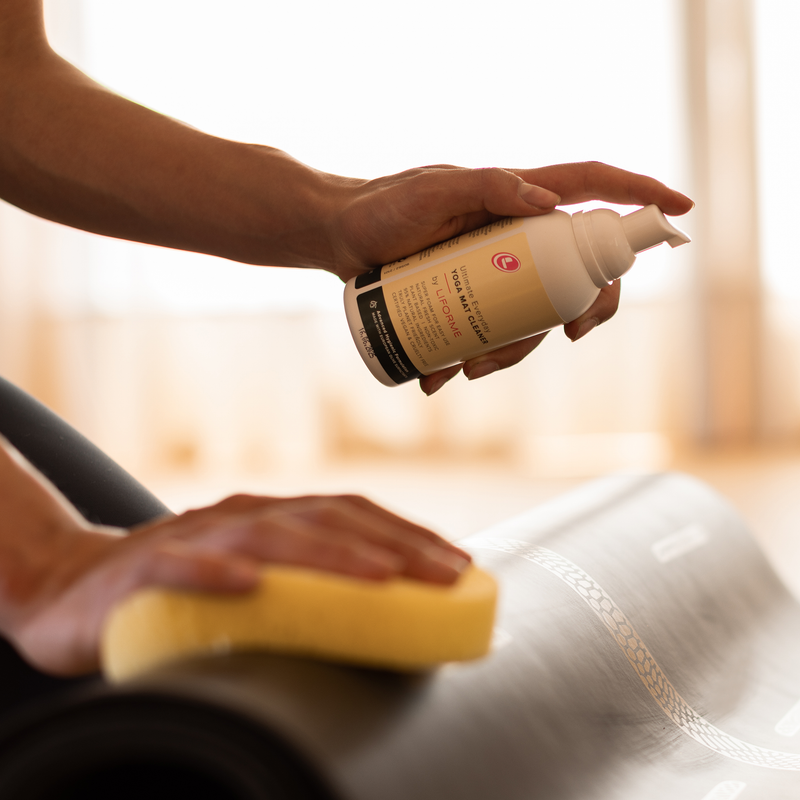
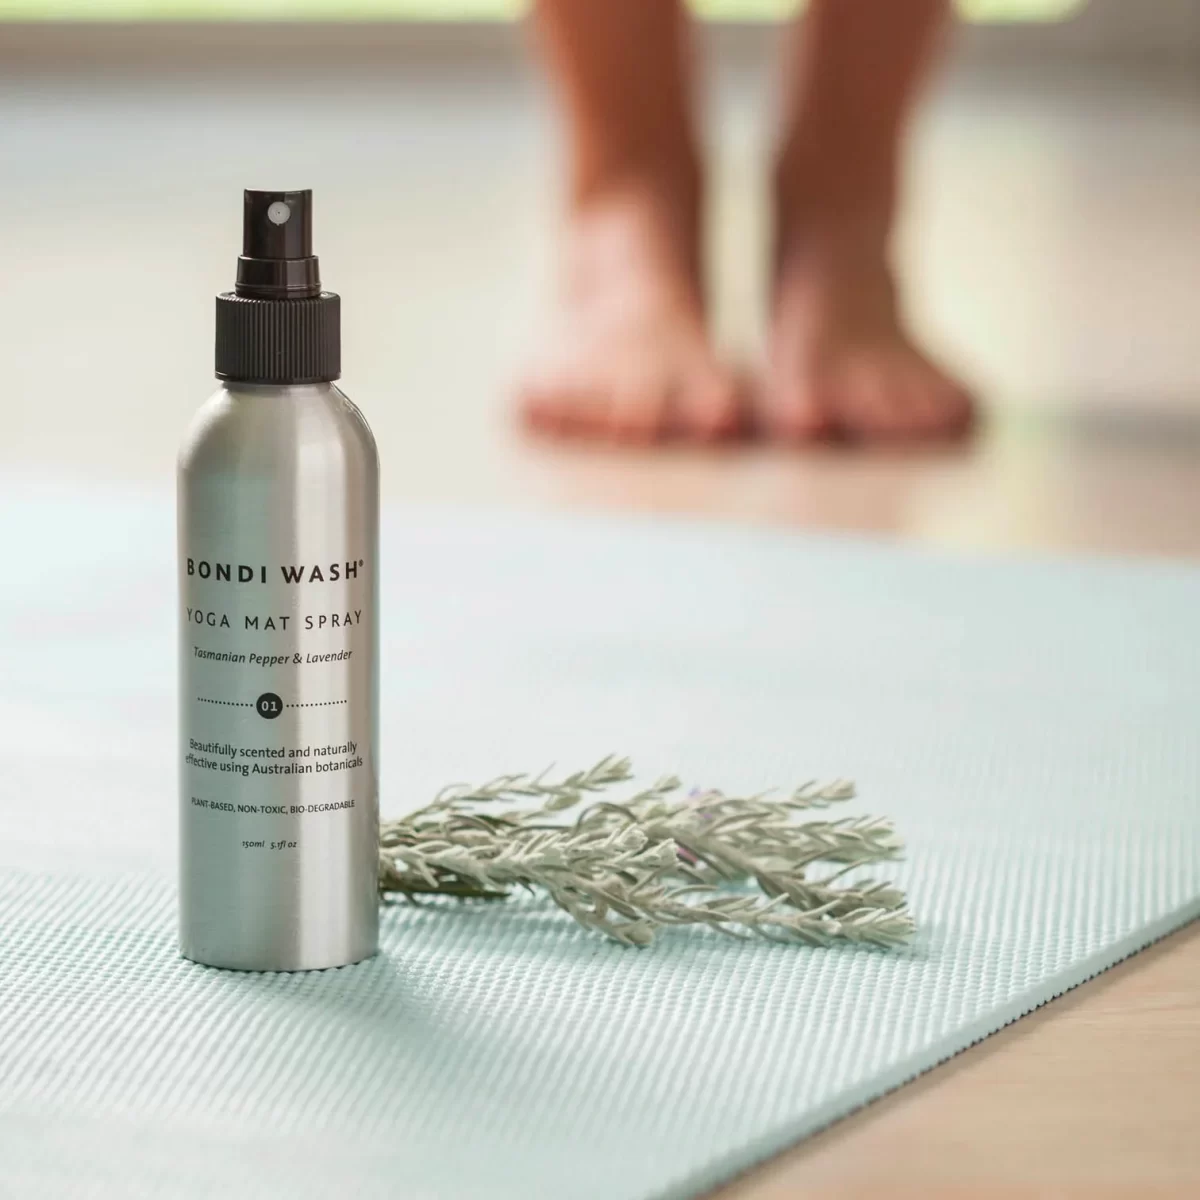
Liforme Ultimate Everyday Yoga Mat Cleaner

Daily Cleaning Routine for Your Yoga Mat

Maintaining the cleanliness of your yoga mat after each session is crucial. Here’s a simple daily cleaning routine:

  1. Wipe Down After Use: Right after your yoga practice, take a moment to wipe down the mat with a damp cloth. This removes immediate dirt and sweat.
  2. Use a Gentle Spray: Spritz a mix of water and mild detergent or specific yoga mat cleaner across the mat’s surface. Keep the formula simple to avoid residue.
  3. Soft Cloth Gentle Rub: With a soft cloth, gently rub the cleaner over the mat in a circular motion. Be thorough but gentle to avoid damaging your mat.
  4. Air Dry Briefly: Let your mat air dry for a few minutes before rolling it up. This prevents moisture from becoming trapped and causing odor or mildew.
  5. Consistent Practice: Make this cleaning practice a habit after each yoga session. It assures that your yoga mat stays fresh and ready for your next workout.

By following this routine, you ensure the longevity and hygiene of your yoga mat. It’s a quick step that keeps your practice safe and enjoyable. Use the keywords ‘cleaning a yoga mat’ in your routine to keep it centered and effective.

Deep Cleaning Process for Stubborn Stains

Sometimes, despite regular cleaning, yoga mats can acquire stubborn stains and odors. Dealing with these requires a deep cleaning process. Here’s how to restore your mat to its prime condition.

  1. Prepare Your Cleaning Solution: Mix warm water with a mild detergent or a recommended yoga mat cleaner. Ensure it’s gentle enough to prevent damage to your mat.
  2. Submerge if Possible: If the mat’s material allows, submerge it in the solution to let it soak. This helps loosen the ingrained dirt. Check the manufacturer’s guidelines to see if your mat is submergible.
  3. Scrub Gently: Use a soft-bristled brush to carefully scrub the stained areas. Work in a circular motion and always be gentle to avoid harming the surface of the mat.
  4. Rinse Thoroughly: After scrubbing, rinse your mat with clean water. Make sure no soap residue remains as it can make the mat slippery and unsafe.
  5. Remove Excess Water: Squeeze out excess water gently. Do not twist or wring the mat as it could damage it.
  6. Air Dry Completely: Lay your mat flat or hang it to dry. Ensure it is completely dry before you use it again. This step is crucial to prevent mold and odors.

For very persistent stains or smells, adding baking soda to the cleaning mix can be effective. Remember, performing this deep cleaning routine infrequently can help maintain ‘cleaning a yoga mat’ effectively, without wearing it out prematurely. Always consult your mat’s care instructions to ensure proper maintenance and longevity.

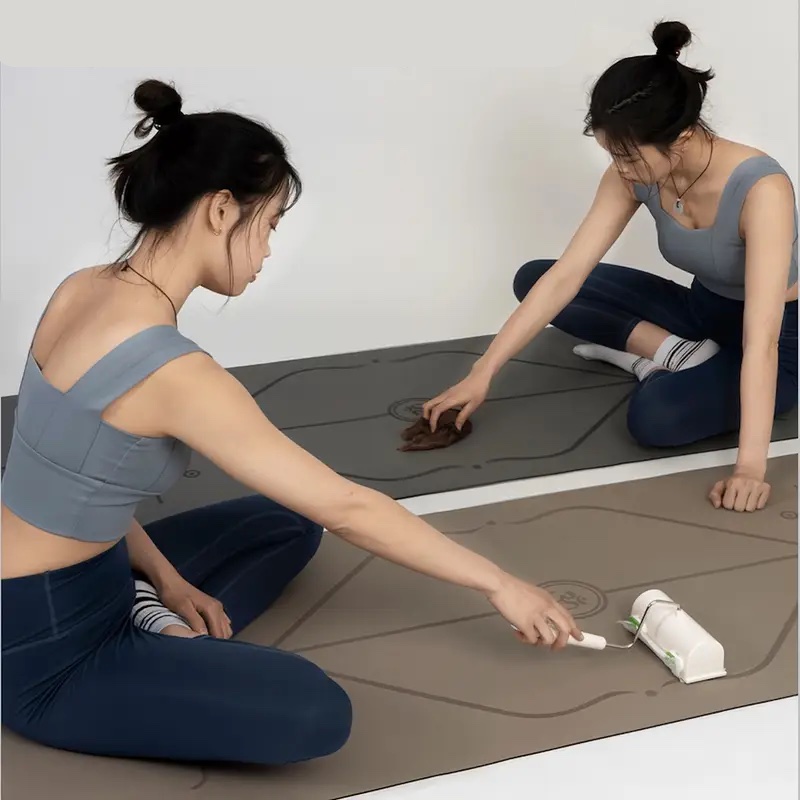
cleaning a yoga mat

Drying Your Yoga Mat Properly

After cleaning, drying your yoga mat is a critical step. Drying helps prevent mold and keeps the mat safe for use. Follow these tips to dry your mat the right way:

  1. Avoid Direct Sunlight: Keep your mat out of direct sunlight. This can cause fading and degrade the material.
  2. Find an Airy Space: Choose a well-ventilated area to lay out your yoga mat. Good airflow speeds up drying.
  3. Use a Towel: Pat down your mat with a towel to remove excess moisture. This shortens the drying time.
  4. Hang It Up: If possible, hang your mat to dry. This ensures it dries evenly on both sides.
  5. Wait Until Completely Dry: Give your mat plenty of time to air dry. Roll it up only once it’s fully dry.
  6. Avoid Heat Sources: Stay away from heaters or other heat sources. These can warp or shrink your mat.

By incorporating these steps when ‘cleaning a yoga mat’, you protect your investment. A well-dried mat is a clean and healthy foundation for your yoga practice.

Maintenance Tips to Keep Your Mat Fresh

Keeping your yoga mat fresh not only makes your practice more pleasant but also extends the life of your mat. Here are some maintenance tips:

  1. Store Properly: After ‘cleaning a yoga mat’ and drying it fully, roll it up loosely. Store it in a cool, dry place away from direct sunlight.
  2. Use a Mat Bag: Protect your mat from dust and dirt by using a yoga mat bag when transporting or storing it.
  3. Avoid Sharing: To keep your mat fresh, it’s best not to share it. This reduces the spread of germs and sweat from others.
  4. Refresh Regularly: Spritz your yoga mat with a gentle cleaning solution after every few uses, even if it’s not visibly dirty. This keeps it smelling fresh.
  5. Rotate Mats: If you practice regularly, consider having more than one yoga mat. Rotate between them to give each mat time to air out completely.
  6. Spot Clean Quickly: Address spills or sweat marks immediately. This helps prevent stains and odors from setting into your mat.

By following these maintenance tips, you can ensure your yoga mat remains a clean and welcoming part of your practice routine.

Natural Alternatives for Mat Cleaning

When ‘cleaning a yoga mat’, using natural solutions is not only eco-friendly but also gentle on the material. Here’s how to tap into the power of nature:

  1. Employ White Vinegar: Mix equal parts white vinegar and water. It disinfects without harsh chemicals.
  2. Leverage the Power of Baking Soda: Sprinkle baking soda on the mat, let it sit, then wipe away. It’s great for neutralizing odors.
  3. Use Witch Hazel: This natural astringent can replace chemical disinfectants. Dilute with water for a safe clean.
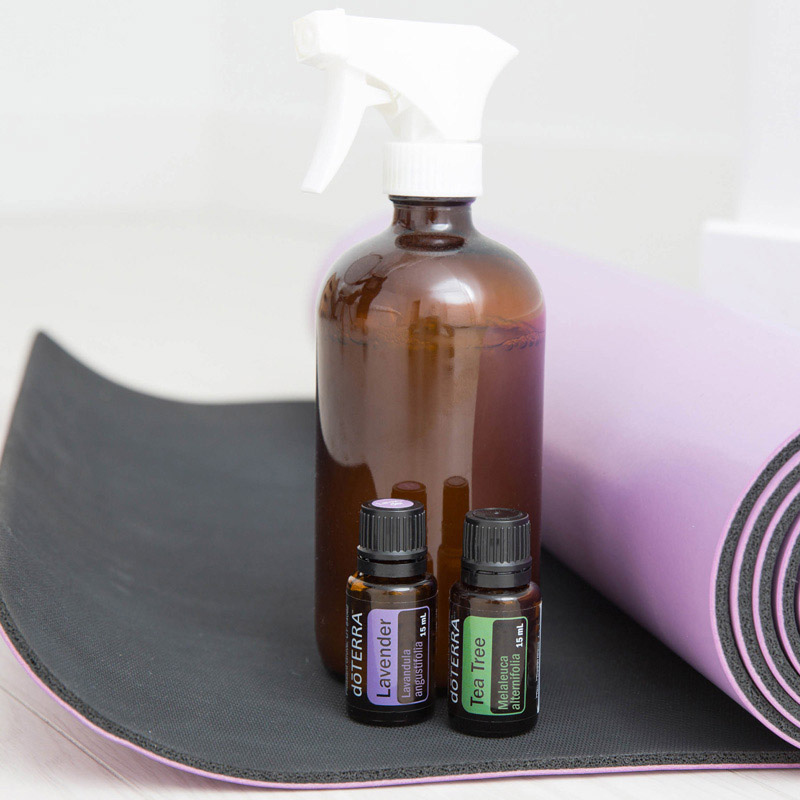
  4. Add Essential Oils: A few drops of lavender or tea tree oil can add a refreshing scent. These oils also have antibacterial properties.
  5. Try Lemon Water: Lemon’s natural acidity can help remove stubborn stains. Mix with water and use sparingly.
  6. Harness the Magic of Salt: Coarse salt can scrub away dirt. Rinse well after use to avoid residue.

These alternatives can keep ‘cleaning a yoga mat’ safe and natural. They protect both the environment and your mat’s integrity. Remember to always do a spot test before applying any new cleaning solution to the entire surface.

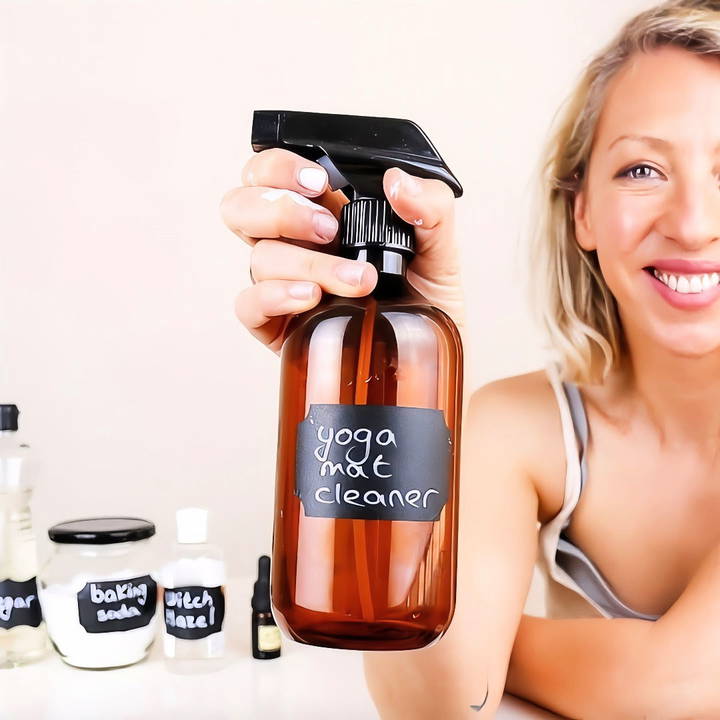
DIY: Yoga Mat Cleaning Spray

When to Replace Your Yoga Mat

Just like any fitness gear, yoga mats wear out and need replacement. Here’s when to do it:

  1. Look for Wear and Tear: Examine your mat for visible signs of deterioration. If you notice tears, rips, or areas where the mat has thinned out, it is time to consider getting a new one.
  2. Loss of Stickiness: If your mat starts to lose its grip and you find yourself sliding during poses, its non-slip surface may have worn off. This is a clear indicator that you need a new mat.
  3. Noticeable Odors: A well-maintained mat should not smell. If persistent odors linger even after ‘cleaning a yoga mat’, it’s time for a replacement.
  4. Eco-Friendly Options: When you’re due for a new mat, consider eco-friendly options. These are better for the environment and often provide great quality.
  5. Upgrade for Comfort: Maybe you’ve advanced in your practice and need a mat with more cushioning or one that suits a new style of yoga. Don’t hesitate to upgrade.

Regular inspection and maintenance can prolong your yoga mat’s life, but knowing when to replace it is key to a safe and effective practice. When you start shopping for a new one, remember the features that you valued most in your previous mat, and if possible, recycle or repurpose the old one. Keep ‘cleaning a yoga mat’ as a consistent part of your routine to extend the life of your new mat as well.

Storing Your Yoga Mat to Prevent Dirt Build-Up

Proper storage of your yoga mat is crucial to prevent dirt and keep it fresh. Here are straightforward steps to follow:

  1. Roll, Don’t Fold: It’s better to roll your yoga mat rather than to fold it. Folding can create creases that trap dirt.
  2. Use a Clean Surface: Always roll your mat on a clean surface. This avoids picking up debris from the floor.
  3. Keep It Dry: Ensure your mat is completely dry before storing. Dampness attracts dirt and can cause mold.
  4. Utilize a Mat Bag: A yoga mat bag can shield against dust and grime during storage and transport.
  5. Designate a Storage Spot: Have a specific spot to store your mat. Choose a cool, dry, and dirt-free area.
  6. Avoid Damp Areas: Stay away from storing your mat in damp places. Moisture can lead to bacteria and mold.
  7. Hang It Up: If possible, hang your mat to store. It reduces contact with dirty surfaces and keeps it unrolled.

By keeping these tips in mind during and after ‘cleaning a yoga mat’, you can significantly reduce dirt build-up and extend its lifespan.

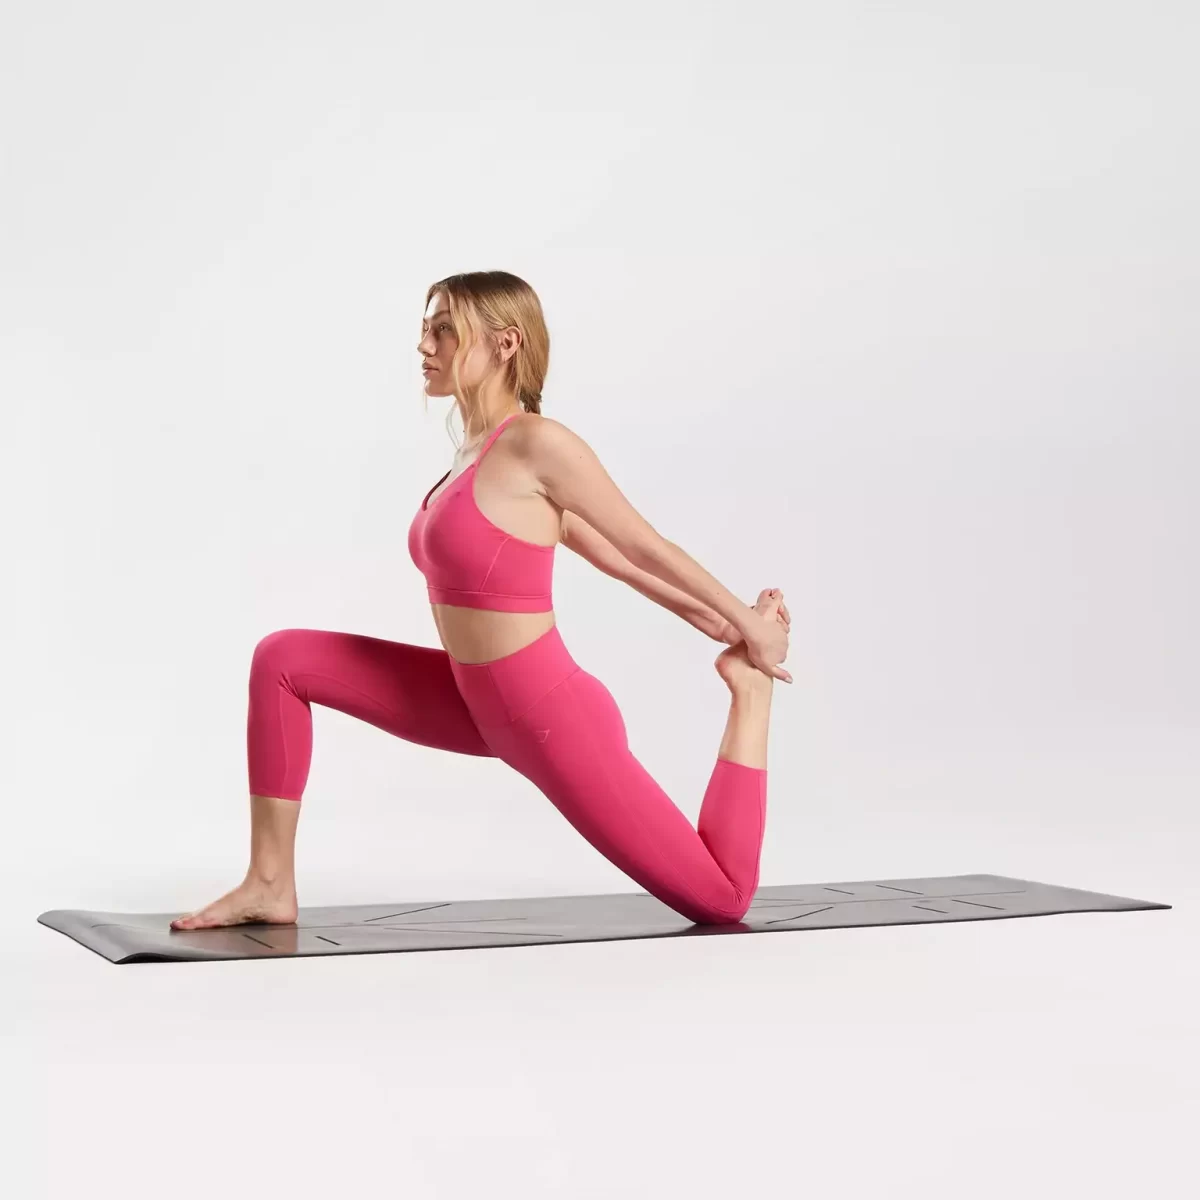
2024 Gymshark Yoga Mat Review: Is It Worth It?

Introduction to Gymshark Yoga Mats

Gymshark, known for its fitness wear, now offers yoga mats. The brand promises quality and performance in its mats. These mats cater to yogis of all levels. They come with features to enhance your yoga experience. In this section, we will explore what sets Gymshark yoga mats apart. We will look at their materials, design, and user-focused features. Whether you are a beginner or a seasoned yogi, understanding these factors is key. They help you decide if a Gymshark yoga mat fits your practice.

Gymshark Flawless Shine Seamless GYM SHARK

Key Features of Gymshark Yoga Mats

When considering a new yoga mat, specific features can sway your decision. The Gymshark yoga mat comes equipped with a variety of key features designed to enhance your yoga sessions. Here are the most notable ones:

  • Non-slip surface: A crucial aspect for any yogi is stability. Gymshark mats provide a non-slip surface. This feature helps to maintain poses without fear of slipping.
  • Optimal thickness: The mats offer an ideal balance between cushioning and firmness. This ensures comfort for your joints while maintaining support for balance and stability.
  • Eco-friendly materials: Gymshark values sustainability. Their yoga mats are made with eco-friendly materials, reducing the impact on the environment.
  • Alignment lines: Some Gymshark yoga mats boast alignment lines. These lines are essential for beginners and experts alike, guiding proper positioning.
  • Lightweight and durable: The convenience of a yoga mat often lies in its portability. Gymshark mats are known to be lightweight yet resilient, perfect for yogis on the go.
  • Aesthetic design: In addition to functionality, Gymshark mats come in sleek designs and colors. They are appealing to the eye, which can be motivating for some practitioners.
  • Easy to clean: Hygiene is vital in yoga practice. Gymshark yoga mats are designed to be easy to clean, contributing to their longevity and your health.

Including these features, Gymshark yoga mats strive to cater to the varied needs of yogis. Whether it’s the grip, the thickness, the eco-conscious production, or the practical designs, these mats are crafted with the user in mind. The combination of these characteristics helps ensure that your yoga practice is as seamless and effective as possible.

Comparing Gymshark Yoga Mats to Competitor Brands

Choosing the right yoga mat can be tricky with so many brands available. It’s essential to know how Gymshark yoga mats stack up against their competitors. Here’s a breakdown:

  • Price Point: Gymshark mats may offer competitive pricing. They often fall mid-range when compared to other high-end mats.
  • Quality and Features: While top brands offer similar non-slip surfaces and thickness, Gymshark adds value with alignment lines and eco-friendly materials.
  • Design Aesthetic: Gymshark’s sleek design stands out. Many users find their style more appealing than other brands.
  • Material Sustainability: Eco-conscious buyers may prefer Gymshark for its commitment to sustainability.
  • Portability: Gymshark competes well in terms of lightweight and portability with other brands on the market.
  • Corporate Ethos: Shoppers who prioritize brand reputation might lean towards Gymshark because of their fitness-focused community and support.

By comparing these factors, we see that Gymshark offers a balance of function, style, and sustainability. This information can help you weigh Gymshark’s offerings against other well-known yoga mat brands like Manduka or Lululemon. Whether Gymshark is the right choice depends on what you value most in your yoga practice.

Gymshark yoga mat

User Experience: Comfort and Grip

When choosing a yoga mat, user experience is paramount. The Gymshark yoga mat stands out in two crucial areas: comfort and grip. Comfort ensures that during prolonged practices, your body is cushioned. Grip, on the other hand, prevents slipping and promotes stability in various poses. Let’s delve deeper into these features:

  • Cushioned Support: Gymshark mats provide ample cushioning, crucial for comfort during yoga sequences. This is particularly beneficial in poses that pressure joints like the knees and wrists.
  • Non-Slip Surface: A consistent non-slippery texture across the mat surface offers excellent grip. This is vital for maintaining balance and securing foot and hand positions.
  • Responsive to Movement: Whether transitioning between asanas or holding a pose, the mat’s material responds well. This responsiveness contributes to an uninterrupted flow and a safer practice.
  • Temperature Resistance: Even in hot yoga classes where sweating is inevitable, Gymshark mats maintain their grip. This is a significant advantage for those who practice Bikram or any hot yoga style.

In summary, the combination of comfort and grip that Gymshark yoga mats provide can greatly enhance your practice. These mats offer protection for your body while ensuring a steady base for all your yoga poses. Users have reported satisfaction with the level of comfort and the reliable grip, making it an appealing choice for both beginners and seasoned yogis alike.

Durability and Material Quality

When investing in a yoga mat, durability is key. Gymshark yoga mats score highly here. They are made to withstand rigorous use. They resist wear and tear from daily yoga sessions. The material used for Gymshark mats is robust. It holds up against stretching and doesn’t tear easily. Thus, it ensures a long-lasting practice surface.

The quality of materials also has a health angle. Gymshark uses non-toxic, eco-friendly materials. This is important for yogis who value environmental sustainability. The mats are free from harmful chemicals. So, they are safe for you and the planet.

Not only are the materials safe and strong, but they also maintain their texture. Over time, this texture continues to provide the same non-slip grip. This makes the mats reliable for any yoga routine.

In conclusion, Gymshark mats are made with quality materials that offer durability. They are eco-friendly and maintain their performance over time. This is crucial for anyone looking to practice yoga regularly.

Size and Portability Options

Gymshark yoga mats are not just durable but also remarkably portable. They come in sizes that are easy to carry and store. The lightweight nature of these mats makes them an excellent choice for yogis on the go. Whether you’re heading to a local class or traveling, you can take your Gymshark mat with ease. The mats roll up tightly and can fit into most yoga mat bags or straps. This is crucial for those who value convenience alongside their practice.

  • Compact Size: Gymshark mats come in dimensions that suit a variety of spaces. Whether at home or in a studio, their size is apt for a comfortable practice.
  • Travel Friendly: Designed with portability in mind, they are hassle-free to transport. Perfect for yogis who love to practice outdoors or carry their mat to classes.
  • Light as a Feather: Weighing less, they won’t add bulk to your travel or gym bag.
  • Ease of Storage: Their roll-up design means you can store them in tight spaces. Ideal for yogis with limited storage space.

Gymshark understands the active lifestyle of modern yogis. They have catered to the need for a yoga mat that pairs durability with portability. The balance of size and ease of carrying positions the Gymshark yoga mat as a favorable option for daily use and travel.

Price and Value for Money

The cost of a yoga mat is a key decision factor for many. The Gymshark yoga mat stands out for offering solid value for its price. To assess its value for money, let’s consider the following points:

  • Competitive Pricing: Gymshark mats are priced to match their quality. They are not the cheapest, but their cost reflects the durability and features they offer.
  • Long-Term Investment: Given their long-lasting materials, the upfront cost may save you money over time. You won’t need to replace them as often as cheaper, less durable mats.
  • Feature-Rich: The mat’s non-slip surface, optimal thickness, and eco-friendliness add value beyond the basic function of a yoga mat.
  • Satisfaction and Reviews: User satisfaction often translates into value. Many users have expressed high levels of contentment with their purchase, suggesting the price is justified.

In summary, while Gymshark yoga mats are not the least expensive option available, they deliver on quality and features which may warrant the higher price tag. The array of attributes from grip to eco-friendly materials presents a strong case for their value for money. When considering the longevity and effectiveness of the mat, it seems to be a wise investment for both new and experienced yogis.

Gymshark yoga mat

Final Verdict: Should You Invest in a Gymshark Yoga Mat?

After evaluating the Gymshark yoga mat’s features, we reach our final verdict. Should you invest in one? The mat’s non-slip surface, optimal thickness, and alignment lines stand out. These features support all levels of yoga practice. The use of eco-friendly materials favors the environmentally conscious. Its durability means it could last through many sessions, possibly saving you money in the long run.

The mat’s design merges both function and style. It suits those who value aesthetics in their workout gear. Portability is another strong point. The lightweight and easy-to-carry design fits an active lifestyle.

When comparing Gymshark’s pricing to others, it positions in the mid-range. It’s not the cheapest but provides a host of features that cheaper options may lack. The mat’s quality and user reviews suggest you get what you pay for. Many users have reported satisfaction, indicating its value for money.

In conclusion, if you prioritize a balance of features, quality, and eco-consciousness, a Gymshark yoga mat could be a sound investment. It offers benefits that can enhance your yoga practice and is made to last. While not the least expensive, it stands up well against competitor brands. It strikes a good balance between cost and value. If these points align with your needs and values, investing in a Gymshark yoga mat is a wise choice.

How to Craft Your Own Homemade Yoga Mat Spray

Introduction to DIY Yoga Mat Sprays

Creating your own yoga mat spray is rewarding and simple. With homemade sprays, you control the ingredients. This means you can avoid harsh chemicals often found in commercial cleaners. A DIY yoga mat spray also lets you personalize the scent. This adds an extra layer of enjoyment to your yoga practice.

Regular cleaning is essential for any yoga mat. Sweat, dirt, and oils can build up over time. This can make your mat a home for bacteria. A good spray keeps your mat fresh and hygienic.

Making your spray only requires a few natural components. Essential oils, witch hazel, and distilled water are the basics. Essential oils give your mat spray antibacterial properties and a pleasant aroma. Witch hazel serves as a natural disinfectant without harming your mat’s material.

In this blog, we will explore how to combine these elements. We provide a step-by-step guide and suggest blends to suit your preferences. We also touch on the importance of regular mat cleaning and offer tips for storage and maintaining the quality of your spray.

Embrace the idea of a yoga practice that includes a mat that’s clean, naturally scented, and energetically aligned with you. Let’s get started with crafting your homemade yoga mat spray.

Homemade Yoga Mat Cleaner

Importance of Cleaning Your Yoga Mat

Keeping your yoga mat clean is crucial for your health and practice. Regular use can cause sweat, oils, and dirt to accumulate. This not only affects your mat’s appearance and grip but can also lead to unpleasant odors. Moreover, an unclean mat can become a breeding ground for bacteria and germs.

Cleaning your mat with a homemade yoga mat spray adds freshness and hygiene to your routine. A spray made with natural ingredients like essential oils and witch hazel can disinfect your mat effectively. Plus, choosing natural ingredients ensures you are not exposing yourself to harsh chemicals during your yoga sessions.

A clean mat can also improve your yoga experience. It helps you focus better and enjoy a sense of well-being. Knowing you’re practicing on a clean surface can enhance your peace of mind. A good clean preserves the mat’s life, maintaining its cushioning and support.

In short, using your DIY spray regularly keeps your mat in top condition. It also supports a healthier yoga environment. We will cover how to make and use your homemade spray in the following sections.

Natural Ingredients for Your Homemade Spray

Choosing natural ingredients for your yoga mat spray is both safe and effective. This section explores essential oils and witch hazel, key components of a health-friendly spray.

Essential Oils and Their Benefits

Essential oils are more than just pleasing scents; they’re powerful antibacterial agents. Popular choices include tea tree oil, known for its antimicrobial properties, and lavender, loved for its calming effects. Eucalyptus oil offers both a fresh scent and cleansing abilities, while peppermint can invigorate your senses during your yoga practice. Using these oils in your spray not only keeps your mat clean but also enhances your yoga experience with their aromatherapeutic benefits.

Witch Hazel: The Natural Disinfectant

Witch hazel is a natural choice for disinfecting without damaging your yoga mat’s material. It’s gentle yet effective, making it perfect for regular use. As a bonus, witch hazel does not leave a residue and helps to preserve the integrity of your mat over time. Incorporating witch hazel into your homemade yoga mat spray ensures a non-toxic, environmentally friendly cleaner that supports both your wellness and your yoga practice.

Step-by-Step Guide to Making Yoga Mat Spray

Creating your own yoga mat spray is easy and effective. Here’s a detailed guide to help you through the process.

Selecting Your Essential Oils

Choosing the right essential oils is crucial. For a homemade yoga mat spray, select oils with antibacterial properties. Tea tree oil is a great choice for its antimicrobial benefits. Lavender oil adds calming aromatherapeutic effects. Eucalyptus oil provides a refreshing scent and cleansing capabilities. Peppermint oil can invigorate your senses and enhance your focus during yoga. Consider your scent preferences and the benefits you desire when choosing your oils.

Mixing the Ingredients

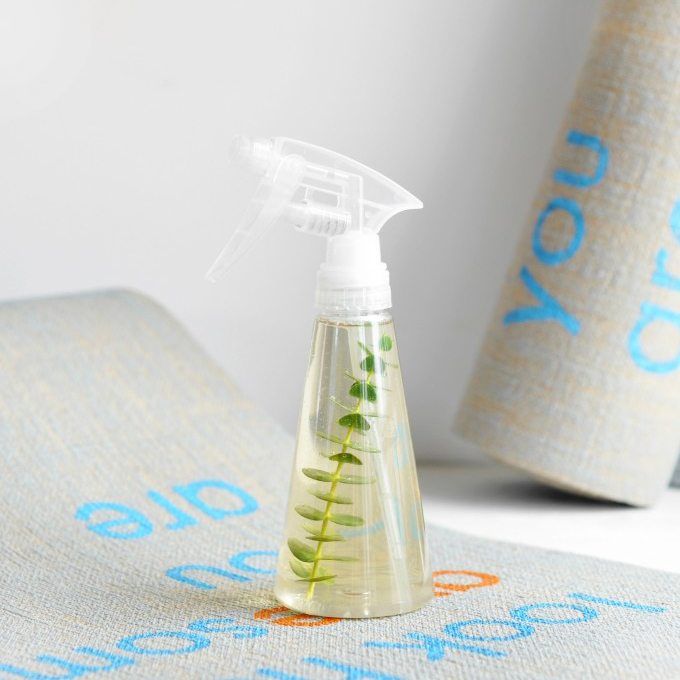
To make the spray, you will need a clean spray bottle, preferably glass. Start by filling half of the bottle with distilled water. Add witch hazel until the bottle is nearly full, leaving room for the essential oils. For a standard 8 oz bottle, adding 3-5 drops of each selected essential oil should suffice. Close the bottle and shake well to mix all the ingredients. Your homemade yoga mat spray is now ready to use. It’s simple, natural, and beneficial for regular yoga mat maintenance.

DIY Yoga Mat Spray: 4 Effective Methods

Customizing Your Spray: Aromatic Blends for Every Yogi

Making a homemade yoga mat spray is not just about clean mats. It’s also about creating a scent that will complement your yoga experience. Everyone has different preferences when it comes to aromas. This is why personalizing your spray with various scent blends is exciting for yogis. Different essential oils offer different mood and health benefits, making your spray truly unique.

Basic Recipes and Variations

Let’s start with a simple recipe. Combine 10 drops of tea tree oil for its cleansing properties with 10 drops of lavender for a soothing effect. For a refreshing spray, blend 10 drops of eucalyptus oil with 8 drops of peppermint oil. This mixture is perfect for a morning yoga session. To mix, fill your spray bottle halfway with distilled water, add witch hazel almost to the top, drop in your essential oils, and shake well. Experiment with oil amounts to find the strength of scent you like best.

Remember, different oils can provide unique benefits. Tea tree fights germs, lavender calms, eucalyptus refreshes, and peppermint invigorates. Feel free to try other oils like lemon for its uplifting properties or neroli for its stress-relieving effects. It’s all about finding what works best for you.

Zodiac-inspired Aromas for Personalization

Now, let’s dive into personalized scents based on the zodiac. Aries might enjoy bold scents like frankincense, bringing warmth and energy to their practice. Taurus could find comfort in the grounding aroma of patchouli. For Geminis, a mix of citrusy bergamot and uplifting spearmint could cater to their dynamic nature.

Cancers may appreciate the nurturing scents of chamomile and ylang-ylang. Leos could resonate with the confidence-boosting properties of cinnamon and orange. Virgo, the zodiac’s healer, might find eucalyptus and tea tree oils purifying.

For a balance-seeking Libra, the sweet harmony of rose and geranium can be appealing. Scorpios might be drawn to the intense and healing properties of myrrh and jasmine. The adventurous Sagittarius could go for the bright and expansive scent of sage.

Capricorns, who value stability, might prefer the steadfast scent of cedarwood, while Aquarians could enjoy the unique blend of peppermint and eucalyptus for their innovative spirits. Finally, Pisces could find solace in the dreamy and mystical combination of sandalwood and incense.

Crafting your yoga mat spray with these zodiac-inspired aromas can enhance your practice and reflect your personality. As always, ensure your blends are balanced and not overwhelming. A few drops of each oil should suffice to imbue your yoga mat with the desired qualities.

Application: How to Clean Your Mat with Your DIY Spray

Using your homemade yoga mat spray is both quick and effective. First, roll out your mat on a flat surface. Spray a light, even coat of your DIY cleaner across the yoga mat. Allow the mist to settle for a few seconds. Then, with a soft cloth, gently wipe the mat clean. For tough stains or areas with more buildup, let the spray sit a bit longer before wiping. Finally, hang your mat or lay it flat to air dry. Ensure it’s completely dry before rolling it up to prevent mold and mildew growth.

Best Practices for Mat Maintenance

Taking care of your yoga mat extends its life and supports a healthy practice. Here are best practices for mat maintenance:

  1. Clean after each use to remove sweat, oils, and dirt. This prevents bacteria growth and keeps your mat fresh.
  2. Let your mat dry fully after cleaning. This stops mold and mildew from forming.
  3. Store your mat in a cool, dry place. Avoid direct sunlight which can degrade the material.
  4. Roll your mat with the top side facing out. This keeps the corners flat during your practice.
  5. Avoid sharing your mat. This minimizes the spread of germs.
  6. Deep clean your mat monthly. This removes lingering dirt and maintains grip.
  7. Patch small tears quickly to prevent them from growing larger.

Following these steps will help to ensure that your homemade yoga mat spray is used effectively, and that your mat stays clean, safe, and durable for years to come.

DIY: Yoga Mat Cleaning Spray

Longevity and Storage Tips for Your Yoga Mat Spray

Ensuring your homemade yoga mat spray lasts long is simple with proper care and storage. Here’s how:

Avoid Direct Sunlight

Keep your spray bottle away from sunlight. Sunlight can break down the essential oils, reducing their effectiveness.

Use a Glass Bottle

Store your spray in a glass bottle. Glass preserves the integrity of essential oils better than plastic.

Keep it Cool

Find a cool, dry spot for storing your spray. Heat can alter the spray’s properties.

Tighten the Lid

Always tighten the lid after use. This prevents the spray from evaporating.

Regularly Shake the Bottle

Shake the bottle before each use. This keeps the essential oils and witch hazel mixed.

Refresh the Batch

Make fresh batches of your spray every few weeks. This ensures potency and effectiveness.

Label Your Spray

Label the bottle with the making date. This helps you track its age and freshness.

Store your homemade yoga mat spray correctly and it will serve you well, keeping your practice clean and aromatic. Remember, a fresh spray enhances the health benefits and pleasure of your yoga sessions.

Conclusion: Embrace the Benefits of a Custom Yoga Mat Spray

In conclusion, creating your own homemade yoga mat spray comes with many benefits. It’s simple to make and ensures your mat stays clean and fresh with natural ingredients. With essential oils and witch hazel, you can craft a spray that disinfects effectively while being gentle on your mat. Plus, the custom scents add a personal touch to your yoga practice.

Remember to clean your mat after each session to keep it in top shape. Store your spray properly to maintain its quality. Regular upkeep with your DIY spray contributes to a healthier practice environment. Take pride in using a product you’ve made that supports your well-being and yoga journey.

By crafting and using your custom yoga mat spray, you gain control over the ingredients and fragrances that surround you during your practice. Embrace the mindfulness and satisfaction that comes from this simple and rewarding DIY project.

Effective Washing Yoga Mat Tips for Beginners

Choosing the Right Cleaning Materials

Yoga is a great way to stay fit and relieve stress, and having a clean yoga mat is essential for a good practice. Over time, yoga mats can accumulate sweat, dirt, and bacteria, making it necessary to regularly clean them. In this article, we will discuss the importance of cleaning your yoga mat and provide a step-by-step guide on how to properly wash it. Choosing proper materials is crucial for effectively washing yoga mat. Below, find two highly recommended solutions.

Non-Oil-Based Soap Solutions

Start with a simple and gentle cleaning method by using non-oil-based soap. This type of soap ensures that your yoga mat does not degrade or become slippery after a wash. Mix a small amount of soap with water and use a soft washcloth for application. This method is not only safe but also effective in removing dirt and sweat without harming the mat’s surface.

Natural Mat Sprays with Essential Oils

For those who prefer a fragrant cleaning agent, natural mat sprays infused with essential oils offer a great alternative. These sprays not only clean but also deodorize the mat, leaving a pleasant scent. Ingredients like lemon, lavender, or eucalyptus not only refresh your mat but also boost your energy or relaxation during yoga sessions. You can either purchase these sprays or easily make them at home by mixing water, a chosen essential oil, and a bit of witch hazel.

washing yoga mat

Why You Should Clean Your Yoga Mat

Regularly cleaning your yoga mat is crucial for maintaining hygiene and preventing the build-up of bacteria and odors. When you practice yoga, your mat comes into direct contact with your skin, and the sweat and oils from your body can transfer onto the surface. If not cleaned properly, this can lead to a breeding ground for germs and microbes. Additionally, a dirty yoga mat can affect the quality of your practice, as it may become slippery or emit unpleasant odors. By cleaning your yoga mat regularly, you can ensure a safe and pleasant yoga experience.

How Often Should You Wash Your Yoga Mat?

The frequency of cleaning your yoga mat depends on how often you use it. If you practice yoga daily or several times a week, it’s recommended to clean your mat at least once a week. For those who practice less frequently, a monthly or bi-monthly cleaning may be sufficient. Additionally, if you notice any visible stains or odors on your mat, it’s best to clean it right away. Listen to your senses and use your judgment to determine when your yoga mat needs a wash.

Deep Cleaning Your Yoga Mat

When it comes to washing your yoga mat, it’s essential to use gentle and natural cleaning agents to avoid damaging the material. Start by preparing a solution of mild soap or detergent and warm water. You can also add a few drops of essential oils, such as tea tree or lavender, for their natural antibacterial properties. Use a soft sponge or cloth to gently scrub the surface of the mat, paying extra attention to any soiled areas. Afterward, rinse the mat thoroughly with water and allow it to air dry in a well-ventilated area. Avoid using harsh chemicals or abrasive scrubbers, as they can deteriorate the material and reduce the lifespan of your mat.

In addition to regular washing, it’s beneficial to perform a deep cleaning of your yoga mat every few months. One effective method is to create a cleaning solution with equal parts water and white vinegar. Apply the solution to the mat and let it sit for 10-15 minutes to allow the vinegar to break down any stubborn dirt or bacteria. Afterward, rinse the mat thoroughly with water and air dry as usual. This deep cleaning method helps to eliminate built-up grime and odors, leaving your yoga mat fresh and sanitized.

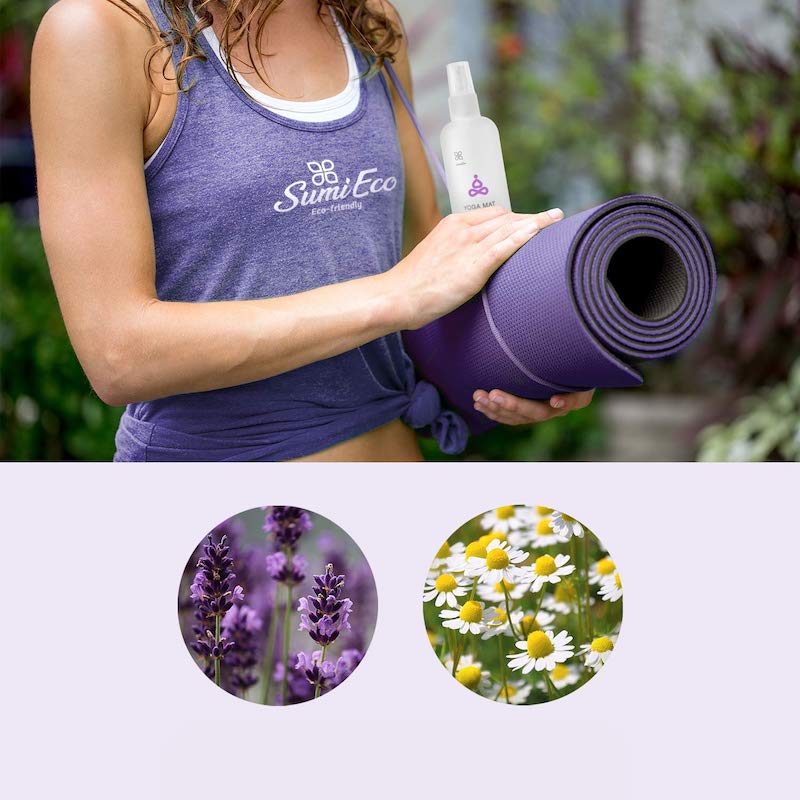
Jade Yoga Plant Based Mat Wash

Preparing Your New Yoga Mat

Preparing your new yoga mat is key to a great start. Ensure it’s ready for its first stretch with a few simple steps.

Initial Hand Wash Procedure

Before rolling your mat out, a quick hand wash will set the stage. Use a soft washcloth with water and a non-oil-based soap. Gently wipe over the surface. This will remove any factory residues and prevent slipping. Rin’t with clean water to wipe away any soap traces. It’s a basic step that goes a long way in mat care.

Regular Cleaning Routines

Establishing a regular cleaning schedule for your yoga mat is essential to maintain its quality and safety. Here are some tips to help you keep your mat in top shape, ensuring a pleasant and effective yoga practice.

Weekly Maintenance Tips

Consistently clean your yoga mat once a week to prevent dirt build-up and bacterial growth. Use a non-oil-based soap and water solution to gently scrub the mat. Rinse it thoroughly to avoid leaving any soapy residue. Air dry the mat completely before rolling it up again. This regular maintenance not only ensures a clean surface but also extends the life of your yoga mat.

Natural Cleaning Mixtures

In addition to the materials already discussed, there are natural cleaning mixtures you can use. These are simple, effective, and often save you money while being eco-friendly.

Vinegar and Water Solution for Quick Cleans

A quick clean of your yoga mat can be done with a vinegar and water solution. Mix equal parts of water and white or apple cider vinegar to create this natural cleaner. This mixture helps remove dirt and cut through body oils that may accumulate on your mat from regular use. After applying it with a soft cloth, rinse with water to wash away any vinegar smell. For best results, ensure your yoga mat is completely air-dried before rolling it up again. This method is not only quick but also prevents the growth of bacteria by disinfecting the mat effectively.

Drying Your Yoga Mat Properly

Proper drying of your yoga mat prevents odors and maintains its quality. After washing, how you dry your mat can significantly affect its longevity and usability.

Air Drying to Prevent Odors

Air drying is the most effective way to dry your yoga mat and eliminate any potential odors. Hang your mat in a well-ventilated area or outside, but avoid direct sunlight as it can degrade the material. This method ensures that no moisture is trapped within the mat’s fibers, which can lead to mildew and a musty smell. Allow it to dry completely before rolling it back up to ensure it stays fresh and ready for your next session.

Enhancing Mat Grip Post-Cleaning

One common issue after washing your yoga mat is reduced grip. Here’s how to tackle it.

Using Baby Powder or Baking Soda

After cleaning, your mat may feel slippery. To enhance its grip, baby powder or baking soda can help. Sprinkle either on your mat and spread evenly. Then, use a dry cloth to wipe it down. The fine powder fills in tiny grooves, improving traction. These powders not only absorb excess moisture but also maintain a fresh scent. Remember, a little goes a long way – use sparingly to avoid making your mat too dusty. If excess powder remains, give your mat a good shake outdoors.

washing yoga mat

Alternative Methods and Considerations

When washing your yoga mat, think outside the box. Here are some additional tips.

Sun and Fresh Air as Natural Disinfectants

The sun’s UV rays and fresh air can naturally clean your yoga mat. Hang your mat outside on a dry, sunny day to help disinfect it. This natural method reduces bacteria and removes odors. But, remember to not leave it out too long to prevent damage. Fresh air also helps mats to dry quicker and stay smell-free.

Maintaining Your Clean Yoga Mat

Once you’ve cleaned your yoga mat, it’s important to maintain its cleanliness for future use. After each practice, wipe down your mat with a clean cloth to remove any sweat or residue. Additionally, consider using a yoga towel or mat topper during intense sessions to provide an extra layer of protection. To keep your mat smelling fresh, you can sprinkle it with baking soda and let it sit for 15 minutes before wiping it off. By incorporating these practices into your routine, you can prolong the life of your yoga mat and enjoy a clean and hygienic surface for your practice.

Conclusion

A clean yoga mat is essential for maintaining hygiene, preventing odors, and ensuring a smooth and safe yoga practice. By following the tips provided in this article, you can keep your yoga mat in top condition and enjoy the benefits of a clean and fresh surface for your practice. Remember to clean your mat regularly, use gentle cleaning agents, and incorporate deep cleaning methods to maintain its cleanliness. With proper care, your yoga mat will continue to support you in your practice for years to come.

Core Power Yoga Mat Essentials for Beginners

Introduction to Core Power Yoga

Core Power Yoga is a dynamic yoga style. It blends strength, sweat, and spirituality. This practice increases stamina, flexibility, and mental focus. Students use a core power yoga mat for better performance. Such mats support the intense flow of poses. They also help maintain balance during challenging sequences. Core Power Yoga is great for those seeking a comprehensive workout. A yoga mat for this practice must meet certain criteria. It should provide grip, support, and comfort. The right mat ensures safety and enhances the overall experience. In the next sections, we will explore the features you need in a yoga mat. These will help you in your Core Power Yoga mat journey.

Membership Discounts & Offers | CorePower Yoga

Essential Features of a Yoga Mat for Core Power Practice

Choosing the right core power yoga mat is crucial for your practice. A suitable mat can enhance your stability, comfort, and overall performance in Core Power Yoga. Here are some essential features to consider when selecting a yoga mat for core power practice:

Grip and Non-Slip Surface

A strong grip is vital. It prevents slipping during intense poses and transitions. Look for mats with a sticky texture or those designed with superior traction.

Adequate Cushioning

While you need a firm surface for balance poses, some cushioning is necessary. It helps absorb impact and provides comfort during floor-based poses. However, too much padding can hinder stability in balance-focused poses.

Durability

Core Power Yoga involves dynamic movements which can wear out a mat quickly. Choose a mat made from durable materials that can withstand repeated use and intense workouts.

Size and Portability

Ensure the mat is long and wide enough to accommodate your body comfortably. Also, if you attend yoga classes at different locations, consider a lightweight mat that is easy to carry.

Eco-Friendly Materials

Many practitioners prefer mats made from natural or recycled materials. These options are better for the environment and often provide excellent performance characteristics.

Identifying these features will help you find a core power yoga mat that meets your needs and supports your yoga journey.

Aimee B | CorePower Yoga

How to Choose Your First Yoga Mat

Choosing your first core power yoga mat can be daunting. Here are practical steps to make it easier:

  1. Assess Your Needs: Consider your body size, the types of yoga you’ll practice, and where you’ll use the mat.
  2. Research: Look up different brands and see which ones offer mats suited for Core Power Yoga.
  3. Check Materials: Ensure the mat is made from durable, eco-friendly materials. Avoid mats that are too light to provide stability.
  4. Feel the Texture: The mat should have a non-slip texture for safety during practice. This is particularly vital for Core Power Yoga because of rapid movements and poses.
  5. Consider Thickness: For Core Power Yoga, a too-thick mat may inhibit balance. Choose a mat that offers a moderate amount of cushioning without compromising your stability.
  6. Read Reviews: Understand the experiences of others who have used the mat in similar yoga practices. This can guide your decision.
  7. Set a Budget: Decide how much you can spend on a yoga mat. While quality is important, numerous affordable options offer excellent performance.
  8. Try Before You Buy: If possible, test mats at yoga studios or stores to get a feel for them.

By following these steps, you will find a core power yoga mat that suits your needs and supports your yoga journey effectively.

The Importance of Mat Thickness and Material

When practicing Core Power Yoga, your core power yoga mat’s thickness and material are crucial. Mat thickness influences comfort and stability. A mat that is too thin can cause discomfort during floor exercises. A very thick mat can make balance poses more challenging. Typically, a thickness of about 4-6 mm offers a good mix of comfort and support for most yogis.

The material of your yoga mat also affects its grip, durability, and eco-friendliness. Common materials include PVC, which offers excellent stickiness and durability but is less eco-friendly. Natural rubber provides a good grip and is biodegradable, making it a more environmentally conscious choice.

Choosing a mat with the right thickness and made of suitable material will greatly enhance your Core Power Yoga experience. Remember to consider your personal needs and the type of yoga you practice when making your choice. A well-chosen mat will not only aid in your yoga sessions but also last many practices to come.

Caring for Your Yoga Mat: Tips and Tricks

Proper care and maintenance of your core power yoga mat extend its lifespan and maintain its effectiveness. Here are some straightforward tips and tricks for keeping your yoga mat in top shape:

Regular Cleaning

Clean your mat regularly to remove dirt, sweat, and bacteria. Use a mild soap and water solution, and wipe it gently. Avoid using harsh chemicals that can degrade the mat’s material.

Air Dry Completely

After cleaning, let your mat air dry completely before rolling it up. This prevents mold and mildew growth, which can cause odors and deterioration.

Avoid Direct Sunlight

Store your yoga mat in a cool, dry place away from direct sunlight. UV rays can fade the mat’s color and weaken its structure over time.

Use a Mat Towel

During intense core power yoga sessions, use a mat towel. It absorbs excess sweat and protects the mat’s surface from moisture damage.

Roll, Don’t Fold

Roll your yoga mat instead of folding it to avoid creases and preserve its shape. Ensure it’s dry before rolling to prevent bacterial growth.

Taking care of your core power yoga mat ensures a safe and comfortable practice. It also helps the mat perform well during your yoga journey.

Popular Yoga Mat Brands for Core Power Yoga

When you start your Core Power Yoga practice, you might wonder which yoga mat brands are the best. Many brands have built strong reputations. They offer mats that cater to the specific needs of core power yoga enthusiasts. Here are a few popular options:

  • Manduka: Known for its high-quality, long-lasting mats. Manduka mats often feature superior grip and just the right amount of cushioning.
  • Jade Yoga: Jade Yoga mats come from natural rubber, which provides excellent traction. They are also eco-friendly, aligning with the values of many yogis.
  • Lululemon: This brand offers stylish mats with a reversible design. One side has a smooth texture for less intense sessions. The other side has a grippy texture suited for Core Power Yoga.
  • Gaiam: A good choice for beginners, Gaiam mats are affordable without compromising on quality. They provide a variety of thickness options and patterns.
  • Hugger Mugger: They offer durable mats with a firm grip. Their products are well-suited for dynamic yoga practices.

Remember, the best mat for you is one that meets the core power yoga mat essentials discussed earlier. When choosing, consider grip, cushioning, durability, and eco-friendliness. Your mat should also support your body size and yoga style. With the right yoga mat, you can enhance your practice and enjoy every session of Core Power Yoga.

CorePower Yoga | Yoga Classes, Yoga Sculpt & Hot Yoga

The Role of a Yoga Mat in Enhancing Your Practice

A yoga mat is more than a simple accessory; it is integral to practicing Core Power Yoga effectively. This mat serves several key functions:

  1. Provides Stability: A good yoga mat offers a stable surface. This is crucial for maintaining balance in challenging poses. Stability is key to executing movements safely and effectively.
  2. Reduces Injury Risk: The right mat cushioning protects your joints. It absorbs the impact during dynamic poses and transitions, reducing the risk of injury.
  3. Enhances Focus: A reliable mat allows you to focus on your form rather than slipping. This focus is essential for a mental and physical workout.
  4. Supports Alignment: A well-designed mat helps in aligning your body correctly. Proper alignment is crucial for the effective practice of Core Power Yoga.
  5. Comfort: During intense sessions, comfort is crucial. A quality yoga mat provides a comfortable surface, allowing longer, more productive sessions.

Investing in a good quality core power yoga mat is vital. It influences the comfort, effectiveness, and safety of your practice.

Accessorizing Your Yoga Mat: Must-Have Add-Ons

Once you select your core power yoga mat, consider these must-have accessories:

Yoga Mat Bag

A yoga mat bag keeps your mat clean and makes it easy to carry. Look for bags with adjustable straps for comfort.

Yoga Towel

A yoga towel absorbs sweat and improves grip. This is especially useful during intense Core Power Yoga sessions.

Yoga Blocks

Yoga blocks help with balance and alignment in poses. They are great for both beginners and advanced yogis.

Yoga Strap

A yoga strap aids in stretching and can enhance your flexibility. It can also serve as a carrier for your mat.

Water Bottle

Staying hydrated is key. Choose a water bottle that is easy to use during your yoga practice.

Accessorize smartly to get the most out of your Core Power Yoga experience. Each accessory should add value to your practice and fit your personal needs.

Yoga Mats Unraveled: Which Side Is Up?

Understanding Yoga Mat Materials and Textures

The general rule for yoga mats is that the textured or patterned side is facing up, while the smooth, rubbery side is facing down. The textured side provides traction and grip, making it easier to hold your yoga poses without slipping. The smooth side is typically designed to provide a non-slip grip on the floor, helping to keep the mat in place during your practice. However, it’s always a good idea to check the specific instructions or recommendations provided by the manufacturer of your yoga mat. Which side of yoga mat to use? Yoga mats come in various materials. Each type provides unique benefits. Understanding these can help ensure you are using your mat correctly.

Foam and Rubber Mats: Grip and Comfort

Foam and rubber mats are quite popular. They give you a good mix of grip and softness. They are ideal for those looking for comfort plus stability. The grippy side helps to prevent slips.

Mats for Different Yoga Styles

Mats also vary based on yoga styles. Light and thin mats are good for dynamic styles like Vinyasa. Thicker mats offer more cushion for gentler forms like Yin yoga. Check the mat’s features to match your yoga type.

Anti Slip Yoga Mat Double Side Rubber Yoga Mat

Tips for Identifying the Correct Side of a Yoga Mat

When using a yoga mat, it’s crucial to know which side is up. This ensures a safe, effective workout. Here are some tips to help identify the correct side of your yoga mat.

Observing Texture and Grip

The top side of a yoga mat usually has a distinct texture. This texture increases grip and prevents slipping during practice. Feel both sides of your mat. The side that feels more textured and less smooth is generally the side to use. If one side feels stickier or more grippy, that’s the side that should face up.

Checking for Brand Logos and Tags

Many yoga mats have a logo or tag on the correct side. This logo or tag often situates at a corner of the mat. If your mat has this, it’s a clear indicator of which side should be facing up.

Importance of Color and Pattern Orientation

Some mats feature colors or patterns that aid in proper alignment. These designs can indicate the correct orientation. The side with brighter colors or more detailed patterns often faces up. This assists in positioning during yoga poses.

Best Practices for Yoga Mat Usage

For a fulfilling yoga session, knowing how to use your mat is key. Here’s how to start right.

How to Properly Position and Lay Out Your Mat

Begin by unrolling your mat on a flat surface. Place the side with more texture or the brand’s logo facing up. If there’s a pattern, it should be right side up to guide you in poses. Ensure the mat lies flat, without any corners curled up, to avoid tripping.

Safety Tips: Ensuring Optimal Grip and Stability

Pick a spot on the floor that’s flat and not slippery. Make sure the mat’s textured side interacts with the ground for a firm grip. Avoid using lotions or oils on your hands and feet before practice. They can make the mat’s surface slick. Clean your mat often to keep the grip strong. It helps to stop you from slipping during moves.

Care and Maintenance of Yoga Mats

Proper care extends your yoga mat’s life and performance. Here’s how to keep it in top shape.

Regular Cleaning Techniques

Keep your yoga mat clean to maintain its grip and hygiene. Use mild soapy water and a soft cloth for regular cleans. Avoid harsh chemicals; they can degrade the mat materials. After cleaning, air-dry the mat completely before rolling it up.

Proper Storage to Preserve Quality

Store your yoga mat in a cool, dry place. Roll it with the top side facing out to maintain its texture. Use a yoga mat bag for extra protection against dirt and moisture. Avoid folding the mat; it can damage its structure. Keep the mat away from direct sunlight, which can fade colors and weaken the material.

Anti-slip Yoga Mat, Double-side, Comfort, Widen, Thick, Pure

Choosing a Yoga Mat Based on Practice Needs

Choosing the right yoga mat is often overlooked. Yet, it’s a key step in nurturing a consistent practice, whether you’re at home, in a studio, or on the road. Your mat should align with the type of yoga you practice and where you practice it. Let’s explore options suited to different practice needs.

Mats for Travel: Lightweight and Foldable Options

If you tend to take your yoga practice on the go, you’ll want a mat that’s light and easy to pack. Look for travel-friendly yoga mats that are thin and foldable, yet have enough grip to keep your poses steady. These mats often come with carrier straps or bags, making it easier to take them with you.

Travel mats should be:

  • Lightweight: Easy to carry, not a burden on your travels.
  • Thin and foldable: Fit in luggage without taking up much space.
  • Grippy: Prevent slips in new, unfamiliar environments.

Mats for Home Practice: Comfort vs. Grip

Home practitioners may have different priorities. At home, you can choose a thicker mat that offers more comfort for long sessions. Or, you might prefer a mat with a better grip for more dynamic forms of yoga.

Consider these points for home practice mats:

  • Thick and cushiony: Great for slower-paced yoga or meditation.
  • Dense with good grip: Ideal for more vigorous styles.
  • Size and shape: Ensure it fits well in your home space.

Your choice of a yoga mat can deeply influence the quality of your practice. Tailor your selection to meet your needs, and you’ll find greater ease and enjoyment in your yoga journey.

Foldable EVA Mat

Special Features to Consider in Yoga Mats

When choosing which side of yoga mat to use, consider the mat’s special features. Some yoga mats come with heat-reactive surfaces. These react to your body’s temperature to improve grip during a yoga session.

Heat-Reactive Surfaces and Alignment Lines

Heat-reactive surfaces on yoga mats can enhance your practice. They adjust based on your body heat, providing better traction. Also, some mats have alignment lines. These lines help you position your hands and feet correctly. They ensure your posture is appropriate throughout different poses.

Eco-Friendly Materials and Environmental Impact

Many yogis prefer eco-friendly yoga mats. These mats often use materials like natural rubber or recycled plastics. Such materials lessen environmental impact. These mats usually have a distinct texture. This often identifies which side of the yoga mat to use for practice. Eco-friendly mats not only support your yoga but also protect our planet.

Conclusion

Yoga is a practice that originated in ancient India and focuses on physical, mental, and spiritual well-being. It typically involves a series of physical postures, breathing exercises, and meditation to promote relaxation, flexibility, strength, and mindfulness. There are many different styles and schools of yoga, each with its own emphasis and approach. The practice of yoga has become increasingly popular around the world for its many health benefits and its ability to help reduce stress and improve overall well-being.

Yoga mats are specially designed mats used for practicing yoga. They provide a non-slip surface and cushioning for the body during yoga poses and exercises. Yoga mats come in various sizes, thicknesses, and materials to suit individual preferences and types of yoga practice. They are typically made of PVC, rubber, jute, cork, or eco-friendly materials. Yoga mats are essential for maintaining stability, balance, and comfort while performing yoga movements and can also help to prevent injuries by providing a supportive surface for the body.

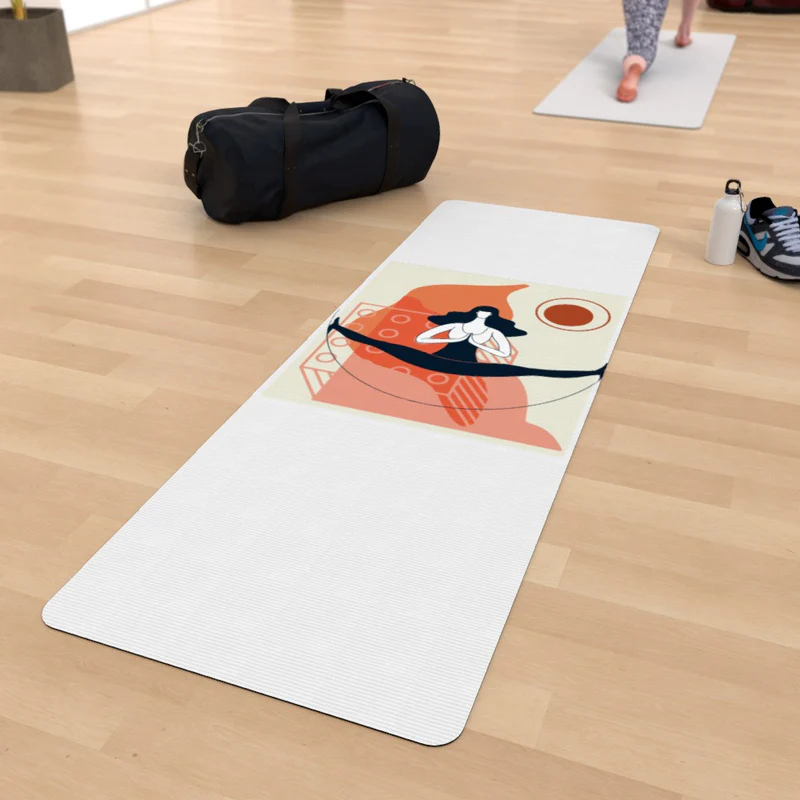
Fresh Designs for Yoga Mat Mockups in 2024

Trending Yoga Mat Mockup Designs

The yoga mat industry often sees a wave of creativity, with 2024 being no exception. Designers are introducing fresh and innovative yoga mat mockup designs that resonate with contemporary trends and customer preferences. Here we explore the top designs that are captivating the market.

Geometric Patterns

Geometric patterns are marking their presence in the yoga mat mockup scene. These designs feature sharp lines and shapes that create a sense of order and symmetry. They often include dynamic tessellations, which are visually stimulating and help in aligning postures. The precision in geometric patterns also aids in marketing, making the yoga mat mockup stand out in promotional materials.

Nature-inspired Designs

Yoga’s essence lies in its ability to connect us with nature, and this year’s mockups reflect that. Nature-inspired designs incorporate elements like leaves, waves, and landscapes into the yoga mat’s surface. The calm and serene vibe these patterns elicit is ideal for the relaxation aspect of yoga, appealing massively to customers seeking a natural experience.

Minimalist Style

Less is more when it comes to minimalist yoga mat mockups. They boast clean lines, limited color palettes, and uncluttered aesthetics. Such designs appeal to the modern yogi who values simplicity and focuses on the essentials. A minimalist yoga mat mockup projects elegance and simplifies the user’s visual experience during yoga practice.

Yoga Mat Mockup Set v.4

Importance of Mockups in Yoga Mat Design

Great yoga mat designs start with detailed mockups. These early models are vital for two key reasons.

Enhancing Visual Appeal

A mockup turns a basic idea into something visual and tangible. It shows how the final yoga mat will look. With a mockup, designers test different colors, textures, and elements. They see what works best. This helps to grab attention and attract buyers. A stunning mockup can make a yoga mat stand out online or in stores.

Facilitating Brand Identity

Mockups help create a strong brand. They let businesses express their identity through design. They use colors, logos, and styles consistent with their brand. This way, a yoga mat mockup can strengthen brand recognition. When customers see the mat, they connect it with the brand. Over time, this builds brand loyalty and trust.

Step-by-Step Creation of Yoga Mat Mockups

Creating a yoga mat mockup is an intricate process. It requires attention to detail and a systematic approach. Follow these steps to ensure your mockup is both attractive and effective.

Selecting Templates

Begin with choosing the right template for your yoga mat mockup. Select a base that aligns with your design vision. Templates vary from basic shapes to intricate patterns. Look for one that can best display your unique design elements.

Customizing Features

After picking a template, it’s time for customization. Add your selected colors, patterns, or images. For a nature-inspired design, incorporate natural textures and hues. For geometric patterns, ensure lines and shapes are sharp and symmetrical. Use tools that allow you to manipulate these features easily and effectively.

Finalizing Design Elements

Finally, refine your yoga mat mockup. Adjust alignments and examine the overall balance. Make sure text is readable and logos are visible. It’s crucial that the final mockup represents the actual product accurately. Preview your mockup in different lighting and from various angles to guarantee it looks great in any situation.

Best Software Tools for Yoga Mat Mockups

The right tools can make or break your yoga mat mockup creation. Some software stands out for their user-friendly interface and powerful features. Here are the top software tools for expertly crafting your yoga mat mockups.

Adobe Photoshop

Adobe Photoshop is a leading choice for designers. Its vast array of tools allows for precise editing. You can add complex patterns or simple textures easily. Photoshop supports high-resolution images, making your mockups look sharp and clear. Use layers and filters to enhance the mockup’s visual appeal. Photoshop is perfect for tweaking every detail until it matches your vision.

Canva

Canva is a great tool for beginners and pros alike. It offers a drag-and-drop interface that simplifies the design process. Canva provides a library of templates, including yoga mat shapes. It’s easy to add elements like images, text, and icons. The colors and fonts adjust quickly, allowing for a wide variety of styles. Canva is ideal if you need a stunning mockup without complex features.

Sketch

Sketch specializes in vector graphics, which are excellent for yoga mat mockups. It has a clean and intuitive interface focused on design, not photo editing. Create detailed designs with flexible shapes and layer styles. Sketch files are lightweight, making collaboration and sharing easy. Use Sketch for intricate patterns and crisp, scalable elements in your mockup.

Mockup of a Woman Stretching in a Sublimated Yoga Mat

Incorporating User Feedback into Mockup Design

Gathering and integrating user feedback is crucial in creating yoga mat mockups that truly resonate with consumers. Listening to the users’ experiences, preferences, and suggestions can significantly enhance the design and functionality of yoga mat mockups. By doing so, designers can ensure that the final product meets the expectations and needs of its target audience.

Analyzing Customer Preferences

Begin with collecting feedback through surveys, focus groups, or social media. Look for trends and common themes that arise. Preferences may include the thickness of the mat, color schemes, or the desire for eco-friendly materials. Analyze this data to understand what features are most important to your customers. Customer preferences play a vital part in shaping the yoga mat mockup design.

Adapting Designs to Meet Consumer Demands

Once customer preferences are clear, adjust your mockups accordingly. If buyers favor sustainability, consider materials and processes that reflect this value in your design. If there is a high demand for vibrant and intricate patterns, incorporate these elements into your mockups. Remember flexibility is key. The aim is to adapt the designs of yoga mat mockups to align with consumer demands, while also staying true to brand identity.

Free Rolled Yoga Mat Mockup PSD

Future Trends in Yoga Mat Design

As the world becomes more environmentally conscious, future trends in yoga mat design are evolving accordingly. Designers are focusing on sustainability and user experience, ensuring that the mats not only look good but are also kind to the planet and enhance the practice session. Let’s delve into the anticipated trends that are likely to shape the future of yoga mat mockups.

Eco-friendly Materials

Sustainability is not just a buzzword; it is a necessity. Upcoming designs are likely to prioritize eco-friendly materials. Manufacturers may use natural rubber or recycled materials, ensuring that the yoga mat is biodegradable or recyclable. Expect to see a surge in mats made from organic cotton, jute, or cork. These materials are not only sustainable but also provide the grip and comfort needed for a seamless yoga experience. The push for green alternatives is strong, with the goal to reduce the carbon footprint and appeal to environmentally conscious yogis.

Technology Integration

Technology is set to play a bigger role in how yoga mats are designed and used. Smart mats with integrated sensors could provide feedback on posture and alignment. They might connect to apps that track one’s progress or offer virtual classes. Features such as antimicrobial surfaces or self-cleaning technologies might become standard, providing users with more hygienic options. Additionally, personalization will go a notch higher with tech-enabled customization features, allowing yogis to infuse personal designs or messages through digital interfaces. As tech integration advances, yoga mat mockups will reflect these cutting-edge features that enhance functionality and user engagement.

Clean Your Yoga Mat Effectively: Step-by-Step Guide

Importance of Keeping Your Yoga Mat Clean

How to wash yoga mat? Keeping your yoga mat clean is crucial. It keeps germs at bay, ensuring a hygienic practice area. Over time, yoga mats can collect sweat, oils, and dirt. This can lead to bacteria and odor buildup. Regular cleaning extends your mat’s life and maintains its grip. A clean mat also enhances your practice by offering a pleasant surface. Without distracting smells or sticky spots, you focus better. Moreover, a well-maintained mat reflects your commitment to your yoga journey. In short, cleaning your yoga mat improves hygiene, longevity, and your overall yoga experience.

Clean Your Yoga Mat Effectively

Types of Yoga Mats and Their Cleaning Requirements

When considering how to wash your yoga mat, you must first identify its type. Different materials demand specific cleaning methods. Here are common types of yoga mats and their cleaning needs:

  • PVC Yoga Mats: Known for durability, PVC mats are easy to clean. Use a gentle soap and water solution. Avoid high heat, as it can damage the mat.
  • Rubber Yoga Mats: A natural choice, rubber mats require mild soap and warm water. Keep these mats away from sunlight to prevent drying out.
  • TPE Yoga Mats: Thermo Plastic Elastomer (TPE) mats are eco-friendly. Clean them with a soft cloth dipped in a mild detergent solution. Rinse thoroughly to avoid slipperiness.
  • Cotton and Jute Yoga Mats: Absorbent and natural, these mats need a deep clean. You can wash them in a washing machine on a gentle cycle. Use a mild, natural detergent.
  • Microfiber Yoga Mats: Great for hot yoga, these mats absorb sweat. Hand wash with cold water and a gentle detergent to maintain their softness.

Remember, frequency and method are key to keeping your yoga mat in top condition. The type of yoga you practice and how often you use your mat will guide your cleaning schedule. Light users might clean their mat once a week, while daily practitioners might do so after each session. Always consult the manufacturer’s instructions for the best care practices.

Preparing to Clean Your Yoga Mat

Before diving into the cleaning process, preparation is key. Get your yoga mat ready for a thorough wash with the following steps:

  • Gather Your Supplies: To start, collect the cleaning essentials. You will need mild soap, a soft cloth or sponge, and clean water. If you prefer, ready a natural cleaning solution or purchase a specialized yoga mat cleaner.
  • Choose an Appropriate Area: Find a space for cleaning that is flat and well-ventilated. A bathtub, a large sink, or an outdoor area works well. Ensure it is a place where water can spill without causing issues.
  • Check Manufacturer Instructions: Before you begin, consult your yoga mat’s care guidelines. These instructions can provide specific advice on how to wash your yoga mat without damage. Not all mats are the same, and some require special care.
  • Roll Out Your Mat: Lay out your yoga mat flat. A flat surface allows you to reach every part of the mat easily.
  • Spot Clean Visible Dirt: In case there are noticeable spots or stains, treat them first. Use a cloth dipped in soapy water to gently rub away the dirt.
  • Prepare Your Cleaning Solution: If using a homemade cleaner, mix it now. A simple solution can be water with a few drops of mild detergent. For natural cleaning, mix water with white vinegar or tea tree oil for their disinfecting properties.
  • Timing: Pick a time when your mat can be cleaned without a rush. It will need time to dry properly after washing, so plan accordingly.

These preparations set the stage for a successful, hassle-free cleaning process. Keep in mind the type of mat you have and any special requirements it might have. Taking a moment to prepare properly can extend the life of your yoga mat and ensure a pleasant yoga experience.

Step-by-Step Cleaning Process

Cleaning your yoga mat is a simple process that can be accomplished with ease following these steps:

  • 1. Create Cleaning Solution: Begin by mixing water with a mild soap. Keep the ratio appropriate to avoid overly sudsy water.
  • 2. Soak Cloth or Sponge: Dip a soft cloth or sponge into the cleaning solution. Wring it out to prevent excess water.
  • 3. Wipe the Mat: Gently wipe the yoga mat with the damp cloth or sponge. Start from one end and move to the other.
  • 4. Scrub if Needed: For tough spots, use a bit more pressure. Scrub carefully without damaging the mat’s surface.
  • 5. Rinse the Mat: After wiping, rinse your mat with clean water. Make sure no soap remains on the mat’s surface.
  • 6. Remove Excess Water: Pat the mat dry with a towel to remove extra water. Be gentle to keep the mat’s shape.
  • 7. Air-Dry: Lay the mat flat in an area with good airflow. Avoid direct sunlight during drying.
  • 8. Repeat If Necessary: If your mat still seems dirty, repeat the process.
  • 9. Inspect the Mat: Once dry, inspect for cleanliness. Your mat is now ready for your next yoga session.

This step-by-step guide ensures a clean and hygienic yoga mat. It’s crucial to know how to wash your yoga mat following these instructions. Regular cleaning keeps your mat in good condition, offering a healthy environment for your practice.

how to wash yoga mat

Natural Cleaning Solutions for Your Yoga Mat

When it comes to cleaning your yoga mat, opting for natural solutions is a smart choice. Not only are they eco-friendly, but they also reduce the risk of damaging your mat with harsh chemicals. Here’s how to use natural ingredients to keep your mat fresh:

  • Use White Vinegar: Mix one part water with one part white vinegar. Apply with a soft cloth and wipe down your mat. The vinegar acts as a disinfectant.
  • Tea Tree Oil Mixture: Combine water with a few drops of tea tree oil. Its natural antifungal properties help eliminate germs and odors.
  • Baking Soda Paste: For tougher stains, create a paste with water and baking soda. Apply it to the spot, let sit for a few minutes, and then wipe away.
  • Lemon Water Spray: Lemon has natural antibacterial qualities. Mix water with lemon juice and spray it on your mat. Wipe clean for a refreshing scent.
  • Witch Hazel: This is gentle on most yoga mats and can be used as a cleaning spray. It’s good for removing oils and sweat.

Remember to always rinse your mat well with water after using any cleaning solution. And, allow it to air-dry completely before rolling or storing. These natural cleaning methods are not only good for your yoga mat but also for the environment and your own health.

Drying and Storing Your Yoga Mat Post-Cleaning

After you’ve washed your yoga mat, drying and storing it correctly is vital. Incorrect drying can lead to mold or mildew, and poor storage can cause damage or lingering odors. Here are some tips to ensure your mat is dried and stored properly:

  • Air-Dry Thoroughly: Lay your mat flat to air-dry, preferably in a well-ventilated area. Avoid direct sunlight, as this can damage some yoga mat materials.
  • Avoid Heat Sources: Don’t use heaters or dryers to speed up the process. High temperatures can warp or melt certain mat types.
  • Flip the Mat: If it takes a long time to dry, flip it over to ensure both sides are dry.
  • Store After Dry: Only roll up or store your mat when it is completely dry. This prevents bacteria growth.
  • Choose the Right Spot: Store your mat in a cool, dry place, away from direct sunlight.
  • Avoid Tight Rolls: Roll your mat loosely or hang it to maintain its shape and avoid creases.

By following these steps, you will protect your yoga mat from damage, and it will be ready for your next session. Remember that the way you care for your mat after cleaning greatly impacts its longevity and your hygiene during practice.

Maintenance Tips to Keep Your Yoga Mat Fresh Longer

Retaining the freshness of your yoga mat extends its lifespan and improves your yoga practice. Here are ways to keep your mat fresh:

  • Use a Mat Towel: During sessions, lay a towel over your mat. It absorbs sweat and is easy to wash regularly.
  • Regular Air-outs: After each yoga session, unroll your mat to let it air out. This prevents odor buildup.
  • Spray After Use: Quickly spray your mat with a natural cleaner after practice. Wipe it down to remove immediate sweat or oils.
  • Handle with Clean Hands and Feet: Ensure your hands and feet are clean before stepping onto your mat. This reduces the transfer of oils and dirt.
  • Deep Clean Monthly: Set a monthly reminder to give your yoga mat a deep clean, as over time, grime can accumulate even with regular upkeep.
  • Use Essential Oils: Add a few drops of essential oils like lavender to your cleaning solution for a pleasant scent and antimicrobial properties.
  • Storage is Key: Store your yoga mat in a mat bag or dedicated space. This protects it from dust and other contaminants when not in use.
  • Avoid Sharing: Keep your yoga mat personal. Sharing can introduce different bacteria and increase the need for cleaning.

Regular maintenance makes your mat last longer and ensures a clean, safe space for your yoga practice.

Clean Your Yoga Mat Effectively

Troubleshooting Common Yoga Mat Cleaning Issues

Even the most diligent cleaning routine can sometimes meet with issues. Here are common problems you might face when you wash your yoga mat, along with solutions to fix them.

  • Sticky Residue After Cleaning: If your mat feels sticky after a wash, it might be due to soap residue. Ensure you rinse your yoga mat thoroughly with clean water. If stickiness persists, rinse again with a vinegar and water solution.
  • Persistent Odors: Sometimes, even after cleaning, smells remain. To combat this, add a few drops of tea tree oil to your cleaning solution for its deodorizing properties. Let the mat dry completely in a well-ventilated space.
  • Stains That Won’t Go Away: For stubborn stains, use a baking soda paste. Apply to the stain, let it sit, then gently scrub and rinse.
  • Drying Takes Too Long: If your mat isn’t drying fast enough, flip it over to expose both sides to air. Consider using a fan or open windows to improve air circulation but avoid direct sunlight or heaters.
  • Discoloration After Washing: Some yoga mats can fade if cleaned with harsh chemicals. Always use mild, natural cleaners to prevent this issue. For future washes, test your solution on a small mat area first.
  • Texture Changes: Mats can become less grippy or change texture if not handled gently. Use soft cloths for cleaning and avoid abrasive brushes or sponges.
  • Mold or Mildew Formation: If your mat remains damp, it can lead to mold. Ensure it’s fully dry before storing, and keep it in a dry environment. If mold appears, clean the mat with a vinegar solution and dry it thoroughly.

By addressing these common issues with the right solutions, you can keep your yoga mat in prime condition. Remember, proper care when you wash your yoga mat will ensure it remains a clean and reliable partner in your yoga practice.